White sage (salvia apiana) has been used for centuries by Native Americans for medicinal and ceremonial purposes. This shrubby desert native produces silver leaves that grow in a rosette arrangement on straight stalks. Young leaves start out green and turn white as they get older and when they are dried.
The natural habitat of white sage is a small geographic area from Santa Barbara County to Baja California, Mexico. Unfortunately, as white sage has grown in popularity over the years, its habitat has been encroached from development, and the plants have been over-harvested and poached in protected areas.
Growing your own white sage from seed is the responsible way to produce harvestable plants. Well walk you through the process from seed germination to harvest.
Growing and harvesting fresh baby sage adds a delightful depth of flavor to savory dishes. But when is the best time to harvest your sage for full potency? In this comprehensive guide, we’ll cover everything you need to know about identifying peak harvest times and using proper techniques for cutting and storing baby sage
Before we dive into harvest times, let’s start with a quick overview of this aromatic herb. Sage is a Mediterranean native belonging to the mint family Lamiaceae. With its robust, piney flavor, sage is a beloved ingredient around the world, used in everything from sausage to stuffing.
The most common variety is common sage (Salvia officinalis), with its fuzzy gray-green leaves But ornamental sages like purple, tricolor, and golden sage also have culinary uses Their flavors range from mildly fruity to more resinous.
When to Harvest Baby Sage for Maximum Flavor
Timing is everything when it comes to capturing the full essence of sage, Here are some tips on identifying the perfect harvest stage
-
Harvest in the morning – Sage has the highest concentration of oils in the morning hours after the night’s condensation has evaporated.
-
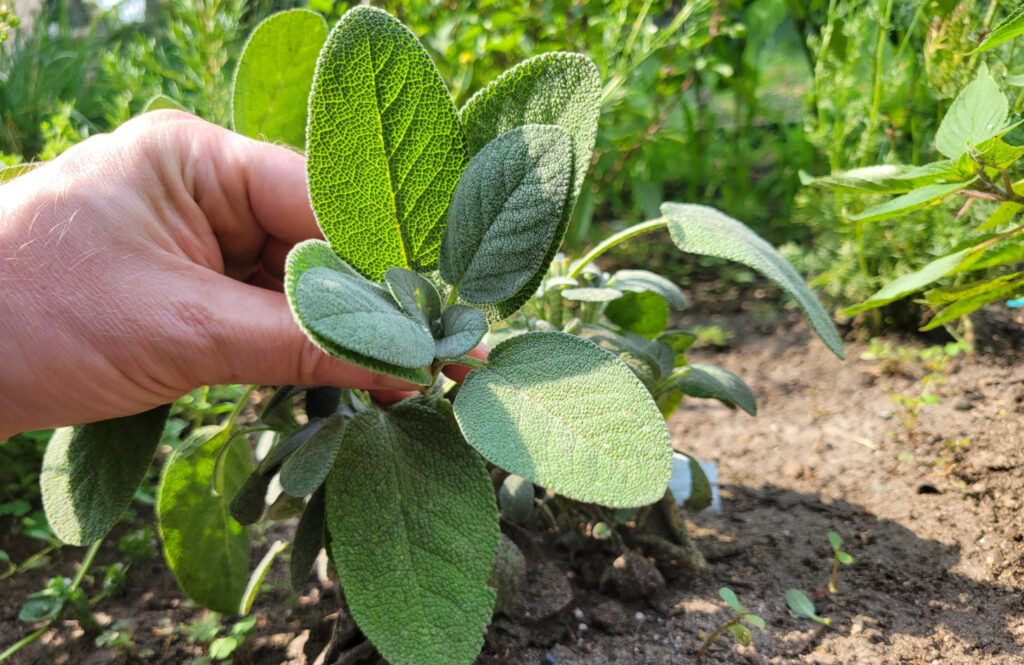
Watch for maturity – Mature sage leaves will be fully developed in size, ranging from 1 to 3 inches long depending on variety. Leaves and stems will appear thick and abundant.
-
Aim for 50-60 days after planting – Baby sage is generally ready for its first harvest around 50 days after sowing seeds or transplanting seedlings.
-
Check for flower buds – Some gardeners use the emergence of flower buds as a visual cue that sage is hitting its prime potency. However, you’ll want to harvest before flowers bloom.
-
Sniff test – Rub or brush against leaves to release oils and take a whiff. Sage is at its peak when the aroma is pungent.
Now that you know when to look for, let’s explore recommend techniques for cutting and storing your fresh baby sage.
Hand Harvesting Baby Sage Step-by-Step
Hand harvesting with scissors or pruners is the classic method for gathering sage. Follow these steps:
1. Gather Your Tools
- Sterilized scissors or pruners
- Small containers or baskets
- Paper towels (optional for cleaning tools)
2. Scan for Harvestable Stems
- Look for stems with mature, healthy leaves. Avoid woody stems.
- Target individual stems rather than shearing whole plants.
3. Cut Stems at the Base
- Position tool near the base of the stem.
- Make a clean snip through the stem.
- Repeat for other mature stems, leaving some behind.
4. Handle with Care
- Gently place harvested stems into containers.
- Avoid bruising or crushing leaves to prevent black spots.
5. Clean Tools
- Use paper towel to wipe down scissors or pruners.
- Periodically sterilize tools with rubbing alcohol to prevent disease transmission.
And that’s all there is to it! Hand harvesting is the ideal method for small-scale garden sage. Now let’s look at another technique called pinch pruning.
Pinch Pruning for Continuous Growth
Pinch pruning stimulates bushy, compact growth while providing a steady supply of baby sage leaves. Here’s a step-by-step overview:
1. Identify New Growth
- Look for the tender top shoots where new pairs of leaves are emerging.
2. Pinch off Tops
- Use your fingertips to pinch off the top 1-2 inches of new growth.
- Snipping with sterilized scissors also works.
3. Repeat Regularly
- Pinch every 3-4 weeks during growing season to encourage dense branching.
- New leaf pairs will continually generate at pinch sites.
4. Harvest from Pinch Points
- Newly pinched stems produce the most tender young leaves perfect for harvesting.
5. Maintain Shape
- Pinch pruning helps maintain a rounded, compact shape.
- Remove any errant or leggy growth as needed.
By pinch pruning your baby sage regularly, you’ll have a continual harvest of choice young leaves for months on end!
Post-Harvest Care: Drying and Storing Sage
Preserving your harvested sage correctly is vital for retaining flavor. Follow these tips:
Dry thoroughly
- Air dry leaves on towel or rack until brittle and dry. Takes 1-2 weeks.
Store in cool darkness
- Seal completely dried leaves in jar or bag.
- Store away from light and heat to preserve oils.
Refrigerate fresh sage
- Loosely wrap fresh-cut stems in damp paper towel.
- Refrigerate in perforated bag for up to one week.
Freeze for long-term storage
- Lay leaves flat in a single layer on tray and freeze solid.
- Transfer to freezer bags, excluding air.
- Frozen sage keeps up to 6 months.
Follow these post-harvest procedures and you’ll be able to enjoy your homegrown baby sage for months on end!
Troubleshooting: Common Baby Sage Harvesting Problems
While harvesting baby sage is fairly straightforward, issues can pop up. Here are some common problems and solutions:
Leaves are small and undersized
- Harvest too early before maturity
- Solution: Allow more time grow before cutting
Leaves are tough and woody
- Harvested too late in season
- Solution: Cut earlier in growth stage
Leaves turn black after cutting
- Bruising from rough handling
- Solution: Handle gently; don’t overcrowd
Loss of aroma and flavor
- Improper drying or storage
- Solution: Dry leaves thoroughly; seal out light and air
White mold on leaves
- Powdery mildew disease
- Solution: Improve air circulation and reduce water on leaves
Follow the best practices in this guide and you should be able to avoid most of these common headaches.
Harvest Baby Sage All Season Long!
Now that you’re armed with tips for identifying the perfect harvest time and techniques for cutting, storing, and troubleshooting, you’ll be harvesting baby sage like a pro all season long.
Follow the scent of sage’s intoxicating oils to gather the choicest leaves for your culinary creations. And don’t forget to pinch back regularly for a steady supply of flavorful foliage! Drying and freezing also let you enjoy your homegrown sage for months after the growing season ends.
Here’s to a bountiful baby sage harvest with this complete harvesting guide. Now go savor all those robust, piney flavors!
Transplanting White Sage Seedlings
As the white sage seedlings grow, they will need bright, full sunlight. Using a grow light is recommended. Continue to keep the soil lightly moist.
After the seedlings have developed true leaves and are 3 inches tall, they can be transplanted outdoors. Once the soil has warmed and all danger of frost has passed, they will be ready to acclimate to life outside. To reduce transplant shock, harden off the seedlings before transplanting.
Space plants 12 to 18 inches apart and water deeply.
While there are more than 700 species of salvias with different tastes and scents, white sage (salvia apiana) is unique. As a sun-loving, drought-tolerant plant, it can grow well in a suitable climate.
Growing your own white sage can take patience, but the harvest is rewarding.
White Sage – Sow Right Seeds
How to Grow White Sage From Seed
White sage seeds have a very low germination rate. While this may be frustrating when starting plants from seed, it’s part of the natural process. To survive its native desert habitat, not all white sage seeds sprout at the same time. Many times germination rates are only 20%. The seeds aren’t duds; they just take their own sweet time.
Scarified white sage seeds on sandpaper.
How to Harvest Culinary Sage
FAQ
How often do you water baby sage?
When to prune baby sage?
How do you harvest Sage?
Use clean shears to snip leaves or stems, about 4-6 inches from the tip. Harvest before flowering for the best flavor, and remove damaged leaves to maintain plant health. Never harvest more than 1/3 of the plant at a time for continued plant growth. In addition to knowing how to harvest sage, it’s also important to know when to harvest sage.
When should Sage be harvested?
Harvest sage when the plant matures and develops its leaves, when the essential oils peak. After the dew has dried, the morning is the optimal time for harvesting. The leaves are dry, and the plant’s energy is concentrated. Avoid harvesting during the winter when the plant is dormant, as it needs time to rest and replenish.
How much sage should I Harvest?
When harvesting sage, never harvest more than one-third of the plant at a time. Overharvesting can weaken the plant and hinder its ability to regrow properly. To ensure continued growth and future harvests, always leave enough foliage on each branch for photosynthesis and energy production.
Can you harvest sage leaves?
Harvesting sage depends on how and when you wish to use your leaves. If harvesting a few fresh leaves to add to a meal then simply pinching out tips or individual leaves from a couple of sage plants is absolutely fine. These light cut-and-come-again harvests will encourage sage plants to branch, resulting in a fuller, bushier shrub.