Basket grass, also known as Oplismenus hirtellus, is a popular ornamental grass cherished for its graceful, cascading foliage Its wispy leaves and trailing stems make it ideal for containers, hanging baskets, borders and mass plantings Growing basket grass from seeds can be an economical way to incorporate this ornamental beauty in your garden or indoor spaces. However, proper storage, sowing and germination techniques are crucial for ensuring successful growth from seeds.
In this comprehensive guide, we will provide key tips and steps for storing sowing and germinating basket grass seeds optimally.
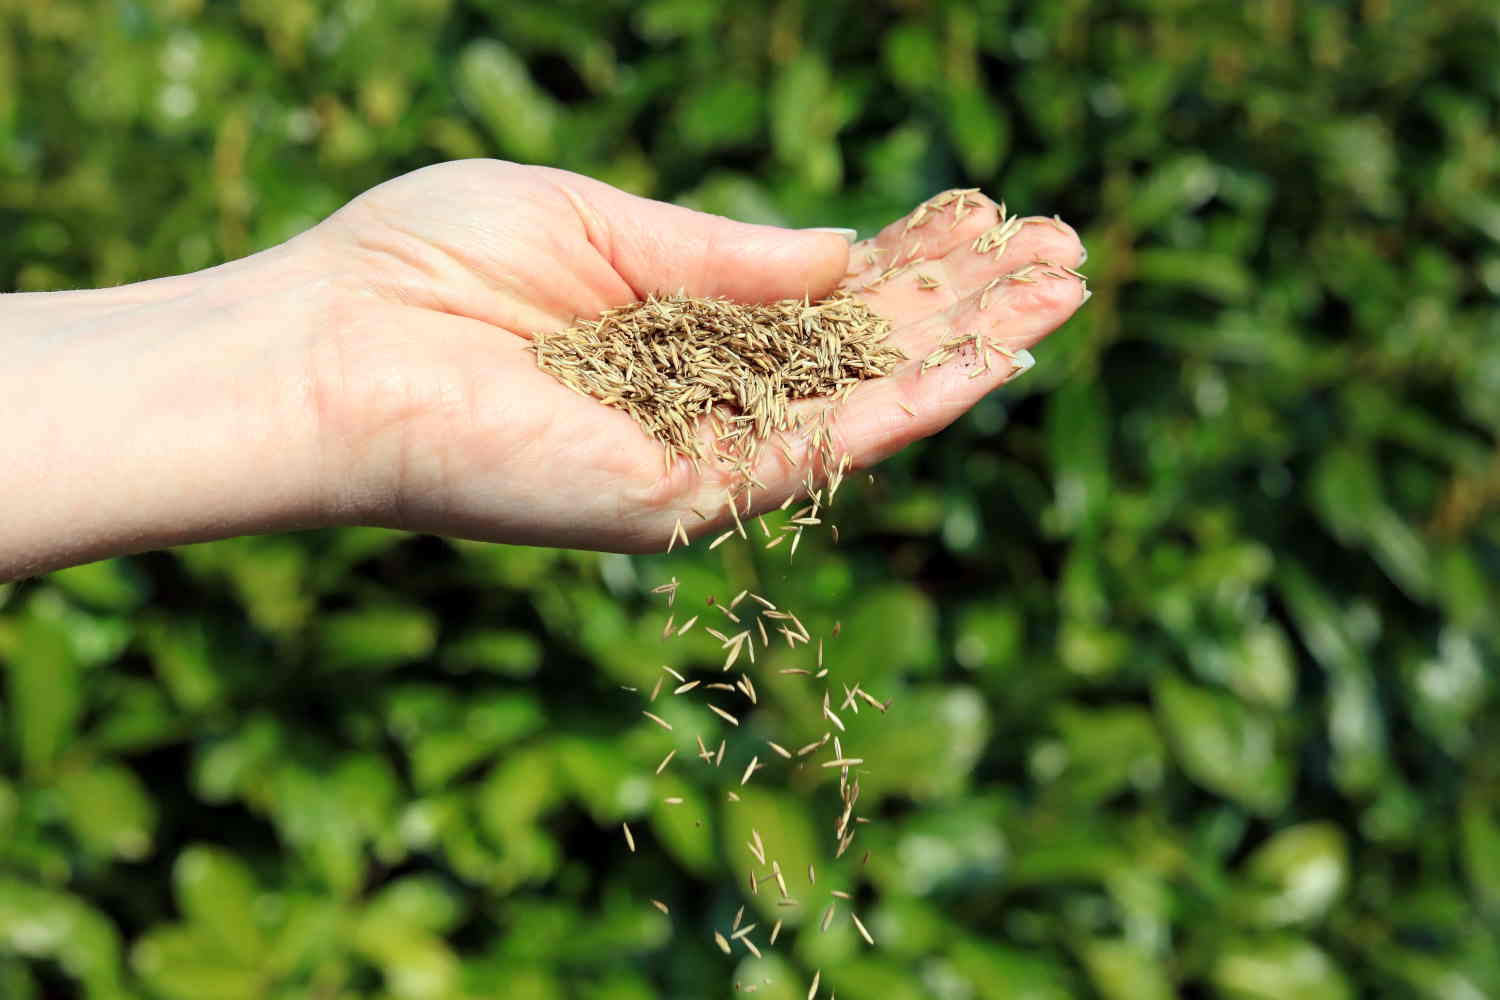
Storing Basket Grass Seeds Correctly
Proper storage is vital for maintaining seed viability and vigor, especially for seeds like basket grass that have a relatively short shelf life. Follow these simple guidelines to store your basket grass seeds correctly
-
Store seeds in a cool, dry place away from direct light and moisture. The ideal storage temperature is 40-50°F. High humidity causes seeds to rot and lose viability.
-
Place seeds in an airtight container like a glass jar or ziplock bag to prevent moisture absorption and entrance of pests.
-
Label the container with details like seed variety, harvest date, expiry. This helps track the seed’s age and viability.
-
Avoid freezing temperatures as it damages the embryo impacting germination rates. Refrigeration can extend shelf life.
-
Use seeds within 1-2 years for best results. Stored properly, basket grass seeds remain viable for 2-3 years max.
-
Inspect stored seeds occasionally and discard any that appear discolored, moldy or damaged.
Following these seed storage tips prevents premature deterioration and maintains high germination rates.
Sowing Basket Grass Seeds for Optimal Germination
Once you have viable, high-quality seeds ready, proper sowing technique is crucial for good germination. Here are some key tips for sowing basket grass seeds successfully:
-
Spring sowing – Sow the seeds in early spring when soil temperatures reach 60-65°F. This provides the right conditions.
-
Well-draining soil – Prepare a light, well-draining seed starting mix. Good drainage prevents fungal diseases.
-
Shallow planting – Basket grass needs light for germination. Sow seeds just 1/8 inches deep into the soil.
-
Even spacing – Scatter seeds evenly over the soil surface about 1-2 inches apart to avoid overcrowding.
-
Light misting – Water carefully with a spray bottle to avoid displacing seeds. Keep soil moist, not soaked.
-
Indirect light – Place container in bright indirect light. Direct hot sun can kill young seedlings.
-
Warmth – Maintain temperatures of 70-75°F for optimal germination.
Follow these simple sowing guidelines for the best germination and plant establishment.
Germinating Basket Grass Seeds Successfully
Germination is the most delicate phase of growth from seed. Here are some key tips for trouble-free basket grass seed germination:
-
Be patient! Seeds can take 14-21 days to germinate. Don’t discard if no sprouts appear immediately.
-
Maintain warm soil temperatures around 70°F consistently. Cooler temperatures delay germination.
-
Keep soil moist through misting. Excess water can lead to rotting.
-
Provide bright indirect light once sprouts emerge. Direct sun will scorch tender shoots.
-
Thin seedlings once the first true leaves appear. Space them at least 2-3 inches apart.
-
Start fertilizing with half strength balanced liquid fertilizer after thinning.
-
Look for disease symptoms like fungal blights, damping off and treat promptly.
-
Transplant outdoors once seedlings are 3-4 inches tall and weather warms up. Harden off first.
Following a patient, consistent process will soon reward you with a flush of feathery basket grass seedlings!
Caring for Basket Grass Seedlings
Nurturing the young seedlings is vital for ensuring they grow into robust, healthy plants. Here are some essential care tips:
-
Acclimatize outdoor transplants slowly over 2 weeks. Harden off to prevent shock.
-
Water 1 inch per week. Increase frequency in extreme heat. Allow soil to partly dry out between watering.
-
Apply slow release granular fertilizer once a month during the growing season.
-
Prune back old foliage and trim wayward stems to maintain a tidy habit.
-
Mulch around plants to conserve moisture and suppress weeds. Avoid piling mulch on crown.
-
Monitor for aphids, spider mites and other pests. Treat promptly before they spread.
-
Divide congested plants in early spring every 2-3 years to rejuvenate growth.
Providing attentive care ensures your basket grass thrives gracefully for years of enjoyment!
Common Problems With Basket Grass Seeds
Growing basket grass from seeds comes with some potential pitfalls. Being aware of these common problems can help you troubleshoot and get your plants thriving:
-
Poor germination due to old seeds, improper planting depth, low soil moisture etc. Always sow fresh seeds correctly.
-
Damping off disease due to fungal infection from excessive moisture. Allow soil to dry out between watering.
-
Leggy, weak growth from inadequate light. Give seedlings ample indirect sunlight.
-
Slow growth caused by incorrect fertilizing or overcrowding. Fertilize properly and thin seedlings.
-
Transplant shock from skipping the hardening off process. Always acclimatize seedlings slowly before transplanting.
With attentive care and following proper techniques, these problems can be easily avoided right from sowing till harvest.
Tips for Harvesting Basket Grass
Basket grass is primarily grown as an ornamental for its graceful foliage and form rather than for seed harvest. But if you wish to collect seeds, follow these tips:
-
Allow seed heads to fully develop and begin drying on the plant. Avoid early harvest.
-
Clip off the mature seed heads individually when they turn light brown.
-
Spread seed heads loosely on a screen or paper in a dry spot. Allow to dry completely.
-
Gently rub the dried heads between your hands over a container to separate the seeds.
-
Discard empty husks and debris. Only store plump, viable seeds for sowing.
-
Place seeds in airtight containers in a cool, dark spot for storage. Label with details.
-
Use seeds within 1-2 years for best viability. Discard shriveled, discolored seeds.
With this handy guide, you can easily grow a graceful basket grass plant from seed to maturity. Follow the seed storage, sowing, germination and care tips outlined here for success with this ornamental grass even as a beginner gardener. Soon, you can enjoy the elegant appeal of basket grass specimens flourishing in your indoor and outdoor spaces.
TECHNIQUES FOR HAND-POLLINATING SPECIFIC CROPS
Corn, Zea mays, is wind pollinated. The tassel, at the top of the plant, is the male flower. Pollen is shed from the anthers, along the tassel branches. Pollen shed usually begins at the uppermost part of the tassel, progressing down the main branch and subsequently onto the branches. Thus, a tassel that has just started shedding pollen will only have anthers producing pollen near the tip of the main tassel branch while a mature tassel will produce pollen along all of its branches. The ear is the female flower part and is located on the stalk. Husk leaves will form at a leaf node, and eventually silks will emerge. Silks are the stigmas and are receptive to the pollen along their entire length. A single kernel or seed is produced from each silk successfully pollinated.
There are a number of techniques for maintaining seed purity in corn. Isolation distance between varieties should be at least 1,000 ft. in arid conditions and increases as humidity increases. Staggered planting times can be very effective. Hand pollination can also be used. We hand-pollinate corn grown at the Conservation Farm because we tend to grow many different accessions at the same time and need to keep each accession from crossing with other accessions, i.e., we’re keeping each accession pure. Home gardeners may want to hand-pollinate because with such small plots (typically), hand-pollinating can increase seed set by ensuring that enough pollen is getting to each ear. Additionally, hand-pollinating can also help ensure that genetic diversity is being maintained.
Once silks have started to appear, the daily ritual of hand-pollinating begins. Anthers begin to shed pollen once the sun is up. After temperatures reach 90-100 degrees, most viable pollen is gone for the day – easily “cooked” by the heat. There are several different strategies for the collection and distribution of pollen when hand-pollinating corn. The easiest is to collect pollen from all tassels shedding pollen that day in a single container and then disperse it equally among all available ears. A large diameter, slick bowl such as glass or enamel works well because the pollen easily slides. Simply bend the tassel over the bowl and gently shake it, being careful not to break the tassel, as it will shed pollen for a few days. The pollen is a bright yellow powder and is an important ceremonial item for several Native American groups.
Cucurbits are a large family of plants that includes squash, cantaloupes, watermelons, and gourds. The plants bear separate male and female flowers and depend on insect pollination for fruit production.
It is important to know the species of squash you plant, as crossing occurs readily between varieties of the same species but is uncommon between species. There are four main species of squash: Cucurbita argyrosperma, C. maxima, C. pepo and C. moschata. Cucurbita argyrosperma is common in the Southwest and is often called cushaw or “calabasa”. Cucurbita maxima includes hubbard, buttercup and banana squashes. Cucurbita moschata is closely related to C. argyrosperma and includes butternuts and calabazas. Cucurbita pepo is a large group that includes zucchini, acorn, crookneck, spaghetti and Halloween pumpkins.
Hand pollination may be necessary to ensure fruit set if adequate pollinators are not available or you are growing more than one variety of the same species and want to save seeds.
Female flowers have a small “baby” squash at the base of the flower and are usually on shorter stems. Male squash flowers are produced on long stems (peduncle) and usually appear well before female flowers. The flowers open in the early morning so it is necessary to get to them before the bees and other insects are active. If you are growing more than one variety of the same species, then taping the flowers shut the evening before they open will help prevent unintentional “pollen mixing”. Tape both male and female flowers shut.The next morning, collect the male flowers and distribute them among the females, using 2-3 male flowers per female. Remove the tape and petals from the male flowers, exposing the anthers and pollen. Quickly open the female flowers without tearing the petals, brush the pollen onto the stigma of the female flower and tape shut again.
A ball of cotton gently placed on top of the pollinated stigma before being taped shut helps prevent pollen-laden insects from burrowing into the flower and crossing it. Label pollinated flowers so that you can save the seed only from those fruits.
Cantaloupes, muskmelons, honeydews and casabas all belong to the same species – Cucumis melo – and will readily cross pollinate. Watermelons also belong to a single species – Citrullus lanatus. For both, hand-pollination will help maintain genetic purity but the flowers on these vines are small and difficult to work with. The plants also have a tenancy to naturally abort 60-70% of the female flowers that bloom. Once fruit has started to set, more flowers will abort. Pollinating the very first female flowers may improve your chances of fruit set. Follow the guidelines for squash pollinating and get out the tweezers!
Though not likely to be something most home gardeners might try, we use isolation cages for our melons and watermelons and rent the services of small hives. Bumble bees are produced in hives small enough to rotate through the 13 ft. X 30 ft. long cages we purchased a few years ago specifically for this purpose. The hives are rotated through all the cages at about 1 week intervals throughout the season. Once the bees take pollen collected from the melon flowers into their hive, it is formed into pollen “balls” and does not leave the hive again. Their careful housekeeping habits prevent cross-pollination between accessions from occurring.
How plants are harvested depends somewhat on whether you’re trying to maintain a variety ‘as is’ or are selecting for certain traits. If you’re trying to maintain a variety ‘as is’, save seed from as many individual plants as possible, even if only 1 seed per plant. If seed matures over a period of time, save seed from multiple harvests so that seeds from early- and late-maturing plants are included in the sample. This helps ensure that genetic diversity will be maintained in your seed sample. On the other hand, if you’re actually selecting for certain traits, only save seed from those plants that express the desired trait.
When to harvest depends slightly on whether the seeds are produced in ‘dry’ or ‘wet’ fruit. Examples of ‘dry’ fruit include chiles, beans, black-eyed peas, gourds, okra, amaranth, sunflowers, corn, peas, garbanzos, cotton, most greens and herbs, sorghum, tobacco, and wheat. These should be harvested when the fruit/seeds are dry. When the seeds rattle in their pods or have begun to fall from the plant, they are typically ready to harvest. They can be left in the field until completely dry or harvested and placed in a protected area to finish drying.
Examples of ‘wet’ fruit include melons, watermelons, squash, tomatillo and tomato. These should be harvested when the fruit are slightly over-ripe but are not rotten. For vining crops, the fruit are typically mature when the fruit are somewhat whitish on the bottom side and the tendrils on the fruit-bearing stem and two adjacent stems are dry. The fruit are typically split and the seeds are scooped out of the fruit, washed and allowed to dry on cloth towels or pillowcases out of the light and heat.
The following are typically mature, and therefore ready to be harvested, when dry:
- Amaranth – cut seed head when majority of flowers feel stiff to the touch, continue drying in a paper bag, pillowcase or on a metal tray to collect seeds that drop.
- Beans/Black-Eyed Peas/Peas/Favas/Lentils/Tepary Beans – pods should be dry and can be picked by hand or by cutting the plant at ground level, letting dry on a tarp out of the rain and threshed.
- Chiles – allow chiles to dry on the plant, hand harvest.
- Corn – if temperatures are high, harvest sweet corn when kernels harden just after the milk-stage (milk-stage is the ideal fresh-eating stage, when a finger nail pressed into a kernel produces a white, milky liquid); sweet corn left too long on the plant in high temperatures may begin to ferment in the husk; for other corns, the cobs may dry completely on the plant, unless frost is likely or birds become a problem; remove entire cobs from plant.
- Gourds – allow to dry on the vine until just before first frost, then continue drying out of the rain; can take several months; gourds are dry when seeds rattle.
- Okra – let dry on plant but harvest before fruit opens allowing seed to drop.
- Sunflowers – let dry on plant as long as possible, protect from birds by covering seed heads with netting or pillowcases; cut heads and let dry in a cool, dry place or in paper bags.
- Melons, watermelons and squash are typically mature and ready to be harvested when the tendrils are dry on the fruit-bearing stem and the two adjacent stems. Some crops require a period of after-ripening in order for the seeds to fully mature. After harvesting, allow squash to after-ripen for 21 days before removing seeds.
Seeds must be cleaned before they can be stored. Different crops require different techniques for cleaning. Overall, seeds should be free of plant material (bits of leaf, stems, etc.) and bad seeds (non-viable, broken, split, etc.).
Download printable instructions for cleaning dry processed seeds here.
Some common techniques for cleaning seed include:
- Threshing – break up plant material (including fruits or pods) and expose the seeds by stomping, beating, crushing, etc.
- Winnowing – separate plant material from seed with a gentle fan or light wind, leaving only clean seed.
- Tarp/fan – slowly pour threshed seeds in front of a fan placed near a tarp, heavy seeds fall onto tarp while the light-weight plant debris is blown farther away.
- Hand-cleaning – remove plant debris by hand.
- Blending – some wet processed seeds can be cleaned by blending fruit in a blender; add water and ‘float’ debris off the top as water is poured off slowly; repeat filling and pouring water off until only clean seeds remain (bad seed and plant debris floats to the top and is poured off with water; good seed sinks). This works well for tomatillos, tomotoes, chiltepines, and small chiles.
WHAT CROSSES WITH WHAT
All plants have a Latin name, known as their genus and species. The same plant can be known by different common, local, or regional names, so Latin names are used to make things universal and less confusing. Plants are given their Latin names based on their flower structure. Thus, plants of the same genus and species are very closely related and therefore cross pollinate. All corns, whether sweet, flour or popcorn, belong to the same species – Zea mays – and readily cross. Most of the peppers, or chiles, commonly grown in gardens are just one species, Capsicum annuum.
Generally, plants within the same genus, but different species, will not cross. Of the squashes, for example, Cucurbita pepo will not readily cross with Curcurbita argyrosperma, Cucurbita moschata or Cucurbita maxima. For this to be helpful, you have to know which species a particular variety belongs to.
For example, crookneck, zucchini, cushaw and hubbard represent 3 different species! It is rare, but not impossible, for plants from different genera (plural of genus) to cross. There are exceptions to the rules, and plant breeders have had some success with forced crossings.
Open-pollinated means that the variety is pollinated randomly, that is, pollination is not controlled in any way, such as that typically performed by plant breeders. Even self-pollinating crops, such as beans, are considered open-pollinated, though there is nothing particularly random about who pollinates whom. Technically, a plot of corn in your neighbor’s backyard is open-pollinated, unless he/she goes out every morning and hand-pollinates individual ears. The interesting twist is that the corn could be the product of controlled pollinations between two or more different corn varieties, i.e., a hybrid. Yet, unless your neighbor actually conducts his/her own pollinations, the corn plot will be considered open-pollinated. Hybrids are produced by specifically cross-pollinating two varieties to produce a unique, third variety, and are common in modern agriculture and commercial garden seeds. Seeds from hybrids often do not produce “true-to-type”, that is, offspring of hybrids often do not maintain the characteristics of their hybrid parents.
Purity means preventing the mixing of more than one variety. Contamination of seed stocks can occur both as a result of cross-pollination between varieties of the same species or by mixing different varieties as a result of poor labeling after they’ve been harvested. The easiest method for maintaining seed purity is to grow only one variety of any one species at a time. Always be aware of what other gardeners near you have planted and what “weeds” may have volunteered in your compost or grow along the roadway.
Hand pollinating is commonly used on a small scale to maintain purity. It can be time consuming and labor intensive, but it’s fun to play Mother Nature! When hand pollinating, you must physically act as the agent to transfer the pollen (male) to the stigma (female). You must also act to prevent any unwanted pollen from finding its way to the stigma.
Staggered planting times is another good practice to prevent crossing, especially for corn. Allow two, four or more weeks between planting of different varieties so that tasseling does not overlap. You must know how many days it takes each variety to mature for this to work; a second planting of an “early” corn that flowers while the first planting is still flowering will defeat the purpose.
Caging individual plants with window screening, or bagging flowers with cheese cloth, muslin or paper sacks can prevent insects from visiting and crossing varieties. This will work well, as in chiles, if flowers are capable of self pollinating. Otherwise, hand pollination may be necessary. Other physical barriers include buildings and plants to disrupt or prevent movement of pollen or insects. Some crops and trees can act as deterrents to insect pollinators, but it takes a comprehensive understanding of which garden insects visit your garden.
The FASTEST Way to Grow Grass Seed: Pregermination Secrets REVEALED!
FAQ
How does basket grass spread?
How to start native grass from seed?
How to get rid of basket grass?
Can you grow sweetgrass from seed?
How to store grass seeds?
Storage in the shed/basement/garage/cellar: Before storing the grass seeds, keep the below-mentioned tips in mind: If you have an unopened grass seed bag, it is best to keep it in the original package at a cool and dry place like a basement or a cellar. However, if rodents visit your storage place, keep the bag in a rodent-proof container.
How do you store grass seed in winter?
When storing grass seed over winter, follow these best practices: Store in a cool, dry place away from fluctuating temperatures. Ensure the storage area is free from moisture to prevent mildew and rot. Rodent-proof containers are recommended, as rodents can destroy grass seed. What kind of containers are best for grass seed storage?
What temperature should grass seed be stored?
Keep it indoors. For energy efficiency and comfort, the average home is kept at somewhere around 60F to 70F. This is the ideal seed storage temperature range, as long as humidity is kept at 35% or less. In these conditions, you can safely store grass seed anywhere that is out of direct sunlight.
Is basket grass a perennial?
Basket grass is a hardy perennial in USDA growing zones 7 to 11. Is troubled by few insect or disease issues. If the blades appear frost damaged or show signs of wind or time abuse, simply trim back to 6 to 8 inches from the ground and the blades will spring back wonderfully. Most lomandras are comfortable in full sun to mostly shaded spots.