Are you interested in harvesting ashwagandha root in Vermont? Look no further! In this comprehensive guide, we will take you through all the necessary steps from identifying the right plant to processing and preserving your crop. Read on to learn about the benefits of ashwagandha root, when to harvest it, and how to use it for health and cooking purposes.
Ashwagandha is an incredible medicinal herb that has been used in Ayurvedic medicine for centuries. Also known as Indian Ginseng or Winter Cherry, this adaptogenic plant is now gaining immense popularity in Western herbalism for its powerful health benefits. If you want to reap the rewards of ashwagandha, you need to know the proper timing and techniques for harvesting this plant. In this comprehensive guide, we will cover everything you need to know about harvesting ashwagandha successfully.
When is the Best Time to Harvest Ashwagandha?
Timing is crucial when harvesting ashwagandha. The roots of the plant contain the highest concentration of potent compounds like withanolides. For optimal potency, the ashwagandha plant must mature fully before harvesting the roots.
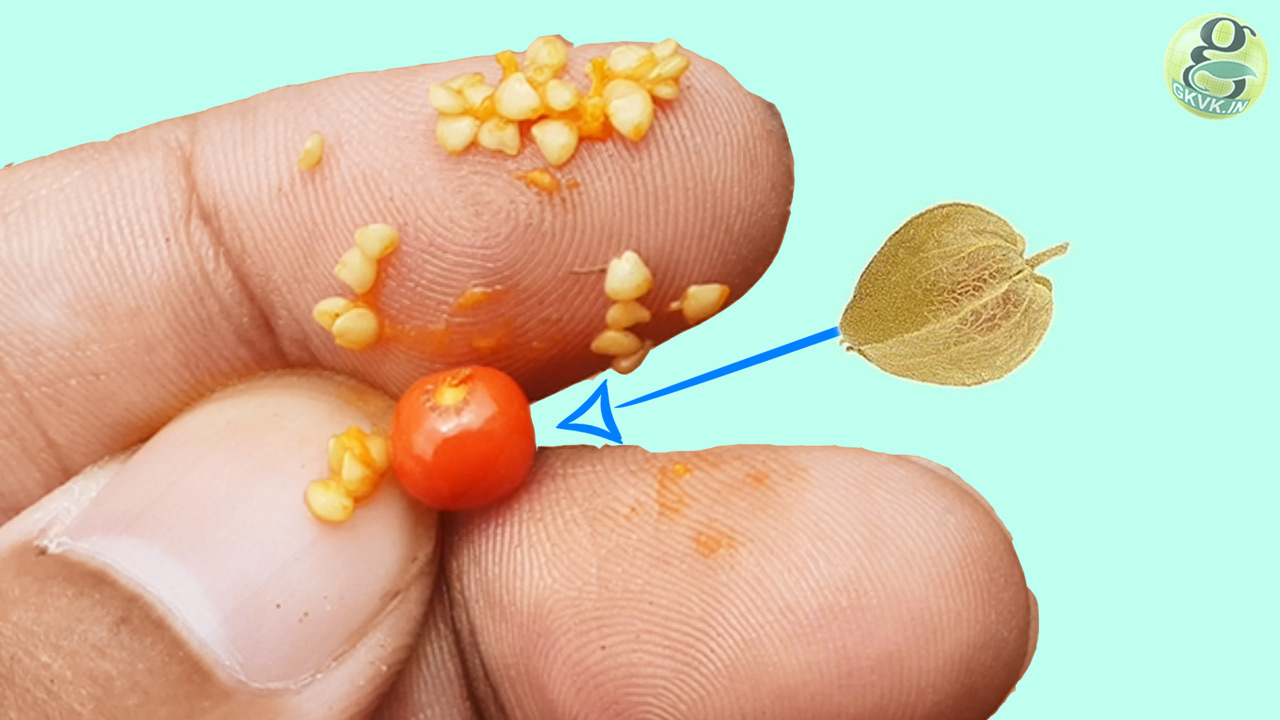
It can take up to 6 months for ashwagandha to mature because of its slow growth rate. The ideal time for harvesting is in late fall or early winter, after the berries have ripened. Signs that the plant is ready for harvesting include yellowing leaves, dying vines and shriveled fruit husks.
Harvesting too early can reduce the concentration and efficacy of medicinal compounds in the roots It’s best to time your harvest just before the first frost when the roots are plump and at peak potency.
Step-by-Step Guide to Harvesting Ashwagandha
Follow these simple steps for harvesting your ashwagandha plants successfully:
Select Mature Plants
Examine your ashwagandha plants and identify ones that are fully mature and ready for harvesting. Indicators include dried out stems, yellow leaves, and shriveled papery husks around the berries. The roots should be large and plump.
Clear Area and Loosen Soil
Clear any weeds, stones or obstructions around the base of the plant. Use a spading fork to loosen the soil around the plant’s base to make digging easier.
Dig Out Entire Plant
Dig around the plant’s base with the spading fork. Slowly lift the whole plant out of the ground, keeping the root system intact. Shake off excess soil but be gentle.
Separate Roots
Once the plant is fully unearthed, use shears or a knife to separate the roots from the rest of the plant. You only need the roots for medicinal use.
Clean Roots
Wash the separated roots thoroughly under cool running water to remove all traces of dirt or debris. Gently scrub with a soft brush if needed.
Dry the Roots
Pat dry the clean roots with a towel. Spread them in a single layer on racks or mesh screens. Allow to dry naturally in shade for 1-2 weeks, turning occasionally.
Store in Airtight Containers
Once fully dried, pack the ashwagandha roots in airtight containers like mason jars. Store in a cool, dark place and use as needed.
5 Tips for the Best Ashwagandha Harvest
Follow these additional tips to ensure you get the highest quality ashwagandha roots from your harvest:
-
Harvest on a dry, sunny day to quicken drying time. Wet weather can cause mold growth.
-
Use clean, sharp tools to dig and separate the roots to avoid bruising or damage. Damaged roots deteriorate faster.
-
Check roots and discard any that are diseased, infected, or damaged before drying.
-
Turn the drying roots every 2-3 days to ensure even drying. Uneven drying reduces potency.
-
If drying indoors, ensure the area is well-ventilated and away from direct light or heat sources.
Storing Your Harvested Ashwagandha
Proper storage is vital to preserve the potency of the ashwagandha roots after harvesting. Follow these tips:
-
Use airtight glass jars or containers to store the dried roots. Avoid plastic bags or boxes.
-
Keep in a cool, dark place away from heat, moisture and direct sunlight.
-
If storing crushed or powdered ashwagandha, place the powder in freezer-safe airtight bags before storing in the freezer.
-
Always label jars with the harvest date and batch number for easy identification.
-
Ideal storage temperature is between 50-59°F.
-
Roots stored properly can remain potent for up to a year. Discard if any mold, caking or deterioration occurs.
Putting Your Ashwagandha Harvest to Use
Once you’ve harvested and stored the ashwagandha roots correctly, it’s time to put them to use! Here are some common ways to use ashwagandha:
-
Ashwagandha Powder – Grind the dried roots into a fine powder to add to smoothies, juices, oatmeal, yogurt and more.
-
Ashwagandha Tea – Simmer 1-2 teaspoons of dried powder or crushed roots in hot water for 10 minutes. Strain and drink.
-
Ashwagandha Tincture – Steep roots in alcohol for several weeks to extract active compounds into a concentrated liquid extract.
-
Ashwagandha Capsules – Encapsulate ashwagandha powder into pills or capsules for easy consumption.
-
Ashwagandha Oil – Infuse the dried roots in a carrier oil for several weeks to create herbal oil for topical use.
With the proper techniques, timing and storage, you can enjoy the many perks of homegrown ashwagandha. Always consult your healthcare provider before using ashwagandha for its medicinal benefits. The future of medicine could very well be grown in our own backyards!
Understanding the Best Time to Harvest Ashwagandha Root in Vermont
The best time to harvest ashwagandha root in Vermont is in the late summer or early fall when the plant has reached maturity and its leaves have started to yellow. You want to make sure that you harvest the roots before the first frost as this can damage the plant. It is also important to choose a dry and sunny day for harvesting to avoid mold and bacteria growth.
Once you have harvested the ashwagandha root, it is important to properly dry and store it. The roots should be washed and dried thoroughly before being placed in a well-ventilated area to dry. It is important to avoid direct sunlight and high humidity during the drying process. Once the roots are completely dry, they can be stored in an airtight container in a cool, dry place for up to a year.
Tools and Equipment Needed for Harvesting Ashwagandha Root
You dont need a lot of tools and equipment for harvesting ashwagandha root, but some essential items include a trowel, a pair of gardening gloves, a harvesting knife or scissors, a digging fork, and a drying rack or dehydrator. You may also want to wear long sleeves and pants to protect yourself from any irritants or insects in the area.
Its important to note that ashwagandha root should be harvested in the fall, after the berries have ripened and fallen off the plant. When harvesting, be sure to only take mature roots that are at least a year old, as younger roots may not have fully developed their medicinal properties. Additionally, its recommended to harvest in the morning when the roots are still moist from the dew, as this can make them easier to dig up without breaking.
Ashwagandha Berry | How To Harvest, Dry & Uses
FAQ
What is the harvesting period of ashwagandha?
What is the best method of extraction for ashwagandha?
What part of the ashwagandha plant do you use?
What are the processing techniques of ashwagandha?