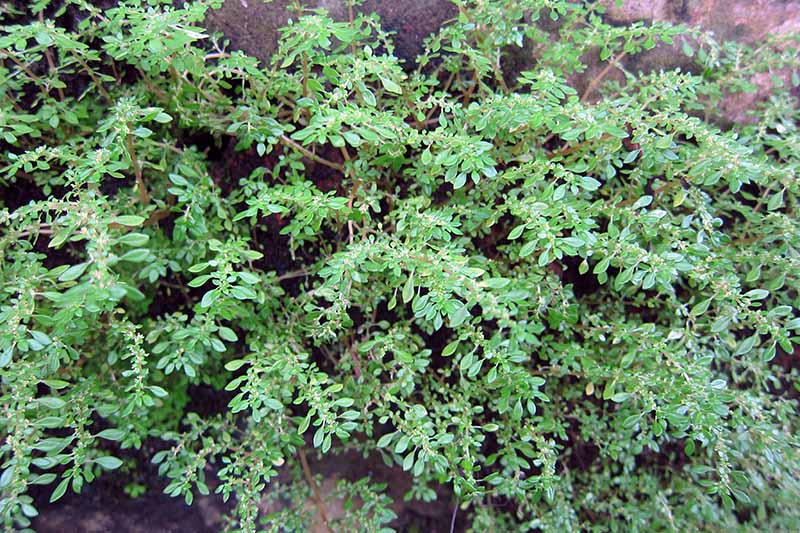
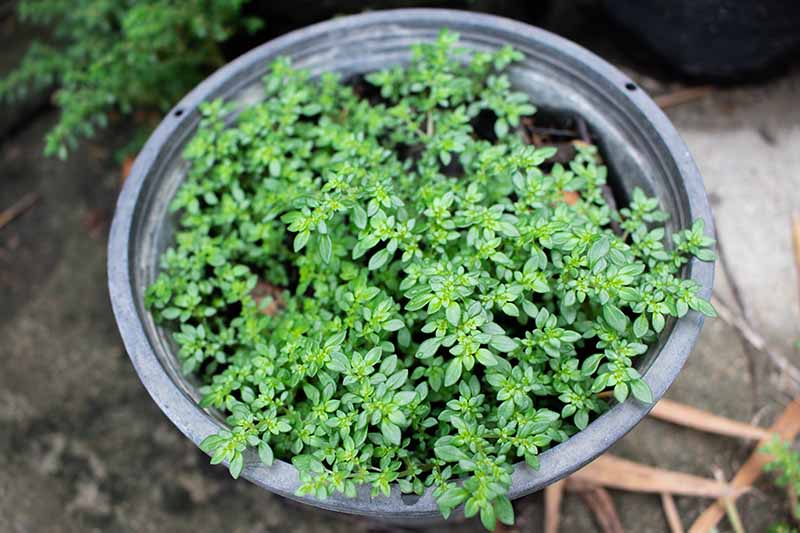
Ornamental artillery plant, Pilea microphylla, aka gunpowder or pistol plant, military fern, or rockweed, is an herbaceous perennial.
It is one of about 600 types of non-stinging Pilea species in the Urticaceae, or nettle family.
This tropical species thrives outdoors year-round in Zones 11 to 12 as a short-lived evergreen perennial. It is also grown as an outdoor annual or indoor houseplant in all zones.
We link to vendors to help you find relevant products. If you buy from one of our links, we may earn a commission.
In this article, we’ll discuss all you need to know to grow and care for your own artillery plant indoors.
It has a creeping growth habit and may reach mature dimensions of six to 18 inches high and 12 to 24 inches wide.
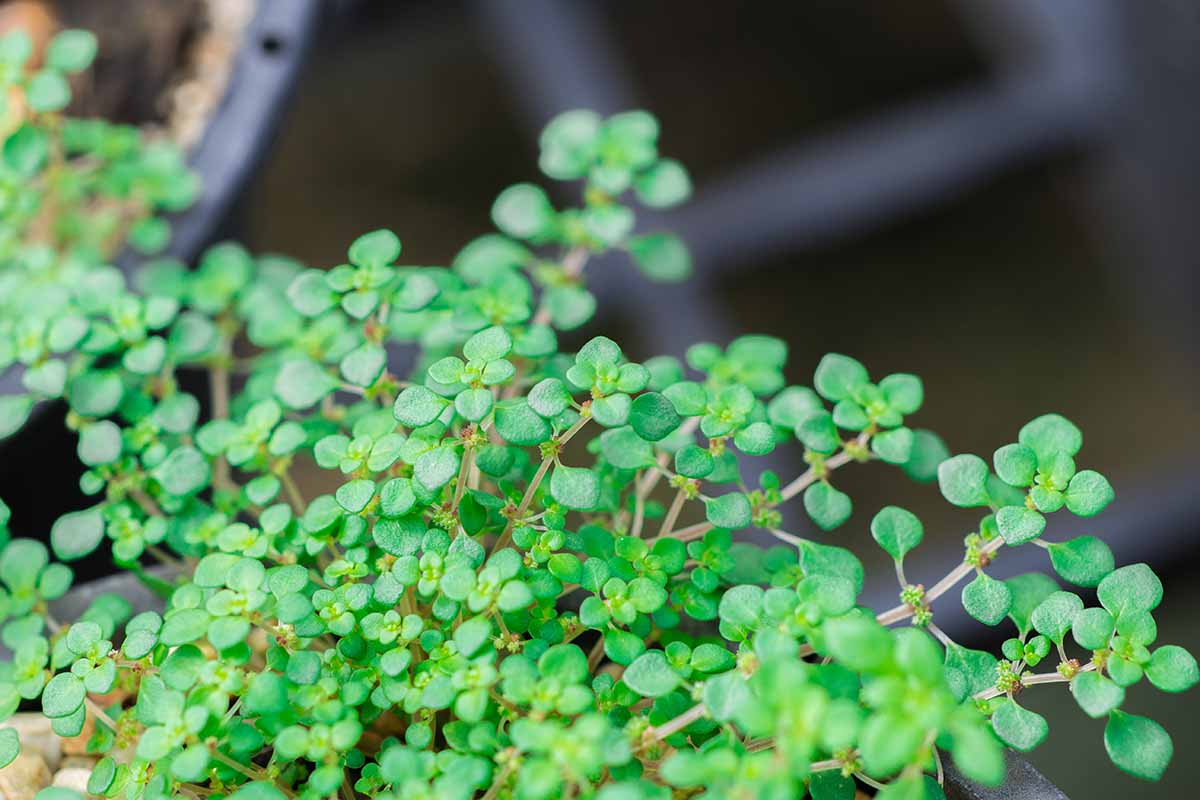
The artillery species has plump leaves like a succulent. They are either green or variegated pink and white, one-eighth to one-half inch long, and “obovate,” or rounded and narrower at the base. The leaves are arranged in opposing pairs, like a fern frond.
In nature, the species produces tiny pinkish flowers followed by brown fruits. And while flowering is unlikely to occur indoors, it’s fun to know about it because the names “artillery,” “gunpowder,” “military,” and “pistol” come from an unusual characteristic.
There are both male and female flowers, and the males literally propel pollen into the air, as in an aerial attack.
Historically speaking, the artillery species has undergone numerous botanical reclassifications by Swedish botanist Carl Linnaeus and later botanists, including Parietaria microphylla (1759), Pilea muscosa (1821), P. microphylla (1851), and P. trianthemoides var. microphylla (1869).
These synonyms and “basionyms,” or name equivalents and their predecessors, still pop up in plant searches, so it’s good to be familiar with them.
The artillery species is native to the Caribbean, Mexico, Central and South America, and the southeastern United States.
In its native habitat, it is a somewhat weedy, spreading ground cover that commonly sprouts between rocks and in lawns, in margins between land and water, and in masonry crevices.
The species has been introduced around the world, and is classified as invasive or at high risk for becoming invasive in many places because it readily naturalizes via stolons, or runner roots, as well as self-sown seed.
Today’s cultivated varieties are robust versions of the hardscrabble wild species. And while indoor cultivation does not pose a threat to the landscape, we do not recommend letting P. microphylla spend the summer outdoors in temperate zones as we do with many houseplants, in order to avoid inadvertently introducing it to the landscape.
This tropical species thrives best with a daytime temperature range of 65 to 85°F and 1000 to 2000 foot-candles of daylight, which is another way of saying bright indirect light.
Lower light is well-tolerated but usually causes shading to dark green, so don’t waste money on a variegated variety if you choose a dim location for your plant.
And growth may be more horizontal than upright. A little pruning of leggy stems contributes to a more compact form.
If you have a very dim setting, such as a windowless office, that you wish to add a plant to, you’ll need a grow light.
To grow your own P. microphylla, you’ll need to start from seed, take a stem cutting from an existing plant, divide an existing plant, or purchase a nursery start.
Outdoors, this is a vigorous self-sower that disperses tiny seeds with gusto, contributing to its invasive tendencies.
However, starting from seed may pose a challenge, as most retailers sell live plants and seeds can be hard to come by.
The artillery plant, also known as Pilea microphylla, is a charming indoor and outdoor plant that is loved for its unique foliage and growth habit. But exactly how tall does this plant get? Let’s take a closer look at the growth characteristics of the artillery plant.
Overview of Artillery Plant
The artillery plant is native to tropical regions of Central and South America. It’s part of the nettle family and known for its tiny leaves that give it a delicate, fern-like appearance. The plant gets its common name from its small flowers that shoot pollen into the air.
This low-maintenance plant can be grown indoors or outdoors in the right climate. It does best in warm, humid environments and thrives in bright, indirect light. The artillery plant has an aggressive spreading habit, forming dense mats of foliage.
Typical Height of Artillery Plant
On average, the artillery plant grows to a height of 6-12 inches (15-30 cm) when kept indoors. Outdoors in ideal conditions, it may reach up to 12 inches tall. The plant has a spreading, creeping habit and can expand horizontally across the ground or cascade out of containers.
Here is a quick overview of the typical height range you can expect
- Indoors: 6-12 inches tall
- Outdoors: 6-12 inches tall
So in most settings, the artillery plant stays quite short in terms of height. But it makes up for its modest height by spreading out extensively if given the room to do so
Factors Affecting Growth Height
Several key factors play a role in determining the ultimate height of an artillery plant
Light – Insufficient light leads to leggy, stretched out growth as the plant reaches for light. Plenty of bright, indirect light keeps plants more compact.
Outdoor Climate – Warm, humid tropical or subtropical climates allow plants to achieve maximum growth potential. Colder climates limit size.
Root Space – When rootbound in a small container, height is restricted. Providing room to spread out promotes growth.
Pruning and Pinching – Regular pruning and pinching of stem tips can restrict vertical growth while encouraging fullness.
Age – Younger plants are smaller while more established plants will achieve larger size. Give it time to reach maturity.
Cultivar – Some specialized cultivars, like the variegated variety, tend to be slightly smaller and slower growing.
Growth Habit
While artillery plant doesn’t get very tall, it displays vigorous horizontal growth. When happy, it will produce many trailing stems and runners that spread out rapidly. Outdoors, it makes a lush, spreading ground cover. Indoors, it cascades attractively out of hanging baskets or mixed containers.
This aggressive spreading habit allows the plant to reach an overall footprint of 6-24 inches wide (15-60 cm) or more if permitted. It fills out empty space quickly and can be pruned and shaped as desired.
Caring for Artillery Plant
To encourage healthy, compact growth, provide the artillery plant with proper care including:
- Bright, indirect sunlight
- Loose, well-draining soil
- Consistently moist soil
- High humidity
- Warm temperatures between 65-85°F
- Monthly fertilizer at half strength
Avoid overwatering, as it is prone to root rot in soggy soil. Also, give it room to spread out rather than confining it to a too-small space. With the right conditions, this adaptable plant will thrive indoors or out.
Uses in the Landscape
Thanks to its diminutive size and spreading habit, the artillery plant has several useful landscape applications:
- Attractive ground cover for tropical gardens
- Cascading element in mixed containers and hanging baskets
- Terrarium plant for closed containers
- Houseplant for desks and shelves
The lush green foliage adds vibrant color and soft texture wherever it grows. It pairs well with larger tropical plants like palms and heliconia or can be used on its own as a carpet of green.
Achieving Maximum Size Outdoors
When grown outside in zones 11-12, the artillery plant can achieve its maximum spread and approach 12 inches in height under ideal conditions. To promote the largest size possible:
-
Plant in rich, moisture-retentive soil amended with compost or organic material.
-
Site in a warm, sheltered location protected from excessive wind and harsh sun.
-
Water frequently to provide consistent moisture. Avoid drought stress.
-
Control weeds so artillery plant doesn’t have competition.
-
Apply a balanced liquid fertilizer every 4-6 weeks during active growth.
-
Allow plenty of room to spread out and fill in space.
-
Pinch back periodically to encourage a dense, bushy habit.
Controlling Growth Indoors
If artillery plant growth gets out of hand indoors, you can easily control its size. Here are some tips:
-
Prune regularly to remove leggy stems and dense growth. You can prune up to 1/3 of the plant at a time.
-
Adjust light if plants are getting too leggy, moving to a brighter location.
-
Limit root space by keeping in a moderately sized container relative to plant size.
-
Reduce fertilizer to slow growth.
-
Pinch back long shoots using your fingers to shape plant as desired.
-
Propagate pruned cuttings to start new artillery plants!
Achieving Maximum Height
While artillery plant typically reaches just 6-12 inches tall, you can encourage it to achieve its maximum potential height through optimal care:
-
Start with a young, vigorously growing plant. Older plants may be more stunted.
-
Allow plenty of room to spread out in a large container or planting bed. Avoid cramped quarters.
-
Site in warm location with temperatures between 65-85°F.
-
Provide very bright, indirect light to promote compact growth.
-
Keep soil consistently moist but not waterlogged.
-
Fertilize monthly with a balanced liquid fertilizer.
-
Allow several years to reach full maturity and peak size.
With diligent care, artillery plant can achieve a height of 12 inches tall indoors or outdoors. But keep in mind, its trailing stems may extend much farther!
The artillery plant may be petite, but it packs a lot of visual impact thanks to its lush, delicate foliage and vigorous spreading habit. Typically reaching just 6-12 inches tall but spreading horizontally, it’s perfectly suited to use as an indoor hanging plant or outdoor tropical ground cover. Provide this easy-care plant with bright, indirect light and consistent moisture for best results. With a little patience and proper care, you can achieve its maximum potential height of around 12 inches.

From a Nursery Start/Transplanting
When you buy a pilea, it may be very young or more mature. To transplant it to another container, or to pot up a stem cutting or division, do the following:
Choose a vessel that is large enough to accommodate the plant, whatever its size, with two to three inches of growing room all around it. Be sure that it has one or more drainage holes.
Keep in mind that when it’s mature, this type of pilea may be between 12 and 24 inches wide. You will probably need to repot more than once before maturity and may want to keep the early containers on the inexpensive side.
At maturity, you may opt to select a hanging container to showcase the species’ creeping, trailing nature.
Buy potting soil that’s rich in organic matter, moisture-retentive, loose and airy, and well-draining. It will approximate the 5.0 to 6.0 pH that this tropical species prefers.
Place a single layer of pea gravel in the bottom to facilitate drainage, and then fill the vessel about halfway with potting soil.
Gently unearth the plant from its current pot.
Settle it in the potting medium so it sits at the same depth it was in the original container.
Backfill with soil and tamp it very lightly to hold the plant upright. Take care not to compact the soil. Light and airy is what you want to aim for.
If you are potting a rooted stem cutting, settle it in the soil, taking care not to injure the fledgling roots.
Bury the rooted end one inch deep in soil, tamp lightly and loosely backfill.
To transplant a division, you’ll want to settle it in much the same way, with about an inch of soil over the roots, at about the same height it was in its original vessel.
After potting, water until it runs out the bottom of the vessel, and repeat.
When all drainage has stopped, find a location with bright, indirect light. You may want to place the container on a single layer of pea gravel in a shallow, non-rusting pan. Add water to the pan until it comes just to the top of the gravel.
This is a great way to increase ambient humidity and replicate the natural habitat of a pilea plant.
One final note: With stems that are fleshy like a succulent, it’s easy to bruise or break them, so be sure to handle yours with care.
Once potted and watered, it’s time to apply a half-strength liquid or slow-release granular houseplant food. It’s best to apply this to wet soil to avoid burning tender roots and stems.

Feed again in the summer, and continue to feed once in spring and once in summer going forward.
Some gardeners recommend feeding more frequently, but overfeeding may prove to be a disaster resulting in a visible buildup of salts on the soil and container that inhibits water uptake.
In the event of a buildup, flush the pot through several times with water, and reduce feeding to once a year in the spring.
Keep the soil evenly moist by watering when the surface feels dry. Avoid oversaturation, as the roots rot easily, and reduce watering during winter dormancy. Just don’t let the pot completely dry out.
In addition, avoid wetting the leaves, especially in low-light locations, to avoid creating a breeding ground for the bacterial and fungal diseases we’ll discuss shortly.
P. macrophylla is not hard to grow when you remember to:
- Use an organically-rich potting soil that is loose, well-draining, and moisture-retentive.
- Avoid packing the soil down hard when potting. Instead, tamp loosely and leave lots of air holes to facilitate the flow of nutrients, oxygen, and water.
- Fertilize sparingly to avoid a buildup of salts, and flush several times as needed in the event of overfeeding.
- Maintain even moisture without oversaturation by watering when the soil surface feels dry.
This is an easy species to maintain. For a more compact shape, pinch off a few inches of the growing tips. If you like, use them to make new plants per the propagation instructions above.

If a fragile stem breaks, use clean pruners to remove the damaged portion. Be sure to cut just above a leaf node to encourage rapid regeneration.
Also, tap water is sometimes so alkaline or “hard” that it causes white spots to form on the leaves. If you note this issue, switch to distilled water.
Like many houseplants of tropical origin, P. microphylla thrives in bright, indirect light but it can tolerate a low-light placement.
Photo by Daderot, Wikimedia Commons, via
P. microphylla ‘Variegata’ is a variegated pink and white cultivar you may like to choose for a location with bright indirect light.
P. microphylla ‘Variegata.’ Photo by Forest & Kim Starr, Wikimedia Commons, via
For best results in low light, remember that a green variety is your best bet, as a variegated one is likely to shade to dark green anyway.
This species has not been widely developed, and options and availability are currently not extensive.
From a Stem Cutting
If you know someone with a plant already, you can get a head start by taking a cutting.
To propagate a stem cutting, make your cut about four inches from the tip of a growing stem at any time during the spring or summer.
Use clean shears and choose a spot to cut that’s just below a leaf node. This is a natural growing point, where roots will readily sprout.
Pinch off the lower leaves to reveal a bare stem about two inches long.
Place the bare stem in one inch of water in a narrow container that can support it, like an old unused drinking glass. There should be no leaves below the water line, as they will start to decay and foul the water.
Place the glass in a location with bright indirect sunlight, such as near a window with an opaque curtain. Avoid direct sunlight, as it may burn the foliage and roots with its intensity.
Change the water daily.
When roots sprout over the next couple of weeks, you’ll have a cutting that’s ready to pot up, which we’ll discuss shortly.
In addition to calling upon another gardener to assist you with the cutting method to get started with your first plant, you may be lucky enough to have a friend who is getting ready to repot. In this case, you can ask for a division.
This method involves unpotting and dividing one plant into two or more sections and transplanting the sections to their own containers.
You can learn how to divide an herbaceous perennial in our guide.
If you haven’t got a repotting friend, it’s time to get your wallet out.
Pilea Microphylla Artillery plant care & Tips.
FAQ
How big do artillery plants get?
|
Hardiness
|
11 – 12 What’s My Zone?
|
|
Exposure
|
Partial Sun
|
|
Season of Interest
|
Spring (Early, Mid, Late) Summer (Early, Mid, Late) Fall Winter
|
|
Height
|
6″ – 1′ (15cm – 30cm)
|
|
Spread
|
6″ – 2′ (15cm – 60cm)
|
Do artillery plants like humidity?
What kills artillery ferns?
