When you purchase through links on our site, we may earn an affiliate commission. Here’s how it works.
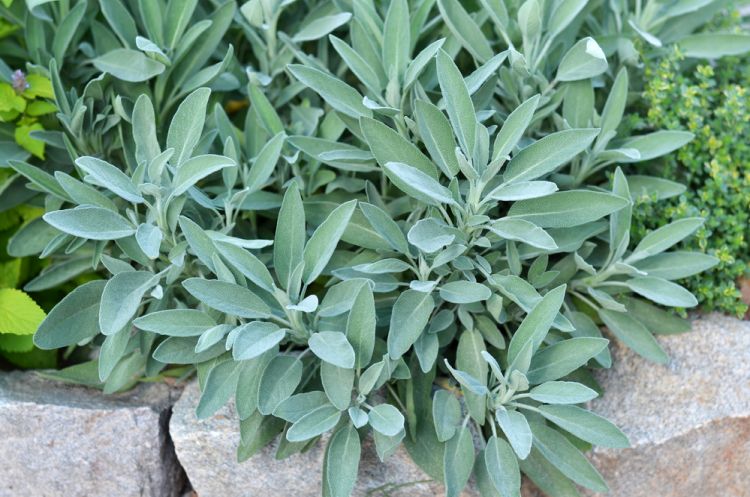
I love salvias! They are colorful with abundant flowers. They are great habitat plants too. The bees really enjoy their nectar. Some salvias stay relatively low to the ground while others can grow over 5 feet (1.5 m.) tall. In areas with cold winters, most salvias are herbaceous perennials. They die to the ground in winter and grow back the following spring. In warm winter climates, you can find a mix of perennial and woody evergreen salvias. If you are like me and want to enjoy even more of these beautiful plants, then transplanting salvia to other areas of the garden may be of some interest.
Transplanting an autumn sage plant (Salvia greggii) can seem daunting, but it’s easier than you think if you follow some simple steps In this comprehensive guide, I’ll walk you through the entire process of transplanting autumn sage from choosing the right time to proper aftercare
When is the Best Time to Transplant Autumn Sage?
Choosing the optimal time to transplant autumn sage is key to success. The best times are early spring or fall when temperatures are mild. Avoid summer when heat stress could damage the plant or winter when cold temps might shock it. Transplant in early spring after the last frost when soil has warmed or in fall about 6-8 weeks before your first expected frost.
How to Prepare the New Planting Location
Careful preparation of the new planting site is crucial prior to transplanting autumn sage. Pick a spot that gets full sun to partial shade. Autumn sage thrives with 6+ hours of direct sunlight per day. The soil should drain well, avoiding soggy conditions. Amend dense clay or sandy soils with 2-3 inches of compost tilled into the top 6 inches to improve drainage and provide nutrients.
Digging Up the Autumn Sage Plant
Once you’ve prepped the new location, it’s time to dig up the plant. Water it thoroughly the day before to make removing easier. Carefully dig around the outer drip line, loosening the soil to get the biggest root ball possible. You want as much of the root system as you can manage to relocate with the plant. Shake off excess soil and lift the plant from the ground.
How to Transplant Autumn Sage into Its New Spot
Now comes the fun part – putting your autumn sage into its new forever home! Dig a hole in the prepared planting site slightly larger than the root ball. Place the plant in the hole, positioning the top of the root ball level with the surrounding soil. Refill the hole with soil gently firming it around the roots. Water deeply to settle the soil and reduce transplant shock. Add 2-3 inches of organic mulch around the base to retain moisture and discourage weeds.
Caring for Newly Transplanted Autumn Sage
Post-transplant care ensures your autumn sage thrives in its new spot. Here are some tips:
-
Water frequently after transplanting, keeping the soil consistently moist but not soaked. Reduce watering once established.
-
Avoid fertilizing for at least one month after transplanting. Then use a balanced fertilizer in spring.
-
Prune back any damaged or overlong stems to stimulate bushy, compact growth.
-
Replenish mulch as needed, maintaining a 2-3 inch layer.
-
Monitor for signs of stress like wilting leaves and adjust care accordingly.
-
Stake larger plants if needed to provide support until the root system is re-established.
How to Transplant a Potted Autumn Sage
Transplanting from a container is slightly different than from the ground. Follow these steps:
-
Water the plant thoroughly and let excess drain. Wait 30 minutes for moisture absorption.
-
Turn the pot on its side and gently tap to loosen the root ball.
-
Carefully slide the plant from the pot, supporting the root ball to avoid damage.
-
Check for circling roots. Gently loosen or trim them before transplanting.
-
Plant in the prepared hole as described above.
-
Water well and provide post-transplant care.
Transplanting Autumn Sage Divisions
Mature autumn sage plants can be divided to propagate more. Here’s how:
-
In early spring as new growth emerges, dig up the plant.
-
Shake off excess soil and use pruners to cut the root ball into sections.
-
Divisions should have 3-5 healthy stems and established roots.
-
Immediately replant the divisions in their new spots.
-
Water thoroughly and care for as new transplants. Divisions may bloom the first year!
Troubleshooting Common Transplant Issues
Even with proper care, transplant stress can happen. Here are some common problems and solutions:
-
Wilting leaves: Increase watering frequency. Move to partial shade if sun exposure is too intense.
-
Failure to establish: Check that the root ball is planted at the proper depth. Remulch if needed.
-
Dieback: Prune damaged stems. Ensure adequate watering and reduce fertilizer.
-
Slow growth: Move to a sunnier location. Test and amend soil nutrients if needed.
Key Takeaways on Transplanting Autumn Sage
Transplanting autumn sage properly takes some preparation and care, but following these key tips will ensure success:
- Transplant in spring or fall during moderate temperatures
- Prepare the new site with well-draining, nutrient-rich soil
- Dig up the plant carefully keeping the root ball intact
- Plant at the same depth it was originally growing
- Water thoroughly after transplant and provide ongoing care
- Monitor for signs of stress and troubleshoot issues
With the right timing and aftercare, your transplanted autumn sage will flourish in its new spot, providing vibrant, pollinator-friendly color for years to come. Just take it step-by-step and soon you’ll have beautiful, thriving plants!
How to Transplant Salvia in the Garden
If you are wondering how to transplant salvias, the answer varies. Choose a day that is not too hot or too cold. In other words – transplanting salvia plants during a heat wave is not a good idea. Transplanting salvia plants during winter is hard on them too. Your salvia plant will need to re-establish its roots in new soil. Excessive heat makes it difficult to keep those roots moist. Really cold weather inhibits new growth and can negatively impact the severed roots when transplanting. Dig the new planting hole first when transplanting salvia plants. That way you can move the salvia to its new location quickly. Choose a location that is correct for your salvia variety. Some salvias prefer full sun. Others can take partial shade. Make sure the new location has good drainage. Dig out as much of the root ball as you can and install it so the root crown is slightly above grade. If you are going to add amendments to your native soil, then choose a good quality potting soil. If there are any long roots, do not bend and wrap them around the planting hole. It is better to snip them off so they are more or less even with the other roots.
As you transplant, you may wonder, “Can you divide salvia plants?” Yes. But dividing salvia is riskier than simply transplanting the whole plant. This is because you are ripping apart a larger percentage of the roots. Woody evergreen salvias are a bit fussier about transplanting than herbaceous perennials. First, dig out the whole plant. Tip prune any excessively long roots so the root ball is relatively even. Remove some of the soil near the root crown so you can inspect the plant to figure out the sections or clumps. Use a serrated knife when dividing salvia. Split your salvia in between the sections. It is essential that you keep the salvia segment evenly moist but not boggy after dividing and replanting.
When to Split Salvia
Choose a day with moderate temperatures or when the plant is dormant. Late autumn is a good time in California because you can get some assistance with root re-establishment from the winter rains. Spring is a good time in both cold winter climates and mild winter climates.
Native Texas Sage Propagation! | Fall Propagation Season Episode 1
FAQ
When to transplant Autumn Sage?
Can you dig up sage and replant it?
Where is the best place to plant Autumn Sage?
Does Autumn Sage like sun or shade?