Transplanting baby sage plants can seem daunting, but it is an easy process if done properly Sage is a versatile herb that adds wonderful flavor to many dishes Growing your own baby sage plants allows you to have fresh sage readily available. While sage can be grown from seed, it is often easier to start with nursery-grown baby sage plants. But at some point, you’ll need to transplant those baby sages into the garden or larger containers. Follow this guide for tips on successfully transplanting baby sage without stressing the plant.
When is the Best Time to Transplant Baby Sage?
Choosing the right time to transplant baby sage is key. The ideal time is early spring after the last frost or in early fall before the first frost. Sage prefers cooler temperatures. Avoid transplanting in the heat of summer or cold of winter. Transplant on an overcast, cool day without rain if possible.
The small size of baby sage means its roots are not very established yet Transplanting during active growth periods stresses the plant less, Early spring or fall allow 2-3 months for baby sage roots to settle before heat or cold extremes
Supplies Needed for Transplanting Baby Sage
Before starting, gather these supplies:
- Trowel or small shovel
- Container or area prepared for transplant
- Watering can
- Compost or fertilizer (optional)
- Pruning shears (optional)
Ensure the transplant location has loose, well-draining soil. Amend clay-heavy soils with compost to improve drainage.
Step-by-Step Guide to Transplanting Baby Sage
Follow these steps for stress-free baby sage transplanting:
1. Water the Baby Sage
Thoroughly water the baby sage plant 1-2 days before transplanting. Well-hydrated plants experience less shock.
2. Dig Up the Baby Sage
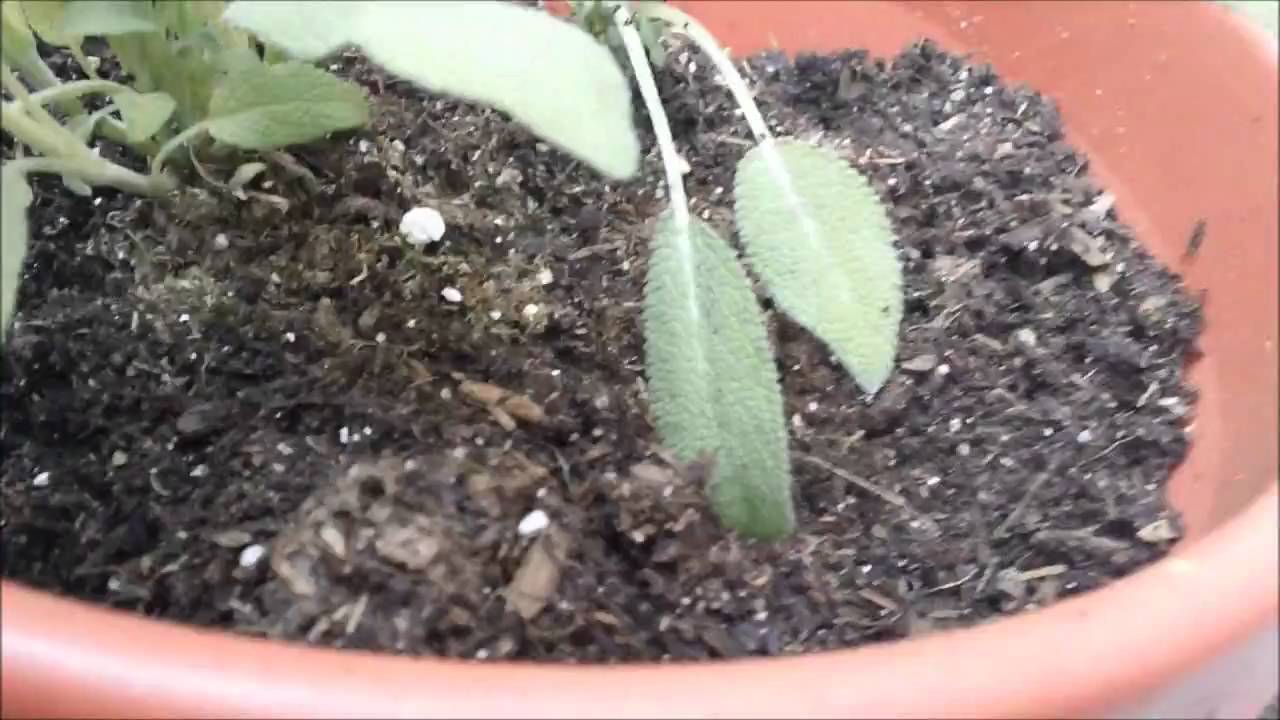
Use your trowel to dig around the baby sage roots. Go 2-3 inches deep and at least 6 inches out from the stem.
Gently loosen the root ball and lift the entire plant out. Try to keep as much soil around the roots as possible.
3. Prepare the Planting Hole
Dig a hole in the new location about twice the width of the baby sage root ball. The depth should match the soil level on the baby sage.
For poor drainage, amend the soil with compost or add gravel to the hole’s bottom.
4. Transplant the Baby Sage
Carefully place the baby sage into the hole. The top of the root ball should be level with the ground.
Fill in around the plant with your amended soil. Gently firm the soil around the base.
5. Water Thoroughly
Give the transplanted baby sage a thorough watering immediately after planting. Water gently to avoid displacing the roots.
6. Provide Shade
Place a shade cloth over the baby sage for 1-2 weeks as it recovers from transplant shock. Filtered sunlight prevents stress.
7. Prune Leggy Growth (Optional)
If the baby sage is leggy, prune back 1/3 of the top growth. This encourages bushier regrowth.
Post-Transplant Care for Baby Sage
Proper aftercare ensures your transplanted baby sage thrives. Follow these tips:
- Water 1-2 times per week during dry periods, aiming for moist but not soggy soil.
- Apply mulch around the base to retain moisture and regulate soil temperature.
- Fertilize 4-6 weeks after transplanting if needed. Use an organic balanced fertilizer.
- Monitor for signs of transplant shock like leaf wilting or yellowing. Hold off on fertilizing if shock occurs.
- Cut back on water and fertilizer during cool weather when growth slows.
- Transplant into a container 2-3 times larger if roots start circling the pot.
Troubleshooting Common Baby Sage Transplant Problems
Monitor baby sage closely after transplanting to catch any issues early. Common problems include:
Leggy growth: Insufficient sunlight, overcrowding, or overfertilizing can cause leggy baby sage growth. Prune back 1/3 of the top growth. Move to a sunnier location if needed.
Leaf wilting: Transplant shock, under watering, or root damage may cause wilting. Increase watering frequency and use shade cloth until recovered.
Yellowing leaves: Usually a sign of overwatering. Allow the soil to partially dry between waterings. Improve drainage if yellowing continues.
Stunted growth: Heavy clay soil, overwatering, or extreme temperatures can stunt growth. Amend soil and protect from weather extremes until established.
Key Takeaways for Transplanting Baby Sage
Transplanting baby sage is simple when done properly. Follow these key tips:
-
Transplant in early spring or fall for less stress on plants.
-
Water baby sage well 1-2 days before digging up.
-
Keep the root ball intact when digging up baby sage.
-
Prepare a hole twice as wide and equally as deep as the root ball.
-
Water thoroughly immediately after transplanting.
-
Provide shade for 1-2 weeks while baby sage recovers.
-
Monitor for transplant shock and troubleshoot any issues.
With the right conditions and care, transplanted baby sage will flourish in no time! Enjoy growing this versatile culinary herb.
Prepping and Planting
Before you play plant surgeon, sterilize your tools—a swab of rubbing alcohol is your ally against infection. Snip below a node, at an angle, to maximize rooting real estate. Rooting hormone? Its like a growth hack for your cuttings, though not a must-have.
The Right Environment
Create a Goldilocks greenhouse for your cuttings—bright, indirect light, and humidity like a misty morning. Keep the soil moist, not swampy, and maintain a cozy temperature around 75° to 80°F. Remember, air circulation is key; suffocation is not on the agenda.
Water your budding babies with a gentle hand; think of a light drizzle, not a downpour. Feeding? Go light on the nutrients; these cuttings arent ready for a full-course meal. Patience is a virtue here; roots take time to emerge and flourish.

Transplanting Sage
FAQ
Can you dig up sage and replant it?
Can you grow baby sage from cuttings?
Will sage cuttings root in water?