Arugula, also known as rocket salad, is a tasty and nutrient-packed leafy green that can be a wonderful addition to any home garden. Getting familiar with the different stages of arugula growth can help you provide the best care to maximize your harvest. In this comprehensive guide, we’ll walk through the full life cycle of arugula from seed to harvest so you can grow lush, beautiful plants.
Overview of Arugula Growth Stages
Arugula goes through five key growth phases during its life cycle:
- Germination
- Seedling
- Vegetative growth
- Bolting
- Flowering
Understanding what happens during each stage will make it easier to identify what your plants need to thrive. Proper timing of planting, preventative care and harvesting are also key to success. Let’s explore each stage in more detail.
Stage 1: Germination
Germination is when the arugula seed first sprouts and the embryonic plant emerges.
- This stage begins when the seed is planted in moist soil.
- Germination usually takes 5-7 days.
- The optimum soil temperature for germination is 40-55°F.
- Seeds should be planted at a shallow depth of 1⁄4 inch.
- Keep the soil moist but not soaked during this stage.
Signs that germination is underway include cracking open of the seed coat and the first tiny root emerging. Monitor moisture levels carefully at this delicate time
Stage 2: Seedling
The seedling stage starts when the first seed leaves (cotyledons) emerge above the soil line. This stage lasts around 3-4 weeks.
- The first true leaves will develop, taking on the classic arugula shape.
- Seedlings grow rapidly with adequate light and water.
- Thin overcrowded seedlings to improve growing conditions.
- Let plants reach 3-4 inches tall before first harvest.
Proper seedling care sets the course for the rest of the growth cycle. Make sure young plants get 6 hours of sun and 1 inch of water per week.
Stage 3: Vegetative Growth
This vital stage is when leaf growth accelerates and plants size up. It usually lasts 4-6 weeks.
- Look for the quick expansion of leaf mass.
- Leaves become larger, more tender and flavorful.
- Plants can reach 12 inches tall and wide when mature.
- Consistent moisture and balanced nutrition are important.
- Harvest leaves regularly to encourage production.
Maximize leaf yield by watering deeply, fertilizing every 2-3 weeks, and cutting outer leaves first.
Stage 4: Bolting
Bolting is when the plant shifts from leaf growth to flowering/seed production. This usually occurs in hot weather or if plants become stressed.
- Stem rapidly elongates as flowers form.
- Leaves may become more bitter or fibrous.
- Flower stalks emerge from center of plant.
To delay bolting:
- Provide afternoon shade
- Water frequently
- Choose bolt-resistant varieties
- Plant in cool weather
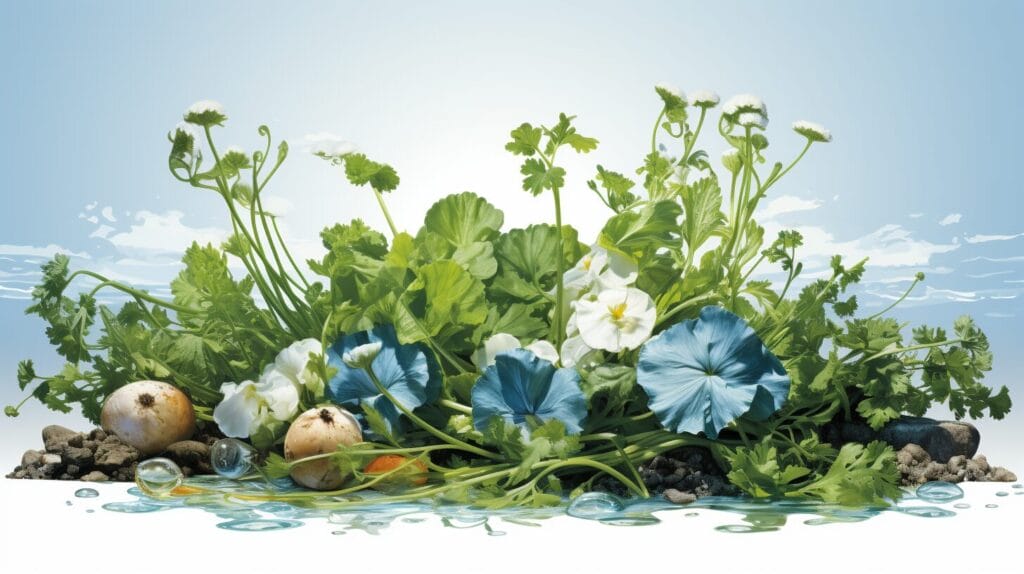
Stage 5: Flowering
This final stage is marked by the emergence of small white or yellow blossoms, signaling seed production.
- Blooms turn into seed pods.
- Leaf quality sharply declines.
- Seeds can be collected for future planting.
At this point, harvest any remaining leaves. Then pull plants to make room for another crop!
Timing Your Planting
Now that you know the growth timeline, let’s discuss when to plant arugula for the best results. Here are some tips:
- In cool climates, plant early spring through late fall.
- In warm climates, wait until temperatures cool below 90°F.
- Successive planting every 2-3 weeks extends harvest.
- Avoid mid-summer planting if possible.
- Start fall crops at least 4-6 weeks before first frost.
Adjust timing for your climate, aiming to avoid extreme heat during the bolting and flowering stages.
Caring Through the Stages
Tailor your care routines to nurture arugula through each phase:
Germination: Keep soil moist and use a heating mat for warmth if needed.
Seedling: Provide full sun. Thin crowded starts.
Vegetative growth: Water deeply. Use balanced fertilizer.
Bolting: Shade plants during hot afternoons. Harvest frequently.
Flowering: Pull spent plants and compost or collect seeds.
Meeting the needs of each growth stage will lead to an abundant harvest!
Troubleshooting Issues
Watch for these potential problems and take corrective action:
-
Poor germination: Soil too dry, too wet, or too cold. Improve conditions.
-
Leggy or weak seedlings: Not enough sun. Provide more light.
-
Stunted growth: Overcrowded. Thin seedlings.
-
Pale leaves: Nutrient deficiency. Fertilize more frequently.
-
Fast bolting: Excess heat. Add shade covers.
Adjust care routines whenever you notice anything amiss to get plants back on track.
Tips for Maximizing Yield
Follow these tips for keeping your arugula healthy and maximizing yields:
-
Select quick-growing, bolt-resistant varieties.
-
Use compost and organic fertilizer to enrich soil.
-
Water early in the day to allow foliage to dry.
-
Cut outer leaves first and allow inner ones to mature.
-
Plant successive crops every 2-3 weeks for continual harvest.
-
Provide temporary shade if weather is extremely hot.
-
Frequently harvest leaves before flowering can occur.
With the right care through each phase, you’ll enjoy bountiful harvests!
Now that you understand the full lifecycle of an arugula plant from seed to table, you can confidently grow this tasty green. Pay close attention to its needs during each stage of growth for the healthiest, most productive plants possible. With a little time and effort, you’ll be rewarded with fresh arugula for months on end.
For even more tips on planting, troubleshooting, and harvesting, explore our complete arugula growing guide. Happy gardening!
Growing Zones and When to Plant Arugula
Arugula can grow well in USDA Hardiness Zones 3-11. Like kale, broccoli, and other healthy greens, arugula likes cooler weather. But arugula is a bit different – temperature doesnt affect it much. It can grow well in both cold and hot weather. Arugula can tolerate more heat than other salad greens, and it can also survive frost as low as 40°F (4°C).
If you plan well, you can enjoy two arugula seasons: spring to early summer and late summer to fall. In spring, you can start planting as soon as you can work the soil. To keep getting arugula leaves regularly, plant more seeds every two to three weeks until it gets too hot in the summer or frosty in the fall. The arugula can tolerate a bit of frost and even a light freeze. Plant arugula where it gets maximum sunlight, like six or more hours every day. It can still grow in spots with some shade, but it wont do as well.
Water needs and how to set up an irrigation system for the Arugula
Like many veggies, arugula needs regular watering to thrive and taste delicious. Its roots are near the surface, so keep the soil moist but not soggy. If the top inch of soil feels dry, it is time to water.
If the soil becomes too dry and the weather becomes hot, arugula may begin to produce seeds prematurely. To avoid this, water deeply and regularly during the summer. This prevents early bolting and allows you to enjoy your arugula harvest for longer.
Consider installing a drip irrigation system to supply water directly to the plants base. It will minimize water contact with the leaves and reduce disease risk. If planting arugula in a garden beds or pots, water with ¼” soaker dripline at 6” spacing. The ¼” soaker dripline is flexible and durable. If planting in rows use the Drip Tape with 8” spacing. These products are available in our DripWorks kits, and the components will help you provide an efficient irrigation system for your arugula garden.
Growing Arugula in Small Space (Rocket from Seed to Harvest) Container garden
FAQ
What are the stages of arugula growth?
How many days does it take to grow arugula?
What not to plant next to arugula?
What does arugula look like when growing?
What are the 7 stages of arugula growth?
Arugula growing stages will include seven stages such as sowing, germination, young plants, mature plants, flowering plants, fruiting plants, and dry plants. Join us to learn about the characteristics and notes in each stage of development of Arugula. Arugula is grown from seeds like some other common vegetables.
How does arugula grow?
In the early stages, you can harvest some leaves without harming the plant. This is called the “cut-and-come-again” phase, where you pick the outer leaves, and the plant keeps producing more. As the arugula grows, it produces flowers. After flowering, the plant produces seeds, and this is the last stage of its life cycle.
How to start an arugula crop?
To start an Arugula crop, gardeners will prepare the soil and plant the seeds. During the seed selection process, you need to choose seeds from mature plants that are healthy and free of pests. Seed quality is an important factor in determining the germination rate of seeds after sowing in the ground.
Why should you grow arugula?
From the tiny seeds to the lush green leaves ready for your salad bowl, every step in the growth of arugula brings its own joy. It’s not just about the end product; it’s about watching those first sprouts push through the soil, about tending to your plants, and finally, about harvesting your very own greens. The benefits? They’re huge.