Whether you want to plant vegetables or create a new flower bed, there are several different ways to convert lawn into gardening space. I’m going to share with you the various methods I have used. What works and what doesn’t, and tips for creating your new garden bed.
Before you even begin to start the process of converting lawn grass into gardening space, you need to choose a location for your new garden bed. Unless, you’re just going to grow shade plants, it’s important to find the sunniest place in your yard and plan your new garden bed there.
If you want to grow vegetables, flowers or a mix, you’ll have the best harvest if the designated area gets full sun. Full sun means more than 6 hours of direct sunlight a day.
It’s also important to think about convenience in maintaining your new garden. Think about the water needs of your new space, and whether or not you want to install drip irrigation. In other words, your new planting area will need to be close to a water source. Although I don’t always heed my own advice, if this is your first garden, start with just a small area for your new planting bed. You can always add on later if you decide you’re really into gardening.
This post contains affiliate links. If you click on one of the links and make a purchase, I may receive a small commission at no additional cost to you. See full disclosure here.
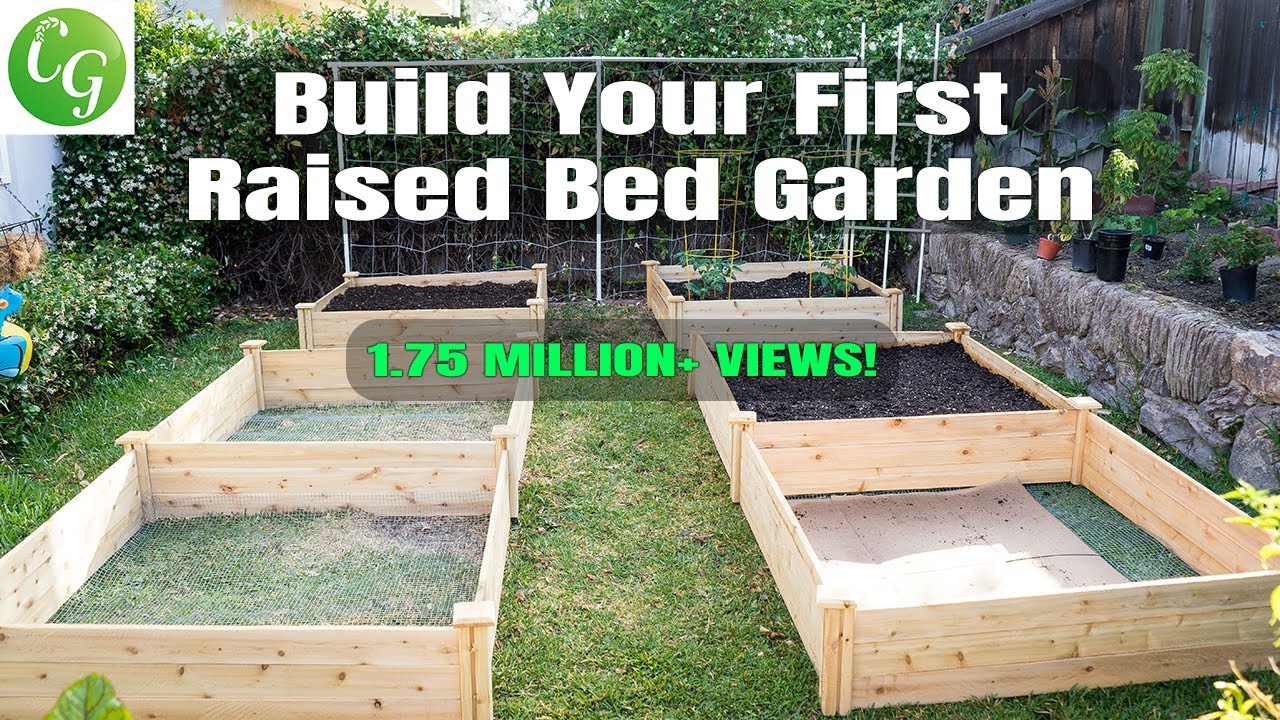
Installing raised garden beds is a great way to grow vegetables, herbs, and flowers. Raised beds provide better drainage, allow you to control the soil quality, and are easier on your back compared to traditional in-ground gardening. But can you put raised beds directly on top of your lawn? Or is it better to remove the grass first?
In this comprehensive guide, we’ll cover everything you need to know about starting raised garden beds on grass.
Should You Put Raised Beds on Grass or Remove the Grass First?
When installing raised beds. you have two options
- Place the beds directly on top of the grass
- Remove the grass first and then install the beds
Both approaches have pros and cons
Benefits of Putting Beds on Grass
- Quick and easy set up
- Saves time and effort compared to removing grass
- No need to till or dig up your lawn
Drawbacks of Putting Beds on Grass
- Grass can creep into beds over time
- May need to continually maintain grass around beds
- Beds not perfectly level if grass is bumpy
- Grass stays wet and can cause wood beds to rot
Benefits of Removing Grass First
- Prevents grass from growing into garden beds
- Allows beds to be perfectly level
- Creates defined gardening space separate from lawn
- Reduces maintenance around beds long-term
Drawbacks of Removing Grass First
- More time and effort upfront to remove grass
- Need to till or dig up area underneath beds
- Can be disruptive to your existing lawn
Overall, removing the grass first provides the most benefits long-term and prevents many potential problems However, putting beds directly on grass can work decently well, especially for a temporary garden
9 Steps for Putting Raised Beds on Grass
If you opt to put your raised beds on top of grass, follow these steps:
1. Observe Sunlight and Drainage Patterns
Note sunlight patterns throughout the day and drainage issues before placing your beds. Avoid full shade and low, wet spots.
2. Choose Appropriate Raised Bed Size and Height
Select raised beds that fit your space constraints. Make sure beds are high enough off the ground.
3. Lay Down Overlapping Cardboard
Cover grass fully with 3-5 overlapped layers of cardboard to smother the grass and weeds.
4. Install Raised Beds on Top of Cardboard
Assemble or set pre-built raised beds directly on top of the flattened cardboard.
5. Use a Soil Mix With Compost
Fill beds with a high-quality potting soil mix amended with compost for drainage.
6. Start With Shallow-Rooted Crops
Grow beets, lettuce, onions, radishes and other shallow crops the first year.
7. Replenish Mulch Walkways
Keep grass from creeping back in by maintaining 4-6 inches of wood chip mulch around beds.
8. Hand Pull Any Grass Growth
Stay vigilant and quickly pull out any grass sprouting up in the garden beds.
9. Replace Cardboard as Needed
Add fresh cardboard layers whenever grass starts poking through into beds.
6 Tips for Putting Beds on Grass Long-Term
To increase your chances of success long-term, keep these tips in mind:
- Use cinder blocks or rot-resistant wood like cedar or redwood for raised beds
- Leave a gap between beds and fences or walls for easier maintenance
- Monitor for grass invasion and act quickly to remove it
- Maintain thick mulch barrier around raised bed perimeter
- Avoid invasive grass varieties like Bermuda grass
- Be prepared to periodically replace cardboard and mulch
5 Key Steps for Removing Grass First
If you want to fully remove grass before installing raised beds, follow these steps:
1. Mark Area for Beds with Stakes
Stake out the footprint for where you want your raised beds located.
2. Remove All Grass and Roots from Area
Dig up grass in the bed space, removing all roots. Till or turn over soil.
3. Level and Smooth the Soil
Rake area smooth. Check for low spots and fill as needed to level.
4. Cover Walkways with Cardboard and Mulch
Lay cardboard between beds and cover with 4-6 inches of wood chip mulch.
5. Install Raised Beds on Leveled Soil
Build or place raised beds directly onto smoothed, grass-free soil.
Removing grass takes more initial effort, but prevents many headaches down the road. And you’ll have a defined garden space separate from your lawn.
Frequently Asked Questions
What type of cardboard should I use?
Use sturdy, corrugated cardboard boxes. Avoid using cardboard with any plastic or wax coatings.
Can I just use plastic sheeting or landscape fabric?
Plastic and landscape fabric prevent water and roots from penetrating into soil. Cardboard breaks down better.
How long will it take for grass to die under cardboard?
Grass and weeds will fully die off after being covered with overlapped cardboard for 1-2 months.
What’s the best material for raised bed walkways?
Use wood chips, pine needles, shredded leaves, or other organic mulch materials around beds. Avoid gravel.
How often will I need to replace the cardboard?
Plan to refresh cardboard layers every 2-3 years. Spot treat any areas where grass pokes through sooner.
Conclusion
Growing vegetables and flowers in raised garden beds on top of your lawn can work decently well, especially in the short-term. But taking the time to remove grass first provides many long-term benefits.
If installing beds on grass, be diligent about maintaining cardboard and mulch barriers. And be ready to pull grass and refresh cardboard periodically. For a near permanent raised bed garden space, invest the effort into removing grass first.
Building Your Own Raised Garden Beds
If you decide you still want to build your own raised garden beds, here are a few tips to remember:
- Make your raised garden beds at least 8 inches deep, 12+ inches is even better. If your raised beds are too shallow, plants will become crowded and won’t have the soil depth to mature and produce.
- Cedar is the best wood for raised garden beds. You can get cheaper wood like pine, but it won’t hold up like cedar will.
- To keep your garden bed sturdy and to finish off the corners, use garden bed corner brackets. For deeper garden beds, these corner brackets are a very good choice.
- To learn more about building your own raised beds, check out Erin’s post at Impatient Gardener. Her raised bed garden is gorgeous!
Raised Bed Gardening (Without Removing Grass)
If you are new to gardening and not sure you’re going to enjoy gardening, perhaps you might want to consider a raised bed garden. Raised garden beds are perfect for growing vegetables, planting an herb garden, growing flowers or really any kind of gardening. They also take less time than other methods because you can sit your raised bed right on top of the grass.