Looking for some home decor ideas? Preparing for your wedding and need some centerpiece inspiration? Have a great vase but not sure what to put in it?
Here is a great way to take some sola wood flowers, greenery and a vase and turn them into an interchangeable centerpiece!
Normally, your first step is to choose which flowers you want to use and your color story. Once you know the colors, it is time to start dyeing the flowers! We have done a few tutorials on how to dye sola wood flowers so feel free to scroll through our past blogs to find any of those for a more detailed how-to for this part
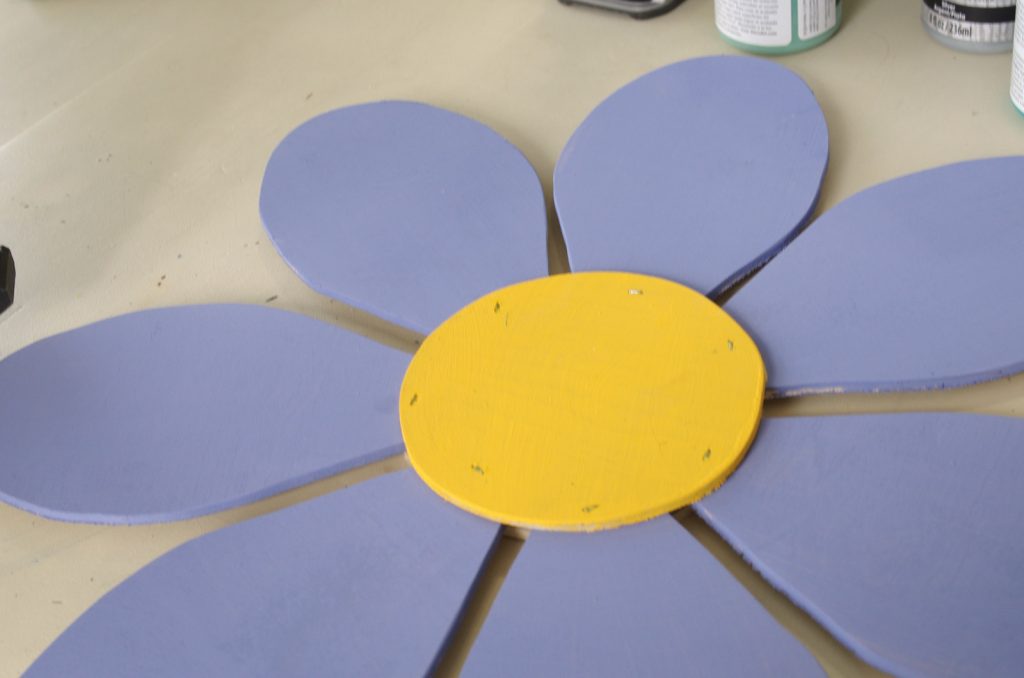
Luckily for me, I had these flowers left from the welcome wreath I made. Since they were already painted, all I needed to do was glue them onto floral wire. I used 18 gauge wire and hot glue to complete this step.
Making wooden flowers can be a fun and satisfying DIY project. The end result is a beautiful, handmade decoration that will liven up your home or make a lovely gift. With just a few simple tools and materials, you can create wooden flowers in any style you like. Here is a step-by-step guide to making your own wooden blooms.
Choose Your Wood
The first step is selecting the right type of wood. Basswood is a popular choice as it is relatively soft and has a fine, even grain that carves well. Birch, poplar, pine, and maple also work nicely. The wood should be easy to cut and shape without splintering too much. Avoid very dense hardwoods.
You can use wood slices, planks, dowels, or other pre-cut pieces. The thickness will depend on the size of flower you want to make, but 1/4 to 1/2 inch thick is a good range for most home projects.
Cut the Petal Shapes
Now it’s time to transform the wood into petals. This can be done freehand with a jigsaw, scroll saw, or bandsaw. For more uniform petals, you can create a paper template and trace around it. Cut just outside the line so you can sand later for a perfect fit.
Make sure to cut with the wood grain, not against it. Cutting against the grain raises the chance of splintering The exact petal shape is up to you Heart-shaped, oval, round, and teardrop shapes all work well. Cut as many petals as needed for your flower.
Smooth and Shape the Petals
Freshly cut petals will have rough edges, Use sandpaper to smooth out the petals and round off any sharp points or corners Start with a coarse grit like 100 and work up to 220 or 320 for a silky smooth finish
You can further shape the petals by clamping the stack between two pieces of wood and using a disc sander to add a curve A benchtop belt sander also works for adding shape and contours Work slowly and carefully to avoid over-sanding.
Assemble the Flower
Once your petals are cut and sanded, it’s time to assemble the flower. There are a few options for connecting the petals:
-
Hot glue – The classic choice, hot glue sets up fast and makes a strong bond. Glue petals in concentric circles working from the center outward.
-
Wire – Twist floral wire around the base of each petal to connect them. Hide the wires by wrapping green floral tape over them.
-
Wood glue – For a permanent bond, use wood glue between petals and clamp until dry. Small spring clamps work well.
Build up layers of petals until you achieve the desired fullness. Press firmly at the center as you add petals to keep a tight, realistic shape.
Add Details and Color
Now for the fun part – adding details and color! Acrylic paints work wonderfully on wood. You can paint the flower all one color or use multiple shades and tones. Dry brushing and layered washes create depth and interest. Here are some easy ways to enhance your wooden bloom:
- Paint the edges – Darker paint on the petal edges makes them pop
- Add veining – Use a small brush to paint on delicate veins
- Dry brush – Lightly brush on paint for subtle highlights/texture
- Wood burn – Add lines, dots for texture with a wood burning tool
- Glitter and gems – Sparkle it up with some bling!
Seal the paint with a clear acrylic sealer for protection. Add a stem made from wire or a wood dowel and your wooden flower is complete!
Extra Tips
- Soak petals in water 10 minutes before shaping to make them pliable
- Work quickly with glue – have all pieces ready
- Start with inexpensive wood in case of mistakes
- Use wood with interesting grain patterns
- Protect work surface from glue drips
- Add leaves and filler flowers for a realistic bouquet
With a little practice, you’ll be churning out gorgeous wooden blooms in no time. The possibilities are endless when you make your own flowers. Let your creativity bloom! Customize them with favorite colors, shapes, and designs to make wood flowers that are uniquely you.
Paint Your Vase! (Optional)
I love metallics (and gold) and wanted to bring in a pop of shiny with my centerpiece. I used my cylindrical vase from Dollar Tree and spray painted it with Rust-Oleum Metallic Gold (you can use any spray paint color to bring in an accent color. Anyone up for trying a hot pink?!).
Once completely dry, I gave it a coat of Rust-Oleum Flat Protective Enamel. This helps to seal the paint and makes it much easier to wipe off fingerprints!
Prep Your Greenery and Filler!
Greenery and filler usually come in bunches of stems. I find it easiest to use single stems while building my bouquets and other arrangements and here are some of my go-to moves to prepare them!
- Use your wire cutters to remove each individual stem from the bundle. I cut as close to the “handle” as possible.
- Remove the leaves/filler that are close to the base of the individually cut stem. Youll only need the top section (at most around 4″ from the tippy top for a small bouquet), so pull off the pieces below that. Use scissors or wire cutters to remove the extra nubs from the stem. We will stem those extra leaves next!
- Some leaves have a little “cup” at the bottom which is how they held onto the original stem. You can glue the floral wire directly into that cup. See the lambs ear (top right) in the picture above as an example.
- Other leaves/filler have a hole at the base. For these, I like to insert my floral wire into the hole and loop it over. You can use needle nose pliers to secure it into place or just give it a tight squeeze with your fingers. The laurel above (on the left) is a good example of how to do this!
- Some fillers may have very short stems after you cut them from the handle. To lengthen them enough to place into bouquets, I will use floral tape or vinyl tape to attach a separate floral stem (as seen with the tiny white spring flowers in the lower right of the above picture).
While this is a relatively easy task, it can be tedious and take a bit of time. Throw on whatever show youre binging on these days and get going!
Wooden Flower
FAQ
How are wood flowers made?
- Sola Wood Source: Sola wood flowers are made from the renewable wood of the Aeschynomene aspera plant, a fast-growing and sustainable resource.
-
Oh! You’re Lovely – Sola Wood Flowershttps://ohyourelovely.comEverything you need to know about sola wood flowersJan 5, 2019 — Made from the renewable wood of a marshy plant (not tapioca or cassava as commonly misunderstood), sola wood flowers look like real flowers and last …

-
- Harvest and Shaping: The plant’s soft, white core is harvested and processed into flat sola rolls.
- Hand-Cutting Petals: These rolls are then carefully hand-cut into delicate petals.
- Flower Assembly: The petals are assembled using a combination of glue and shaping to create the desired flower form.
- Dyeing (Optional): Sola wood flowers can be dyed various colors, says a post on Sola-Flowers.
-
Heart and Sola Creationshttps://heartandsola.comThe Ultimate Guide to Including Sola Wood Flowers in Your WeddingWhat Are Wood Flowers and How Are They Made? … The wood flowers I use to make wedding decor and bouquets are made from the root of a plant called aeschynomene…
-
Reddit · r/weddingplanninghttps://www.reddit.comExplain to me like I’m five: Sola Flowers, how do I make them?Jan 25, 2022 — Sola flowers come in either raw wood which is harder and uncolored. Or you can order the precolored packs which will be dyed and treated in softener…
-
- Stemming: Once the flower is assembled, it can be stemmed with bamboo or wooden sticks, says Sola-Flowers.
How to stick fake flowers to wood?
Hot glue. If you’re trying to figure out how to attach faux flowers to a wooden sign, you might have just found the easiest option.
Do I need softener for sola flowers?
Hand-crafted wood flowers are great to use in floral decorations but without a softener they can turn brittle over time.Oct 12, 2021
How to make wooden flowers?
The first step in making wooden flowers is selecting the right type of wood. Different types of wood offer unique characteristics and aesthetics, so it’s important to choose wisely. Here are some popular choices for making wooden flowers: Basswood: Basswood is a softwood that is easy to carve and has a smooth texture.
What are wood flowers made of?
Wood flowers are made of various types of wood, such as birch, poplar, and pine. How Sola Wood Flowers Are Made? Sola wood flowers are made by hand from the bark of the tapioca plant.
How do you decorate a wood flower?
Let your creativity flow and personalize each wood flower. Using beads, glitter, or other decorative elements: Apply a clear adhesive and carefully place beads or glitter on desired areas. Experiment with other decorative elements like sequins or small trinkets. Ensure the glue or adhesive is suitable for wood to pr e vent any damage.
How do you glue a wooden flower?
Wood glue: Wood glue is used to attach different pieces of wood together. Opt for a strong, fast-drying wood glue for secure and durable connections. Paintbrushes: Paintbrushes are necessary for applying paint or coatings to the wooden flowers. Choose brushes of various sizes to accommodate different areas and details.
How do you make flower petals from wood?
Consider the grain pattern, hardness, and durability of the wood. Popular choices for wooden flower petals include maple, cherry, and birch. Cutting the Petal Shapes: Use a scroll saw or a band saw to carefully cut out the desired shapes for your flower petals.
Are wood flowers a good DIY project?
Wood flowers can be a fun and creative DIY project that adds a rustic touch to home decor or events like weddings and parties. With some basic materials and simple steps, you can create beautiful and long-lasting wood flowers that can be customized to fit any style or color scheme.