Heres a way to do just that! The only digging you’ll do is to put in your plants!
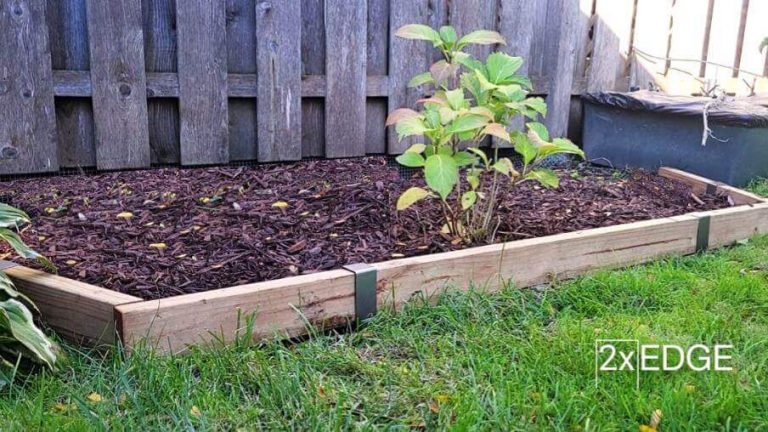
In this step-by-step guide we use 2xEDGE, the two-by lumber landscape staple, to install the wood edging that will serve as the container for your brand-new garden bed.
No digging or drilling is required to install edging around your flower bed, tree surround, vegetable garden – anywhere you need to create a mulch bed.
Early Spring is around the corner! Get a jump on the growing season with this quick and effective approach to making mulch beds.
How to Make Mulch Beds
A mulch bed is a great way to define your landscaping and planting areas. Mulch not only looks nice, but it also helps control weeds, retain moisture, and protect plants. Making a mulch bed is a relatively easy DIY project. Here are some tips for creating the perfect mulch beds for your yard:
Plan Your Bed Shape and LocationTake some time to think about the shape and placement of your mulch beds Consider existing trees, shrubs, flower beds, and hardscapes like patios and walkways Make sure to leave enough space between plants and structures for future growth. Mark the outline of your bed with a hose or spray paint.
Remove Grass and WeedsUse a flat shovel to skim off the grass and weeds inside the bed area, about 1-2 inches deep This will help prevent weeds from popping up later Alternatively, you can smother grass and weeds by layering cardboard or newspaper and topping with mulch.
Define the Edges
For a clean look, dig a small trench along the perimeter with a sharp spade. Remove 3-4 inches of dirt to create a crisp edge between the bed and lawn. Taper the trench so it’s wider at the top.
Add Compost (Optional)
For enriched soil, mix 1-2 inches of compost into the top layer of native soil. Compost improves drainage and nutrients for plants.
Spread the Mulch
Dump wheelbarrow loads of mulch over the bed and use a rake to smooth it into an even 2-3 inch layer. Pull mulch away from tree trunks and the bases of plants to prevent rot. Refresh the mulch annually to maintain your beds.
Plant Flowers, Shrubs, Etc
Now your mulch bed is ready for plants! Focus on native, low-maintenance perennials. Grasses, sedums, and daylilies do well in many regions. Plant in groupings for visual impact.
Add Finishing Touches
Consider adding edging material between the mulch and grass for extra definition. Plastic, metal, brick, and stone work well to contain the mulch. Other optional extras are pathway stepping stones, decorative garden art, and landscape lighting.
Maintaining your new mulch beds will be easy. Replenish the mulch as needed each year. Prune overgrown plants and promptly remove weeds. With proper care, your mulch beds will provide a beautiful, polished look for years to come.
Dig holes for plants (optional)
If youre ready to plant right away, dig holes for your plants now.
You wont put them in yet so keep track of each hole so you can find them later.
If youre just making a mulch bed for now, skip this step.
Cut edging lumber to size
If your mulch bed requires custom lumber lengths, now is the time to make your cuts.
2xEDGE works with any length of two-by lumber. Check out this guide to learn how many 2xEDGEs youll need to staple your lumber securely.
At first glance, you might think using two-by lumber would confine you to mulch beds that are square or rectangular. With a little imagination and a few angle cuts, you can do a lot with two by lumber.
An example: this six-sided hexagon shaped raised tree surround was made with six 4-foot 2x4s.
To make this project we cut each end of the lumber at a 30-degree angle. This is a pretty straightforward thing to accomplish with power tools like a miter saw (aka chop saw) or circular saw. You could also use a hand saw which would add a beneficial cardio work out.
Make your own hex-shaped mulch bed. Check out the plan.
Create a NEW MULCH BED from SCRATCH
FAQ
How do you prepare the ground for mulch?
How do you prepare a mulch bed?
- Kill and remove weeds. …
- Trim nearby trees and bushes. …
- Rake your mulch bed. …
- Cultivate the soil. …
- Edge your mulch bed. …
- Smooth out your mulch bed. …
- Treat your mulch bed. …
- Start mulching!
What should I put down before mulch?

Before applying mulch, prepare your garden beds by removing weeds, cleaning up debris, and potentially applying a pre-emergent herbicide to prevent weed growth.
Do I need to remove old mulch before applying new mulch?
It’s not necessary to remove old mulch before adding a new layer, as it will decompose eventually.