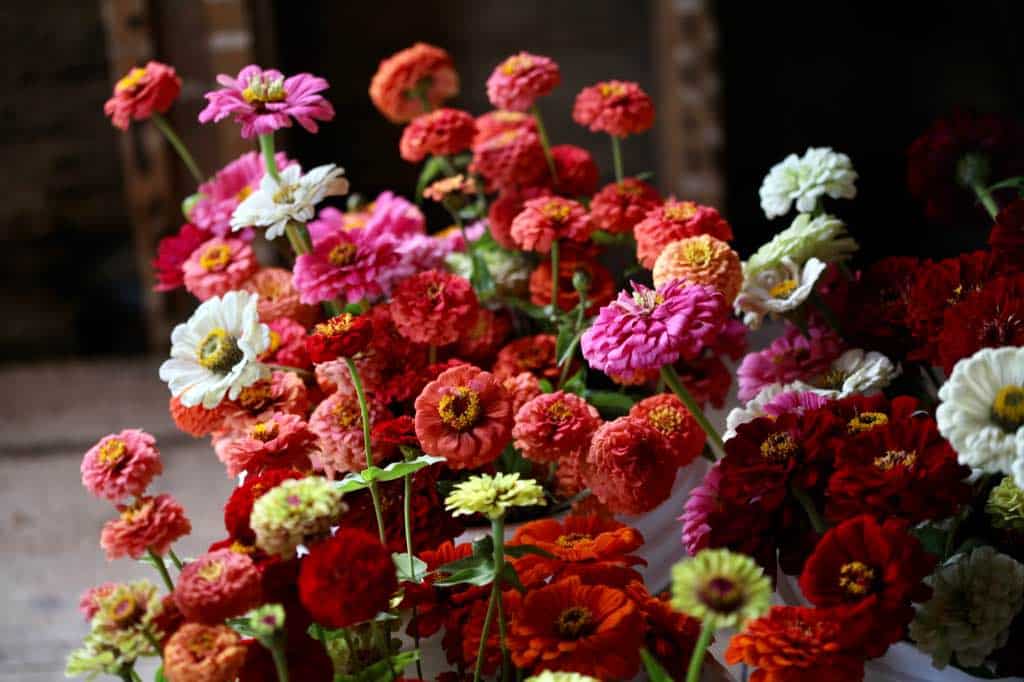
A spectacular cut flower, the zinnia has a special place in our cut flower garden. Not only is it easy to grow, it comes in a wide array of colors and varieties, making it a versatile flower for arrangements and bouquets. Let’s look at some tips for growing great zinnias for cut flowers.
Zinnias are one of the most rewarding and versatile flowers for cutting gardens With their wide range of colors, easy care, and continuous bloom over summer and fall, it’s no wonder zinnias are a favorite for bouquets and arrangements Follow this guide to grow a bountiful zinnia harvest for vibrant, long-lasting floral displays.
Choosing the Best Zinnia Varieties for Cut Flowers
While all zinnias make great cuts, certain varieties are bred specifically for cut flower production When selecting seeds, look for
-
Large, fully double blooms on long, strong stems. Single zinnias have charm but doubles have more petals and longer vase life.
-
Tall plants, at least 24-36 inches high. Long stems are easier to use in designs.
-
A diverse color range. Pick a spectrum for bold, vibrant bouquets.
Some top-performing cut zinnia series include:
-
Benary’s Giants – Huge 4-5 inch blooms on sturdy 3-4 foot plants in vivid hues. A standout!
-
Oklahoma – Prolific semi-double 2-3 inch flowers on 20-24 inch plants, great for small arrangements.
-
Zinderella – Ruffled, scabiosa-type doubles with long stems, can revert to singles in heat.
-
Queen – Unique bicolor doubles in smoky shades of lime, orange, peach, and burgundy.
-
State Fair – Classic giant dahlia-flowered zinnias in bold mixtures. Reliable large blooms.
Growing Zinnias from Seed
Starting indoors: For earlier blooms, start seeds indoors 4-6 weeks before your last expected frost date. Use seed starting mix and grow under lights or in a sunny window. Harden off before transplanting outside.
Direct sowing: After danger of frost passes, sow seeds 1/4 inch deep and 6 inches apart in prepared soil. Thin crowded seedlings.
Ideal conditions: Zinnias thrive in full sun and warm weather 70-85°F. Keep soil moist, especially during germination and flower formation.
Care and Maintenance
-
Watering – Give zinnias a thorough soaking 1-2 times per week. Avoid overhead watering to reduce disease. Consistent moisture during bloom formation results in the best flowers.
-
Fertilizing – Work compost into beds before planting, then side-dress growing plants with a balanced organic fertilizer every 4-6 weeks. Compost tea is also beneficial.
-
Pinching – When plants reach 6-12 inches tall, pinch or cut back tops by 1/3 to encourage bushy growth and more flowering stems.
-
Staking – Add stakes or trellising to support tall varieties prone to flopping, especially after rains.
-
Pest control – Watch for aphids, Japanese beetles, and other pests. Remove by hand or use organic sprays as needed.
-
Deadheading – Remove spent blooms to redirect energy to new buds.
Harvesting Zinnias for Maximum Vase Life
-
Cut zinnias in the morning when blooms are fully open. The best stems will be thick, upright, and 12-24 inches long.
-
Use clean, sharp pruners or floral snips. Make cuts at an angle above a set of leaves.
-
Condition just-cut stems in cool, clean water out of direct sun before arranging.
-
Strip lower leaves that would sit in water. Change water daily and recut stems every 2-3 days.
Handling Tips for Longevity
-
Add commercial flower food and 2 drops bleach to prevent bacteria.
-
Avoid refrigerating – zinnias are cold-sensitive.
-
Display out of direct sun to prolong vase life.
-
Choose budding blooms that will open fully in the arrangement.
How to Save Zinnia Seeds
-
Allow some blooms to remain on plants and form seed heads.
-
When dried and brown, clip entire heads into paper bags. Further dry indoors 1-2 weeks.
-
Rub heads between hands over a bowl to separate seeds from chaff.
-
Store seeds in sealed containers in a cool, dry spot.
Troubleshooting Common Zinnia Problems
Leggy growth – Plants need more sun or were started too early indoors. Pinch regularly to encourage branching.
Powdery mildew – Improve air circulation and reduce water on leaves. Remove affected foliage promptly.
Tiny flowers – Pinch early and often for robust branching and blooms.
Flopping – Stake or trellis tall varieties. Allow adequate air movement.
Poor germination – Sow at proper 1/4 inch depth. Soil must stay warm, at least 70°F.
Pests – Attract beneficial insects. Hand pick off pests or use organic treatments.
Few blooms – Pinch flowers for indoor use. Deadhead to stimulate new buds. Fertilize as needed.
Maximizing Your Zinnia Cut Flower Patch
With the right varieties chosen for your climate, proper planting techniques, and attentive care through the season, a flourishing zinnia harvest for cutting is achievable. These endearing flowers are well worth the space in any cut flower garden. Follow this guide to growing zinnias for cut flowers and expect vibrant bouquets all season long.

How To Cut Zinnias
It can be a little confusing when you are first learning to cut your zinnia flowers.
Cutting deep into the plant produces long and healthy stems on future blooms. Follow an individual bloom down along the stem to the base of the plant.
Cut above a set of leaves. Trim off side branches to your zinnia stem, leaving only the flower and a few leaves at the top of the stem.
Zinnias are “cut and come again”, so you can keep on cutting on each plant throughout the season, for a steady supply of blooms.
Immature blooms have a tendency for weak necks, which can bend, break, or snap off.
It’s sometimes difficult to tell if the blooms are mature just by looking. The Benary’s Giants can be big and look ready for harvesting, but still not be mature enough.
I have made this mistake a few times.
Now I always do the wiggle test.
Hold the stem approximately 2” to 3”below the zinnia bloom.
Move the stem quickly from side to side.
If the bloom wiggles back and forth, this means that the bloom and stem are immature, and are at risk for bending and breaking if cut at this stage.
If the bloom does not wiggle, but stays straight and stiff between your fingers, it is time to cut!
Follow the spent bloom to the base of the stem, where the stem meets the next set of leaves. Cut at this location.
Decide Your Planting Location, and Method Of Planting
Zinnias do best in a sunny location. Plant in full sun.
This is dependent on your method of planting:
- Zinnias can be direct seeded, straight into the garden, once the soil has warmed and the chance of all frost has passed.
- Zinnias can also be started indoors in trays under grow lights, 4-6 weeks before last frost, and then transplanted out into the garden once the danger of all frost has passed.
We have chosen to transplant seedlings rather than direct sow, due to our weed pressure, as well as our later last frost dates here in zone 5b.
Days to maturity are approximately 75 – 90 days.
Since we are in zone 5b and our spring is often affected by late frosts, we chose to start indoors under lights.
How to Grow Zinnias from Seed to Bouquet, Cut Flower Garden
FAQ
How to cut zinnias so they keep blooming?
zinnias are considered cut and come again flowers. which means they need regular deadheading to produce new blooms. to deadhead locate a spent flower and follow the stem down to the next new growth. snip right above the new growth and watch as new stems appear and more blooms are produced.
What is the secret to growing zinnias?
Staking: These flowers have sturdy stems, so do not need staking. Watering: Zinnias need moist soil to grow their best. This is especially true of young plants. Water deeply a few times a week so the soil stays moist 6 to 8 inches deep.
Which zinnias are best for cut flowers?
- Benary’s Giants. Bred in Holland specifically for the cut-flower trade, Benary’s Giants have long, extra-sturdy stems and extremely long-lasting blooms (7 to 10 days in a vase). …
- Oklahoma Zinnias. …
- Queeny Series.
Do zinnias come back after cutting?
-
Gardenaryhttps://www.gardenary.comHow Many Blooms Can You Get From One Zinnia Plant? – GardenaryMay 13, 2022 — Pinching your flowers back encourages the plant to branch out and produce more blooms. Zinnias are cut-and-come-again plants, so the more you cut fr…

How do you grow zinnias in a cut flower garden?
Follow these easy steps to grow zinnias in a cut flower garden. Plant zinnia seeds or starts after the threat of frost has passed. Your zinnias may not survive if planted out when the weather is still too cold. Leave sufficient space between plants to reduce chances of powdery mildew later in the season. How do you prune a zinnia plant?
Are Zinnias good for cutting?
Zinnias are truly a wonderful flower for cutting because they are one of those cut-and-come-again flowers. So long as you keep cutting flowers from the plant, it will continue to produce flowers for you all season long. How do you grow zinnias in a cut flower garden? Follow these easy steps to grow zinnias in a cut flower garden.
Should Zinnias be cut off before cutting?
Since zinnias thrive when their blooms are trimmed off, they are an ideal addition to your cutting garden. “Rather than allowing flowers to be spent on the plants before deadheading, cut the mature flowers for use in bouquets to encourage blossoming throughout the season,” Mbofung-Curtis says.
How to grow Zinnias?
Here are some steps to grow zinnias: Choose a sunny location: Zinnias need at least 6 hours of direct sunlight daily. Prepare the soil: Zinnias grow best in well-draining soil. Amend the soil with compost or organic matter if necessary.
How do you pick Zinnia flowers?
When you pick zinnias, you should look for big, pretty flowers that are almost open. Take a look at the picture above. The flower has a nice cluster of blooms in the middle. This means it will continue to open and last a long time once cut. You can certainly cut and use flowers that are even more open, they just won’t last as long.
Can Zinnias be propagated by cuttings?
Zinnias can also be propagated by cuttings, making it an efficient way to expand a stunning variety mid-season. Here’s how: Select a Cutting: Choose a healthy, 4–6 inch stem from the parent plant. Prepare the Cutting: Remove the lower leaves, leaving only a few at the top. Place the cutting in water and wait for roots to develop.