How to install rubber pavers is a question that’s top of mind for many eco-conscious facility managers exploring sustainable and durable solutions for playgrounds and sports areas.
Rubber pavers, made from recycled materials, are both eco-friendly and durable. They’re designed to withstand all weather conditions, provide excellent slip resistance, and require minimal maintenance. Perfect for enhancing outdoor spaces, these pavers offer a sustainable and practical flooring solution.
I’m Landon Olson, and I’ve dedicated my career to innovative recycling solutions and environmental sustainability. With experience in how to install rubber pavers, I know how these solutions not only reduce maintenance costs but also support eco-friendly objectives.
Laying rubber pavers is one of the easiest ways to create a beautiful and functional patio or walkway. Unlike poured concrete or natural stone, rubber pavers require no special skills or tools to install. With a few simple steps, even novice DIYers can transform an ordinary backyard into a stylish outdoor living space. In this comprehensive guide, we’ll walk through everything you need to know about how to lay rubber pavers.
What are Rubber Pavers?
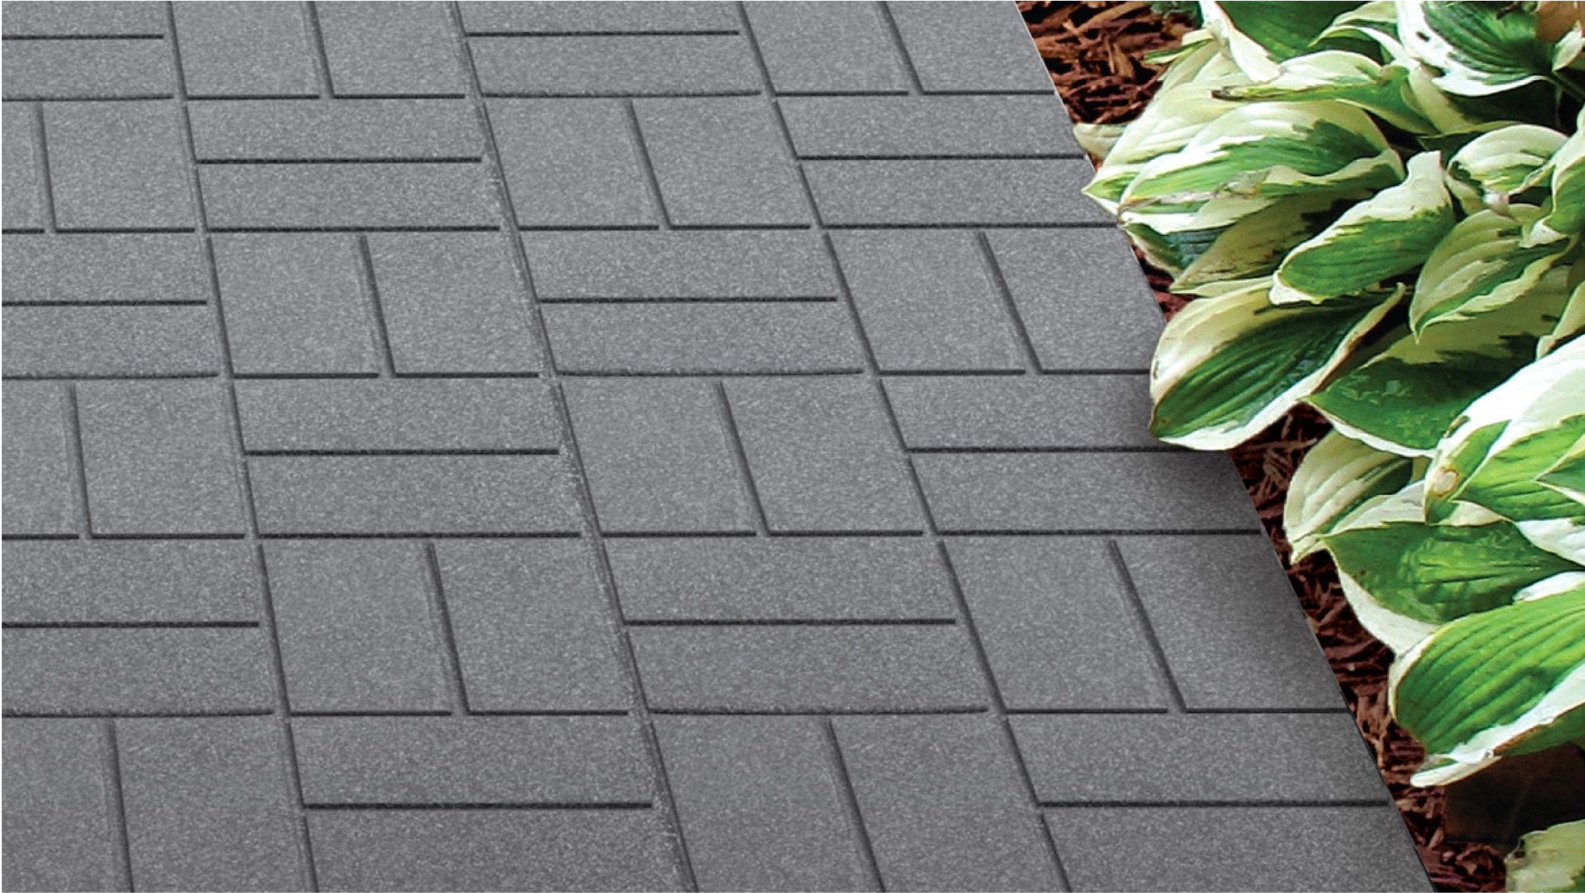
Rubber pavers are interlocking tiles made from recycled rubber, typically recycled vehicle tires. The recycled rubber is ground up and mixed with binding agents to create durable, flexible patio tiles available in a range of earth tone colors. Rubber pavers are designed to connect together like puzzle pieces, eliminating the need for mortar or adhesive.
Compared to materials like concrete or natural stone. rubber pavers offer several advantages
-
Durability The rubber material is flexible yet strong enough to withstand heavy foot traffic without cracking Rubber pavers hold up well to weather extremes and won’t degrade in sunlight
-
Traction: Rubber pavers provide excellent slip resistance, even when wet. The tactile surface is comfortable and safe for walking barefoot.
-
Low Maintenance Unlike stone or concrete, rubber pavers don’t require yearly sealing or re-sanding of joints Simply spray them down with a hose to remove dirt and debris
-
Easy Installation: The interlocking pavers connect together without mortar or adhesive. Complex cuts aren’t necessary as the material is flexible enough to contour around curves or corners.
-
Cost Savings: Rubber pavers are roughly half the cost of poured concrete. Labor costs are also less since installation is straightforward.
-
Eco-Friendly: Rubber pavers repurpose vehicle tires and other recycled rubber that would otherwise end up in landfills. They qualify for LEED building credits.
For homeowners looking for a beautiful yet practical patio material that’s easy to install, rubber pavers are tough to beat. Now let’s go over the supplies, tools, and steps for how to install them.
What You’ll Need
Laying a paver patio is considered an intermediate DIY project. While no advanced skills are required, there are some specialty tools and materials to have on hand:
Tools
- Safety gloves & eye protection
- Measuring tape
- Cordless drill
- Spade shovel
- Flat shovel
- Rake
- 4-foot level
- Broom
- Jigsaw with metal cutting blade
- Mallet or rubber hammer
- Tamper
Materials
- Landscape fabric
- Edging (plastic, steel, stone, etc)
- Gravel or crushed stone
- Washed concrete sand
- Rubber pavers
- Polymeric jointing sand
Optional materials that help ensure proper drainage and prevent weed growth:
- Weed barrier landscape fabric
- Crushed stone drainage layer
- Perforated drain pipe
How to Lay Rubber Pavers – Step-by-Step
Follow these simple steps for flawless rubber paver installation:
Step 1: Define the Area
First, stake out the exact size and shape of your patio using string, spray paint or chalk. Account for a 1-2 inch overhang if using edge restraints like plastic edging or metal tracks.
Consider drawing a layout of your finished patio to visualize spacing and test arrangements. For geometric patterns, use the 3-4-5 rule to ensure proper 90 degree angles.
Step 2: Excavate and Prepare the Base
Excavate 4-6 inches deep to allow for a 2-4 inch crushed stone sub-base topped with 1-2 inches of bedding sand. Clear any debris, plants or sod from the area.
For drainage, dig a trench around the perimeter and install perforated piping leading to a drainage outlet. Backfill the trenches with drainage gravel.
Cover the entire area with quality weed barrier landscape fabric, overlapping seams 6-12 inches. This prevents weeds from sprouting up between pavers.
Step 3: Install Edging
Choose plastic, metal, stone, brick, concrete or wood edging to contain the perimeter of your patio. Install edging tightly against string lines to maintain straight edges. Secure edging with spikes.
Edging keeps the pavers contained neatly and prevents them from drifting or spreading.
Step 4: Add the Base Layer
Spread 2-4 inches of crushed stone or gravel across the area. Use a rake to level. Compact with a hand tamper or plate compactor.
The crushed stone sub-base provides drainage and a solid foundation for pavers. Compacting creates a flat, even surface.
Step 5: Install the Bedding Sand
Spread 1-2 inches of concrete sand across the compacted sub-base. Use a rake and 4-foot level to create a flat, consistent layer.
The sand bedding provides a level surface for setting pavers. It also allows for fine adjustments to level out each paver during installation.
Step 6: Set the Pavers
Start laying full pavers tightly together on one edge. Continue row by row towards the opposite edge. Use a mallet to tap and adjust their level as needed.
Cut border and fill pieces as needed with a jigsaw using a metal cutting blade. You can also score rubber pavers with a utility knife and snap pieces off.
Work across the area methodically to avoid scattered empty spaces. Fill any gaps between pavers with jointing sand once all pavers are laid.
Step 7: Compact and Set the Pavers
Use a plate compactor to tamp down the pavers into the sand bedding. This locks them firmly in place at a uniform height.
Sweep dry jointing sand across the surface to fill gaps. Compact again to settle the sand into joints. Spray water and repeat twice more to fill any remaining gaps. Allow 24 hours for the sand to cure before use.
Step 8: Edge Restraints (Optional)
For added stability and a polished finish, glue edge restraints around the perimeter with construction adhesive. This keeps pavers neatly contained. Use a mallet to tap pavers flush against edge restraints.
Once glue fully cures, backfill behind edge restraints with soil or gravel, covering the bottom lip. This neatly defines the paver area.
That covers the essential steps for how to install rubber pavers. Always follow manufacturer’s instructions for the products you choose. Now let’s go over some frequently asked questions:
FAQs About Installing Rubber Pavers
How long does it take to install a paver patio?
For experienced DIYers, a basic 100 square foot paver patio can be completed over a long weekend. After excavating and preparing the base, the paver installation itself takes 2-3 days working at an easy pace.
Can you install rubber pavers over existing concrete or an old patio?
Yes, rubber pavers can be installed over any existing hard surface. Sweep away debris, clean the surface, and apply a construction adhesive formulated for rubber bonding. Use a mallet to tap pavers into the adhesive for a secure bond.
Is stone or gravel base required under rubber pavers?
A crushed stone or gravel sub-base is highly recommended, but not absolutely necessary. Rubber pavers can be installed directly over compacted soil or sand. However, this may lead to premature settling or weed growth between pavers over time.
How are rubber pavers attached together?
Rubber pavers interlock together through a peg-and-hole or puzzle piece type design. No glue, mortar or adhesive is required between the pavers themselves. The pavers essentially “float” within the sand bedding and are contained neatly by perimeter edging.
Should gaps be left between rubber pavers?
Yes, it’s recommended to leave a small 1/8-1/4 inch gap between each paver. This space is filled with polymeric jointing sand. The sand joints allow for subtle shifting of pavers over time while keeping out weeds and debris.
Can you use rubber pavers for a driveway?
Rubber pavers are durable enough for light vehicle traffic on driveways and RV pads. However, the material is still flexible and may rut under heavy vehicles. For driveway use, choose thicker 1-1/2 to 2-inch thick pavers and install over a 6-8 inch compacted gravel base.
How do you cut rubber pavers?
The flexible pavers can be cut with heavy duty scissors if only making small nips or notches. For straight cuts, score deeply with a utility knife then snap. For detailed cuts, use a jigsaw with a blade designed for cutting metal. Go slow and steady to avoid overheating the rubber.
Do rubber pavers need sealing?
Rubber pavers are inherently waterproof and dense enough to resist staining, so sealers are not necessary. In fact, most manufacturers advise against using sealers or coatings as they can damage the paver surface. Simply cleaning debris with a hose or pressure washer is all that’s needed.
How long do rubber pavers last?
When properly installed, rubber pavers typically last 15-25 years or longer. Their durability comes from the dense, resilient recycled rubber material. Freeze-thaw cycles have minimal effect compared to concrete. Just avoid using sealants or coatings that can degrade the pavers prematurely.
Transform Your Backyard with a Stylish Paver Patio
Thanks to their durability, flexibility, and ease of installation, rubber pavers make an ideal choice for DIY patios, walkways and outdoor spaces. Follow the simple techniques for base preparation, grading and laying the pavers, and you’ll have a beautiful new outdoor living area you can enjoy for decades to come.
On Grass or Dirt
Installing rubber pavers on grass or dirt is a straightforward process, but it requires careful preparation to ensure stability and longevity.
- Debris Removal: Start by clearing the area of any grass, stones, or debris. A clean surface ensures better placement and extends the life of your pavers.
- Soil Leveling: Use a rake and a spirit level to ensure the ground is flat. Uneven surfaces can lead to unstable pavers, so take your time with this step.
- Compacting: Use a hand tamper or a plate compactor to compact the soil. This creates a solid base for your pavers, preventing them from sinking or shifting over time.
- Placing the Pavers: Begin at one corner and work your way across the area, ensuring each paver is snug against the others. This interlocking method provides a stable and seamless surface.
- Edge Securing: Use landscape edging or wood framing to contain the pavers. Secure the edging with landscape spikes to prevent movement and keep your layout tidy.
On Concrete or Wood Decks
Rubber pavers can also be installed on existing concrete or wood decks, changing these surfaces into comfortable and safe outdoor areas.
- Surface Cleaning: Ensure the concrete or wood deck is free of dirt, grease, and loose material. A clean surface allows the adhesive to bond effectively.
- Adhesive Use: For a permanent installation, apply a polyurethane construction adhesive to the back of each paver. Make sure the adhesive is suitable for outdoor use to withstand weather conditions.
- Dry Laying the Pavers: Before applying adhesive, lay out the pavers to plan the layout and identify any necessary cuts. This step helps avoid mistakes and ensures a neat finish.
- Pressing and Placing: Press each paver down firmly, ensuring they are closely fitted. This creates a seamless surface that improves the aesthetic and safety of your space.
- Edge Securing: As with grass or dirt installations, use landscape edging or wood framing to keep the pavers in place. Secure the edging with pins or landscape spikes for added stability.
By following these steps, you can successfully install rubber pavers on a variety of surfaces, creating durable and attractive outdoor spaces. Next, we’ll explore the Benefits and Drawbacks of Rubber Pavers, highlighting their durability, slip-resistance, and eco-friendly features.