Hey gamers! Today I’m gonna break down everything you need to know about the tricky Shells level in A Little to the Left. I’ve spent countless hours playing this level and figuring out all the solutions, so let me share my insights with you!
Quick Overview
The Shells level is the 7th puzzle in Chapter 4: Inner Nature (59th level overall). While it might look simple at first glance, getting that perfect symmetrical arrangement can be a bit challenging for some players.
Level Details
- Chapter: Inner Nature (Chapter 4)
- Level Number: #7 in the chapter, #59 overall
- Solution Type: Single solution level
- Location: Between “Gems” and “Plant Trimming 2” levels
The Main Goal
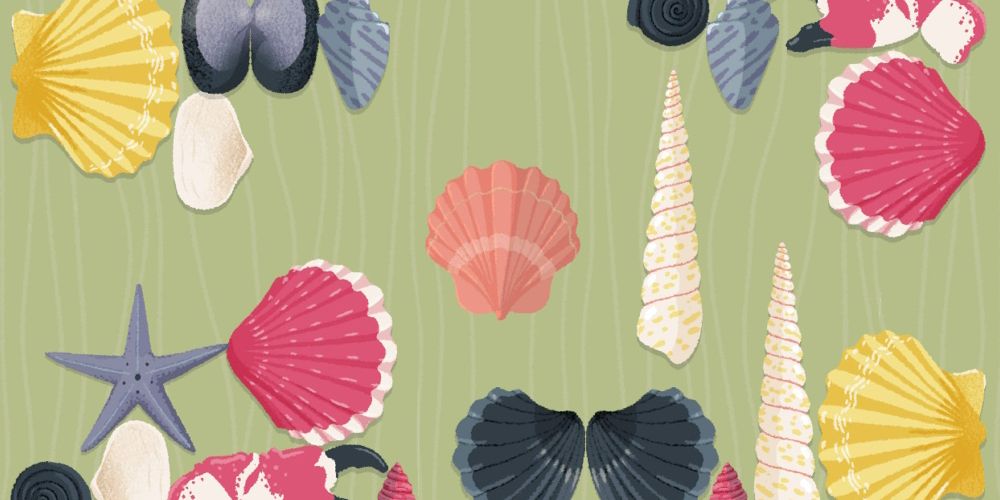
Your task is pretty straightforward – you need to arrange various shells in a symmetrical pattern. The cool thing about this level is that there’s no single “right” way to do it. As long as your arrangement is symmetrical, you’re good to go!
Tips for Success
Here’s what I’ve learned while playing this level:
- Start with the centerpiece – I usually place the light pink shell, star, and oval black shell in the middle
- Work outwards from the center
- Make sure both sides mirror each other perfectly
- Don’t overthink it – any symmetrical pattern works!
Step-by-Step Solution Guide
- Clear your workspace and take a look at all your shells
- Choose which shells will be your center pieces
- Place the light pink shell, star, and oval black shell in the middle
- Start adding matching shells on both sides
- Keep checking that everything stays symmetrical as you build
- Adjust and fine-tune until everything looks balanced
Common Mistakes to Avoid
- Not maintaining perfect symmetry
- Forgetting to check if shells match on both sides
- Overthinking the pattern – remember, any symmetrical arrangement works!
My Personal Experience
When I first tried this level, I kept trying to make super complex patterns. But honestly, keeping it simple works just as well! The key is just making sure whatever you do on one side, you mirror exactly on the other
Additional Tips
- Take your time examining each shell
- Don’t be afraid to experiment with different arrangements
- If you get stuck, start over with a fresh perspective
- Remember that symmetry is more important than complexity
Final Thoughts
The Shells level is actually one of my fave puzzles in A Little to the Left It’s got this perfect balance of creativity and structure – you can make your own unique pattern while still having clear rules to follow.
Remember, there’s no rush to complete this level. Take your time, experiment with different arrangements, and most importantly, have fun with it! The satisfaction of creating that perfect symmetrical pattern is totally worth the effort
#Gaming #ALittleToTheLeft #PuzzleGames #GameGuide
Why might you want to seal your shells?
Your shells might not have bright or vibrant colours, especially if they are saved from a meal like my clam shells. Sealing them can bring out the colours and make them more beautiful. It can also help to protect them and make them more durable.
You’ll want to clean your shells thoroughly before you use them for anything else. Pop them in a bowl of warm water with a little washing up liquid (dish soap) or a little bicarbonate of soda (baking soda) and give them a bit of a scrub. A old toothbrush is good for this.
I’ve seen lots of people recommend a bleach and water solution for cleaning shells but I found the warm soapy water did a good job and the bicarb of soda version is helpful if your shells have a funny smell. As bleach is harmful to the environment it seems best to avoid using it whenever possible.
I tried 10 different methods to seal my clam shells, some definitely worked better to bring out the colours and make them more shiny than others. I literally pulled out everything I already had in my craft stash that I thought might work and gave each product a try. I also tried sealing a shell with baby oil but for some unknown reason the baby oil isn’t in this photo, not sure what happened there?
Let me go through each of them now and show you the results.
All the products were applied to a clean dry shell with a small paintbrush (with the exception of the baby oil, which I applied with a scrap of fabric and the sealant spray which obviously I sprayed) and then left to dry. I’ve photographed each alongside a plain original unfinished shell so you can see the difference. The sealed shell is on the left and the unfinished shell is on the right in all these photos.
I tried 2 types of Mod Podge, Matte and Sparkle.
Both types of Mod Podge went on easily and smoothly. As you might expect the Matte Mod Podge gives a virtually undetectable matte finish. The Sparkle Mod Podge gives a really sparkly glitter finish. This type of Mod Podge is one of my favourite ways to apply glitter because it is so mess free, you really don’t get any of that glitter shedding that so often happens. Neither made much of a difference to the colours in the shell.

The Decopatch decoupage glue I had seems very much like Mod Podge to be honest: the smell, look and feel seems the same, but the one I had is described as glossy so I thought it was worth a try. The sealed shell had what I can describe as a light sheen once it dried. The colours do seem brighter and more distinct.

This Rustoleum Crystal Clear Gloss spray is favourite craft sealant of mine, it is easy to apply and I’ve always found it gives a lovely hard wearing glossy finish to all sorts of surfaces.
After just one coat it gave the shell a lovely shiny finish and an increase in the depth of colour.

This Vernidas varnish is intended for air dry clay, I happened to have it so thought it was worth a go. It says glossy effect on the bottle and they are not lying! This was the glossiest, shiniest finish of all the methods to seal shells that I tried. It took a little longer to dry than the other methods but if you want shine this is a great product.

Clear nail varnish gave this clam shell a beautiful shiny finish and a lovely depth of colour. This is a great option if you don’t want to be going out and buying more craft supplies. I used a simple base and top coat from OPI but I imagine the results would be the same with any nail varnish.
Spectrum Noir Glossy Highlights
Glossy Highlights from Spectrum Noir is a papercraft product, described as a clear gloss medium intended to add dimension. You can add a blob onto small embellishments to add a 3D element, use it as a glue for adding beads, sequins etc or it can be used as a protective coating.
To be honest I was a little surprised that this shell didn’t come out more shiny and glossy. When I’ve used Glossy Highlights before on paper the results have seemed more noticeable than they are here. Compared with some of the other products this shell ended up with more of a sheen than a shine.
Baby Oil or another type of mineral oil is widely recommended online to give shine and durability to your shells. I applied a little with a scrap of cotton fabric but to be honest this one was a little disappointing. There was a slight sheen at first but as the oil dried the shell looked exactly as it had before. I thought it would make more of a difference to the shells colours and shine but it had very little effect. There is so side by side photo here unfortunately as I tested out this mineral oil on my last shell!
This is a slightly random product to try to seal a shell. I had some of this cold wax medium left over from sealing the art project I made with my late grandma’s paintings so I thought why not give it a go and see what happens. Nothing! That’s what happened! To be fair the main selling point of the cold wax medium when used to coat a painting is that it doesn’t change anything on the surface it covers, paint colours remain the same and nothing smudges so this is to be expected. The Cold Wax Medium gives a completely matte finish, unless that is what you would I really wouldn’t bother with this one. Save this product for the job it is intended for – sealing and protecting paintings – as it does that really well.

Another coating idea that might seem a little unexpected, it certainly didn’t give the the results I was expecting anyway! When I’ve used this Plasti-Kote copper enamel paint before I’ve found it quite thin and it’s needed several coats to give any significant coverage. With that in mind I thought it might give the clam shell a coppery sheen but still allow some of the shells original colour to show through. No. That is not what happened! I’ve ended up with a copper painted shell. It’s actually really quite lovely and this is an experiment after all so it’s all good but not the light sheen I was anticipating.
A Little to the Left ( Level 59 | Shells | Satisfying Puzzle Game ) | Tutorial & Gameplay
FAQ
What is a little to the left?
A Little to the Left emphasizes creativity, attention to detail, and problem-solving, offering a soothing and engaging experience. The game aims to provide a unique and captivating puzzle adventure, with detailed graphics, intriguing challenges, and a relaxing atmosphere.
How difficult is a little to the left?
Welcome to the full step-by-step guide to A Little to the Left. A Little to the Left is a highly engaging and cozy game with numerous puzzles and organizing tasks. While the levels are very enjoyable, some of them can be quite challenging. Here, you can find all possible solutions for each level.
Is a little to the left a good game?
With gentle and calming music, soft aesthetics, and the occasional cat, A Little To The Left is like a warm hug in a game. The game has chapters full of fun puzzles where you get to tidy and rearrange objects but if you get a bit stuck we have every solution for you right here in our A Little Bit To The Left complete guide.