Hey plant lovers! I’ve been growing pitcher plants for years, and let me tell ya, repotting these carnivorous beauties can be tricky. But don’t worry – I’m gonna break down everything you need to know about repotting pitcher plants the right way. Trust me, once you get the hang of it, it’s not as scary as it seems!
When Should You Repot Your Pitcher Plant?
The best time to repot your pitcher plant is early spring, just before new growth starts. Here’s how to know it’s time:
- Roots are peeking out of drainage holes
- Potting mix looks super compacted
- Plant has outgrown its current pot
- Soil is breaking down or decomposing
- It’s been 1-2 years since last repot
What You’ll Need
Before we dive in let’s gather our supplies
- New plastic pot with drainage holes (avoid terra cotta – it absorbs salts)
- Fresh potting mix (I’ll share the recipe below)
- Clean scissors or pruners
- Chopstick or small fork
- Distilled water
- Optional: screen for drainage holes
The Perfect Potting Mix Recipe
For the best results, mix these ingredients
1/2 cup sand1/2 cup washed charcoal1 cup sphagnum moss1 cup peat mossPro tip If you’re growing Nepenthes species. use equal parts sphagnum moss perlite. and orchid bark instead!
Step-by-Step Repotting Guide
1. Prep Work
First things first:
- Clean all your tools with alcohol or hot soapy water
- Remove dead leaves and spent pitchers
- Put a little potting mix in the new pot
- Have your workspace ready
2. Removing the Plant
This is where you gotta be super careful:
- Gently squeeze the sides of the current pot
- Tilt the pot sideways (yeah, you might lose some pitcher fluid, but it’s okay!)
- Carefully slide the plant out
- If it’s stuck, use a butter knife around the edges
- Support the plant from below – don’t pull on the leaves!
3. Root Work
Now for the delicate part:
- Gently remove old potting mix from roots
- Use a chopstick to carefully loosen roots
- Trim any dead or rotting roots with clean scissors
- If dividing the plant, now’s your chance!
4. Repotting
Time to give your plant its new home:
- Place plant in new pot at same depth as before
- Add fresh potting mix around roots
- Tap pot gently to settle soil
- Water thoroughly to remove air pockets
- Top up with more mix if needed
Aftercare Tips
Your pitcher plant needs some TLC after repotting:
- Keep potting mix moist but not waterlogged
- Place in dappled sunlight or behind sheer curtains
- Don’t let pot stand in water
- Add distilled water to empty pitchers (fill about 1/4 full)
- Feed one small insect monthly if needed
Common Mistakes to Avoid
Learn from my oopsies:
- Don’t use regular potting soil
- Skip the fertilizer – these guys don’t need it
- Don’t pack the soil too tight
- Never pull on the leaves or pitchers
- Don’t repot during winter dormancy
FAQ About Pitcher Plant Repotting
Q: How big should the new pot be?
A: Just slightly larger than the current one – these plants like to be a bit snug!
Q: Can I reuse old potting mix?
A: Nah, better use fresh mix. The old stuff might be broken down or harbor problems.
Q: Help! I broke a pitcher during repotting!
A: Don’t panic! Plants can recover from this. Just remove the damaged part cleanly.
Final Thoughts
Repotting pitcher plants ain’t exactly a walk in the park, but it’s totally doable with some patience and care. Just remember to be gentle with those roots and pitchers, use the right potting mix, and choose your timing well.
I always say to my gardening buddies – if you’re nervous about repotting your pitcher plant, start with these steps and take it slow. These fascinating carnivorous plants are pretty forgiving if you give them the basics they need.
Got any questions about repotting your pitcher plant? Drop ’em in the comments below – I’d love to help out!
Would you like me to explain or break down any part of this guide in more detail?

When should I repot Nepenthes?
You ideally want to repot your Nepenthes every 2-3 years. However, if you notice any of the following, it may also be time to repot!
- The root mass has outgrow the pot
- The media smells or is decomposing
- The roots are rotting (commonly known as “root rot”)
- The media is too tight
- The media is holding onto more or less water than is optimal
- You have a pest problem
Like most plants, the best time to repot Nepenthes is early spring when the plant is being exposed to more light and warmer temperatures.
How do I repot Nepenthes?
Repotting Nepenthes is trickier than a regular houseplant. Follow these tips to ensure your Nepenthes is safely repotted!
- Remove the plant from its current pot Hold the base of the plant in one hand and the pot in another. Gently wiggle the plant out of the pot.
- Remove old media from roots Lightly shake the old media off the roots. Use your fingers to lightly remove any media stuck to them.

- Check plant health Examine the roots and rhizome of the plant for root rot. If you see root rot, trim it off with a clean knife or pruners.

- Prune or divide the plant (if needed) This is a great time to prune or divide your plant, but it is not necessary. Read our blog post about Cuttings and Divisions for more info!
- Prepare the new pot Add media to the pot and leave room for the plant’s roots.
- Pot the plant Place the plant inside the pot, making sure the roots are snug but still have some room to grow. Then, fill in the rest of the pot with media. Pack the media tightly enough that the plant won’t fall over and can hold its own weight.

Here are some helpful tips to keep in mind when repotting Nepenthes:
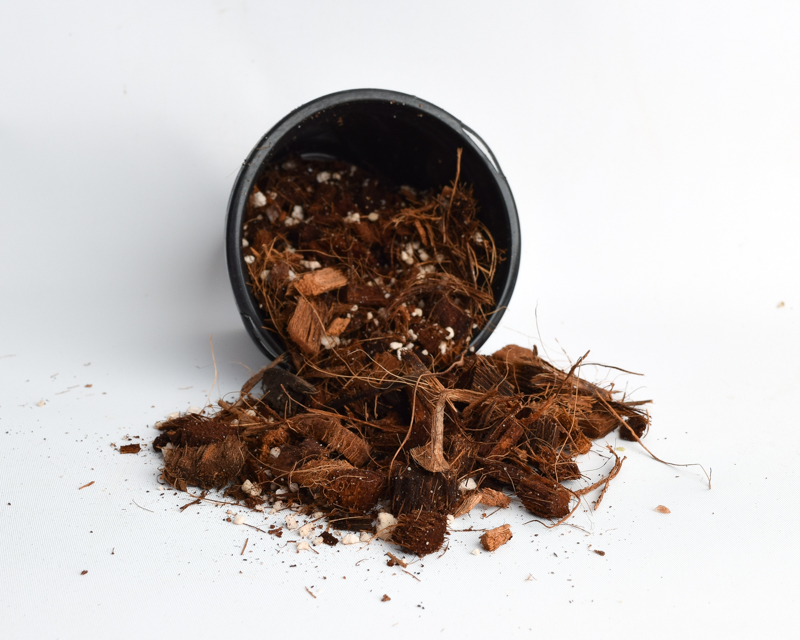
- Use a media that balances water retention and drainage. Good examples of this are coconut coir or sphagnum moss mixes.
- Nepenthes have very delicate roots, so be gentle when removing them from their old pot.
- Don’t use a potting mix or media that contains fertilizer. Nepenthes need to be fertilized in their pitchers. To learn more about Nepenthes fertilization read How to Fertilize Nepenthes
- Use a pot with drainage holes