Our in-house team of flower experts can teach you all about the flowers we use and help you get the best out of your arrangements
Hey there, garden lovers! If you’re anything like me, you’ve probably stood in your yard, gawking at those stunning sedum flowers—especially the Autumn Joy kind—turning all crimson and gorgeous in the fall. And then, bam, it hits ya: I gotta keep this beauty alive through winter! So, can you dry sedum flowers? Heck yes, you can! But, lemme tell ya, it ain’t always a walk in the park. I’ve had my share of flops—think faded blooms and creepy-crawly surprises—but I’ve also cracked the code on getting it right. Stick with me, and I’ll spill all the deets on how to dry these bad boys for a killer winter display.
In this post, we’re diving deep into the world of drying sedum flowers. I’m talking why you’d wanna do it, the best ways to pull it off, and the pitfalls to dodge. Whether you’re a green thumb or just messin’ around with some garden vibes, I’ve got your back with simple tips and tricks. Let’s get this party started!
Why Dry Sedum Flowers? It’s All About That Autumn Magic
First off let’s chat about why we’re even bothering with this. Sedum flowers, often called stonecrop, are straight-up magical in autumn. All summer they’re just chillin’ in green, and then late September rolls around, and they explode into shades of crimson, pink, or even rusty bronze. It’s like nature’s paintbrush went wild! But, as the season fades, so does that color—unless you dry ‘em right.
Drying sedum flowers lets you hang onto that beauty for months. Imagine a rustic bouquet on your mantle or a pop of color in a wreath while snow’s piling up outside. Plus, it’s a fun lil’ project to flex your creative muscles. Me and my buds have turned dried sedums into everything from table centerpieces to funky wall hangings. It’s cheap, it’s natural, and it’s a dope way to bring the outdoors in.
Can You Dry Sedum Flowers? Yup, But Timing’s Everything
Alright let’s cut to the chase yes, you can dry sedum flowers, and it’s not rocket science. The catch? You gotta pick the right moment to snip ‘em. If you cut too early they’re still too sappy and might just rot. Too late, and the color’s already half gone. I’ve learned the hard way—trust me, a moldy mess ain’t cute.
Here’s the sweet spot:
- Snip in early autumn: Aim for late September or early October when the blooms are at their peak color but still firm. If they’re starting to droop, you’ve waited too long.
- Check the weather: Dry, sunny days are your best bet. Wet flowers equal moldy disasters.
- Look for tight heads: The flower clusters should feel sturdy, not mushy. That’s when they’re ready to hold up during drying.
I usually stroll out with my clippers right after a crisp morning, when the dew’s gone but the heat hasn’t zapped ‘em yet. That’s my little trick for max freshness.
How to Dry Sedum Flowers: Two Main Vibes to Try
Now that we’ve got the “can you” outta the way let’s get into the “how to.” There’s a couple ways to dry sedum flowers, and I’ve messed around with both. Neither’s perfect every time but they’ll get you there with some patience. I’ll break ‘em down real simple-like, so you can pick what works for your setup.
Method 1: Hang ‘Em High and Let ‘Em Dry
This is the old-school way, and it’s probs the first thing I tried. You’re basically turning your sedums into little upside-down bouquets and letting nature do its thang. Here’s how I roll with it:
- Gather your blooms: Snip a bunch of sedum stems, about 6-8 inches long. Keep the flower heads intact, but strip off the leaves—those suckers turn yellow and sap the color from the blooms.
- Bundle ‘em up: Tie 5-10 stems together with some twine or a rubber band. Don’t make it too tight; air’s gotta flow through.
- Hang ‘em upside down: Find a dark, dry spot—like a closet or a corner of your garage. Hook the bundles on a hanger or a nail. Darkness helps keep the color from fading too fast.
- Wait it out: This takes about 2-3 weeks. You’ll know they’re done when the stems feel brittle and the flowers ain’t droppin’ petals.
Pro Tip: I’ve had bugs sneak into my hanging bundles before—gross! So, give ‘em a gentle shake before bringing inside to knock off any hitchhikers. Also, if your place is humid, this method might not be the best. You don’t wanna end up with slime city.
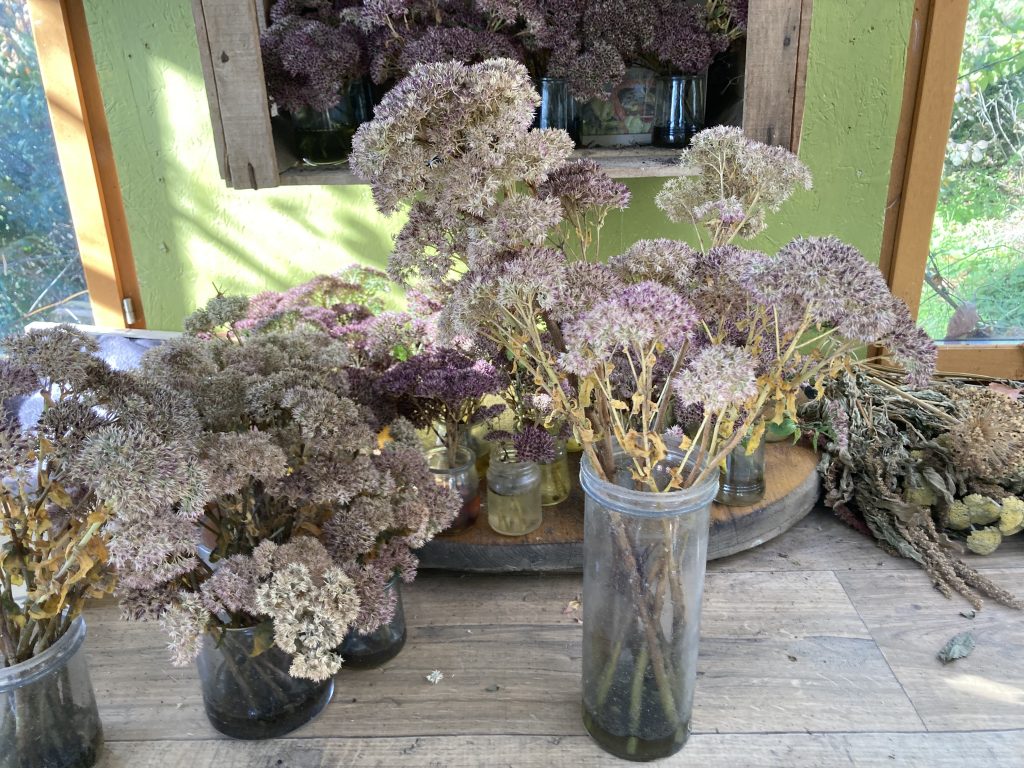
Method 2: Vase Drying for a Low-Key Win
If hanging stuff ain’t your vibe, you can dry sedum flowers right in a vase. This one’s easier for me ‘cause I don’t gotta climb ladders or rig up fancy setups. Plus, it looks kinda artsy while it’s drying. Here’s the deal:
- Prep the stems: Again, cut your sedum flowers at peak color, and yank off all the leaves. Leaves are the enemy—they just turn gross and steal the bloom’s glory.
- Pop ‘em in a vase: Grab any old vase or jar, and stick the stems in. Here’s the kicker—add just a tiny bit of water, like half an inch at the bottom. This helps ‘em dry slow and steady without rotting.
- Sear for success: I picked up this weird lil’ hack—dip the stem ends in boiling water for about 30 seconds before poppin’ ‘em in the vase. It seals ‘em up and seems to help with color. Dunno why, but it works!
- Set and forget: Put the vase in a spot with good airflow but outta direct sun. Let ‘em sit for 2-3 weeks until they’re crisp.
Heads Up: Don’t overdo the water. I made that mistake once, and my sedums turned into a swampy mess. Half an inch, max, then let it evaporate. If you see any funky smells, toss that batch and start over.
| Method | Pros | Cons | Best For |
|---|---|---|---|
| Hanging Upside Down | Keeps shape well, traditional | Needs dark space, risk of pests | Folks with dry, cool spots |
| Vase Drying | Easy setup, looks cool drying | Risk of rot if too much water | Small batches, lazy gardeners |
Challenges of Drying Sedum Flowers: It Ain’t All Roses
Look, I’m gonna be real with ya—drying sedum flowers can be a pain in the butt sometimes. I’ve had plenty of batches go south, and it’s usually ‘cause I didn’t see these hiccups coming. Let’s talk about the big baddies and how to dodge ‘em.
- Color Fading: This is the biggest bummer. Sedums look fire in the garden, but once dried, they can turn blah and beige. Stripping the leaves helps a ton, ‘cause they suck the vibrance out. Also, keep ‘em outta sunlight while drying—UV rays are color killers.
- Pests and Slime: Ugh, don’t get me started. I’ve found aphids and some weird slimy junk on my dried sedums before. Check your flowers before cutting, and don’t store ‘em in damp spots. A quick rinse and pat-dry can save ya some grief.
- Brittleness: Dried sedums can get super fragile. One wrong move, and poof, petals everywhere. Handle ‘em gentle-like, and store in a spot where they won’t get bumped.
- Mold Issues: If your drying spot’s too humid, you’re asking for trouble. I’ve lost whole bundles to fuzzy green nastiness. Use a fan or dehumidifier if your house feels like a sauna.
I remember one fall, I was all proud of my sedum display, only to find it crawling with tiny bugs a week later. Lesson learned—always inspect and keep things dry as a bone!
Tips to Make Your Dried Sedums Pop
Alright, now that we’ve covered the basics and the headaches, let’s get into some extra goodies to make your dried sedum flowers look next-level. These are the lil’ things I’ve figured out over time that really up the game.
- Cut at Different Stages: Don’t just snip all your sedums at once. Grab some when they’re just turning color, and others when they’re fully crimson. Mixin’ different shades in your display adds depth and looks wicked cool.
- Use a Sealant: After they’re dried, a quick spritz of clear hairspray or a floral sealant can lock in what’s left of the color and keep petals from falling off. I’ve used cheap hairspray in a pinch, and it works alright.
- Pair with Other Stuff: Dried sedums look awesome on their own, but toss in some dried grasses, pinecones, or even twigs for a rustic vibe. I’ve got a wreath on my door right now with sedums and some random sticks—folks always compliment it!
- Store Smart: Once dried, keep ‘em in a cardboard box with tissue paper, away from moisture. I’ve got a shelf in my garage that’s perfect—dry and outta the way. Don’t stack heavy stuff on top, or you’ll crush ‘em.
- Experiment with Glycerin: I’ve heard whispers of using glycerin to preserve flowers, though I ain’t tried it with sedums yet. Mix it with water, soak the stems, and it’s supposed to keep ‘em softer and colorful. Might be worth a shot if you’re feeling fancy.
Ideas for Using Dried Sedum Flowers
So, you’ve dried your sedums—now what? Lemme throw out some ideas that me and my crew have played with. These flowers are versatile as heck, and you can get real creative.
- Winter Bouquets: Stick a bunch in a vase with some evergreen sprigs. It screams cozy cabin vibes and lasts all season.
- Wreaths and Garlands: Hot-glue dried sedum heads onto a wreath frame or string ‘em into a garland. I’ve got one over my fireplace, and it’s a convo starter for sure.
- Table Decor: Scatter small clusters on a table runner for a natural centerpiece. I did this for a fall dinner party, and everyone thought I was some kinda pro.
- Craft Projects: Use ‘em in scrapbooking or to decorate gift boxes. My niece glued some to a picture frame, and it turned out adorable.
- Holiday Ornaments: Tie a single dried bloom with ribbon and hang it on your Christmas tree. It’s a quirky lil’ touch that’s different from the usual baubles.
Common Questions About Drying Sedum Flowers
I’ve gotten a bunch of questions from pals over the years about this whole drying gig, so let’s tackle a few. If you’re wondering somethin’ else, hit me up in the comments!
Do all sedum varieties dry well?
Not really. The chunky ones like Autumn Joy hold up best ‘cause their flower heads are dense. Thinner types might just crumble. Stick with the beefy kinds if you’re new to this.
How long do dried sedums last?
If you store ‘em right—dry and outta direct light—they can look decent for a year or more. I’ve got some from last fall that still ain’t too shabby.
Can I dry ‘em with other flowers?
Sure, but watch the timing. Sedums take a couple weeks, while thinner blooms might dry faster. I’ve mixed ‘em with hydrangeas before, and it worked okay—just check ‘em separately.
What if the color still fades?
Sometimes, it’s just gonna happen. You can cheat a bit with a tiny dab of craft paint on the edges if you’re desperate for color. I’ve done it for a display, and no one noticed!
My Personal Journey with Drying Sedums
Lemme wrap this up with a lil’ story. First time I tried drying sedum flowers, I was a hot mess. I snipped a ton, hung ‘em in my damp basement—big mistake—and ended up with a moldy, buggy disaster. I almost gave up right then! But I’m stubborn, so I kept at it. Next year, I stripped the leaves, used a vase with just a splash of water, and stuck it in a breezy spot. Boom, success! Those dried blooms sat on my shelf all winter, reminding me of sunny fall days.
What I’ve learned is this: drying sedum flowers is as much about trial and error as it is about technique. You’re gonna mess up, and that’s fine. Keep tweakn’ your method, whether it’s where you dry ‘em or how much water you use. Every batch teaches ya something new.
So, can you dry sedum flowers? Abso-frickin-lutely. It’s a sweet way to preserve nature’s art, and with a bit of patience, you’ll have displays that make your space feel alive even in the dead of winter. Grab your clippers, pick a method—hanging or vase—and give it a whirl. I’m rooting for ya! Drop a comment if you’ve got tips or flops to share. We’re all in this garden game together, right?“`
Pip Carter on the Art of Flowers
Artist Pip Carter talks to us about the influence of flowers, her creative process and her exhibition Somewhere in the Nowhere