If you’re anything like me, you spend at least a portion of the winter dreaming of the glory of the coming summer’s garden. I plan and plot, but most of the actual work won’t start until the spring.
But there are a few gardening tasks that I can begin during the winter months to get a jump on the growing season.
It gives me that gardening fix I crave, and it helps me to prepare my upcoming magical summer garden. Starting gladiolus corms early is one of those tasks that I look forward to.
We link to vendors to help you find relevant products. If you buy from one of our links, we may earn a commission.
As late winter rolls around, I start planting so I can enjoy the colorful gladiolus flowers earlier than if I planted them directly outdoors.
This guide will give you the knowledge you need to start your corms and move them to the garden when the timing is right.
Gladiolus, with their tall spikes of vibrant summer blooms, are a favorite flower for many gardeners. Typically gladiolus are planted outdoors in the spring and flower in mid to late summer. But did you know you can get a head start on the gladiolus growing season by starting the corms indoors?
Growing gladiolus indoors also known as forcing glads allows you to enjoy their gorgeous blooms 4-6 weeks earlier than normal outdoor planting time. Starting glads inside is a great way to get a jump on the season, especially if you live in an area with a short outdoor growing season.
In this complete guide, we will cover everything you need to know about successfully growing gladiolus indoors, including:
Why Start Gladiolus Indoors?
There are several advantages to getting a head start on gladiolus by planting them indoors first:
-
Enjoy flowers earlier – Glads started indoors can bloom up to 1-2 months sooner than outdoor planting
-
Lengthen bloom time – By staggering indoor plantings, you can have glads blooming over a longer period.
-
Guarantee blooms – Forcing glads indoors helps ensure blooms in short season climates prone to early frost.
-
Test new varieties – Grow new corms indoors first to evaluate them before planting outdoors.
-
Add indoor color – Use forced glads as temporary living decor in the home.
When to Start Gladiolus Indoors
Timing is important when forcing glads indoors. Follow these tips:
-
Start glads indoors 4-6 weeks before your average last spring frost date.
-
Allow sprouted bulbs to grow indoors for 4-5 weeks before moving outside.
-
Transplant sprouted glads outdoors when nighttime temps remain above 60°F.
Supplies Needed
A few basic supplies are needed for starting gladiolus indoors:
-
Gladiolus corms – Purchase new corms or use stored corms from the previous season. Select large, healthy corms.
-
Container – Shallow trays, pots, or buckets work well. Make sure container has drainage holes.
-
Growing medium – Use a well-draining potting mix made for starting seeds/bulbs indoors.
-
Water – Use room temperature water for indoor forcing.
-
Light – A sunny window or grow lights to provide bright, indirect light.
Step-by-Step Growing Guide
Follow these simple steps for successfully forcing gladiolus corms indoors:
1. Prepare Corms
-
Select plump, blemish-free corms that haven’t sprouted yet.
-
Optional: Soak corms in room temperature water overnight to pre-sprout.
2. Plant in Containers
-
Fill container with moist potting mix.
-
Plant corms 2-3 inches deep and 1-2 inches apart, pointed end up.
-
Water soil until moist but not saturated.
3. Provide Warmth & Light
-
Place containers in warm spot (65-75°F) with bright, indirect light.
-
A sunny window or grow lights work well.
4. Monitor Moisture & Growth
-
Check soil moisture daily, water as needed to keep damp but not wet.
-
Watch for sprouts emerging in 2-3 weeks.
5. Harden Off & Transplant Outdoors
-
Gradually introduce to outdoor conditions over 7-10 days.
-
Transplant sprouted glads outdoors when soil is above 60°F.
Growing Medium Options
You have a choice of starting gladiolus corms in soil or water:
-
Soil – Plant in pots/trays filled with moist potting mix. Provides stability & nutrients. Requires more space than water.
-
Water – Place corms close together in shallow water, just covering base. Simple & space-saving but water must be changed frequently to prevent rotting.
Troubleshooting Common Problems
Here are some potential issues and how to prevent them:
-
Leggy growth – Caused by insufficient light, move to a brighter spot or use grow lights.
-
Rotting corms – Usually caused by overwatering, allow soil to partially dry between waterings.
-
Floppy stems – Tall, weak stems need support, stake stems to keep them upright.
-
Few or no blooms – Likely due to inadequate chill period, be sure to store bulbs properly after digging.
-
Deformed blooms – Can be caused by extreme temperature changes, keep growing area stable.
Growing Gladiolus Year-Round
By starting glads at strategic intervals, you can have gladiolus blooms nearly year-round:
-
January – Force bulbs for mid-late spring blooms.
-
March – Start bulbs for early summer blooms.
-
May – Plant outdoors for mid-late summer blooms.
-
July – Start bulbs for late fall blooms indoors.
With a little planning, you can brighten up your home with colorful gladiolus blooms during the colder months when garden color is scarce. Forcing gladiolus indoors is simple and rewarding. Give it a try this year and enjoy gorgeous, early glads!

How to Start Gladiolus Indoors
To be clear, gladiolus have corms, not bulbs. But many gardeners refer to them as “bulbs,” so we’ll being using the terms interchangeably in this guide.
Spring can’t come early enough, as far as I’m concerned. So let’s not wait one minute more!
Four to six weeks before the last predicted frost date in your area, prepare the corms.
Whether you purchase new bulbs to plant or you’re restarting some that you lifted in the fall and kept in storage, you need to prepare them for planting.
Some retailers won’t carry gladiolus during the off season but others have them in stock, so if you’re buying new, it pays to shop around.
Eden Brothers, for example, carries a fantastic range, from the tricolored pink, pale yellow, and creamy white ‘Mon Amour’ to the blood-red ‘Black Star.’
Or maybe you want a mixture of colors. If so, visit Burpee for a Glamini mix in yellow, red, purple, and white.
Brush off any dirt from the overwintered bulbs with a soft, dry brush. Divide up any large clumps. Purchased bulbs should be clean and already divided up for you.
You can optionally set the corms in water overnight to encourage them to open up and start growing.
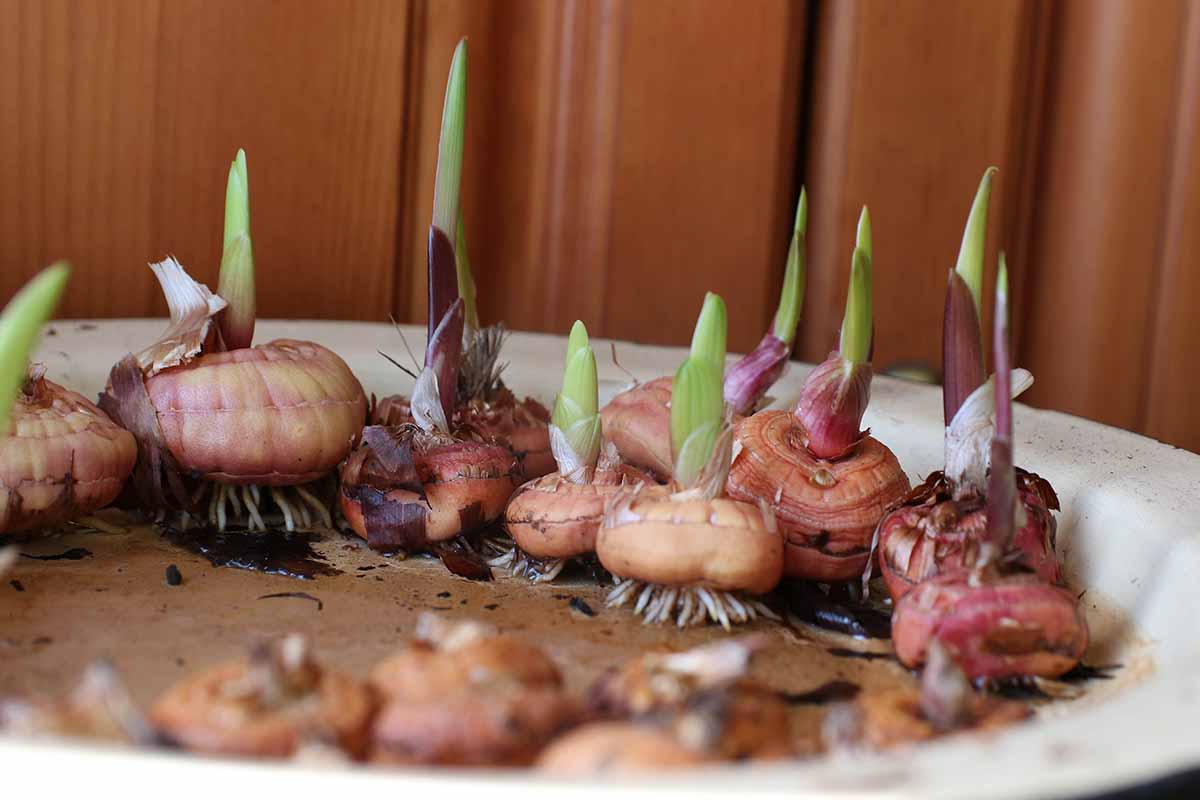
Either submerge them entirely or just set the base in the water. This just speeds up the sprouting process, but it’s not essential.
Fill a flat or a container that’s at least eight inches deep with fresh, water-retentive potting mix.
If you have lots of gladiolus corms, consider using a large storage bin – 18-gallon or larger. Just remember to put it in place before you start filling it up, because it’s going to be heavy to move.
You might even want to put the container on casters or in a wagon if you don’t have friends around to help you haul it.
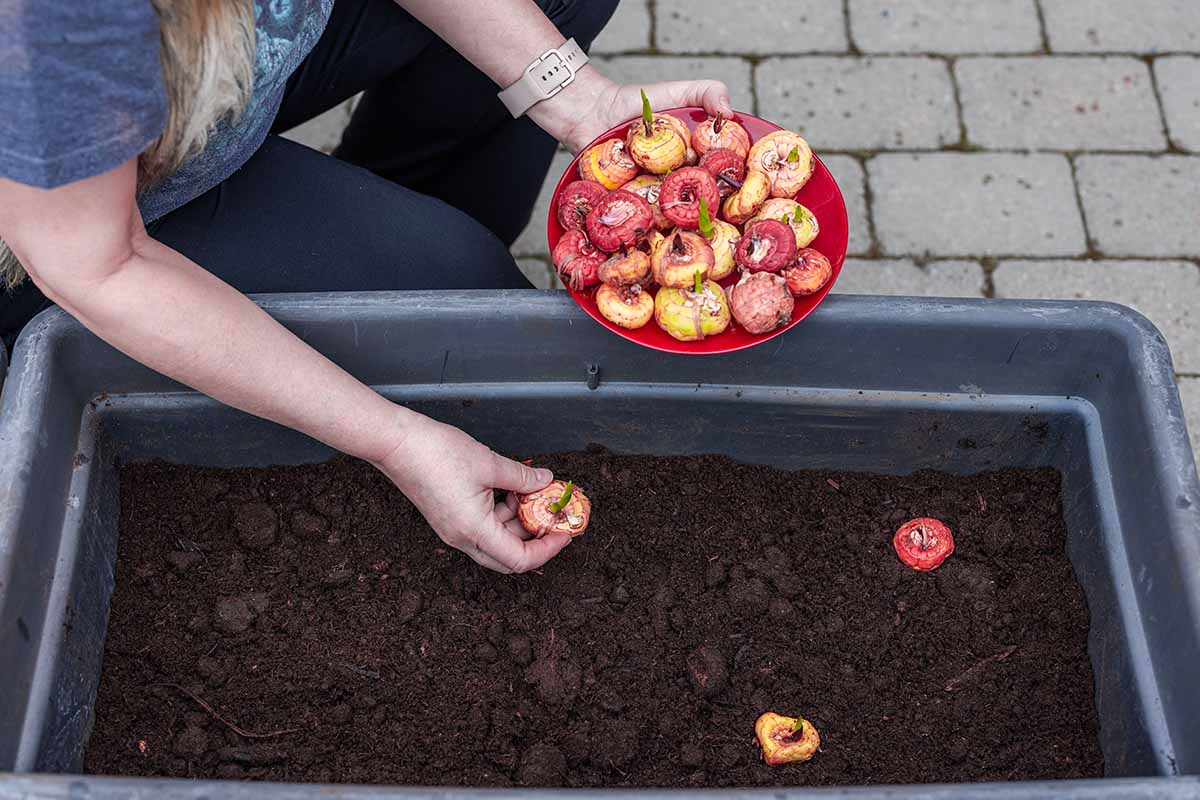
Plant the corms approximately two to four inches deep, depending on the size, as you’ll want them twice as deep as the length of the corm. Make sure the pointy end is facing upwards.
Water the medium well so that it’s moist but not soaking wet or soggy.
Place the container in a warm, sunny spot indoors that receives at least six hours of direct sun and keep the soil moist.
You can also use supplemental lighting if you don’t have an area with enough exposure.
Allow the top inch of the soil to dry out between watering.
Be cautious if you’re using a large storage container, because it’s easy to add too much water to the point where the soil starts becoming soggy at the bottom of the container, which can lead to rot.
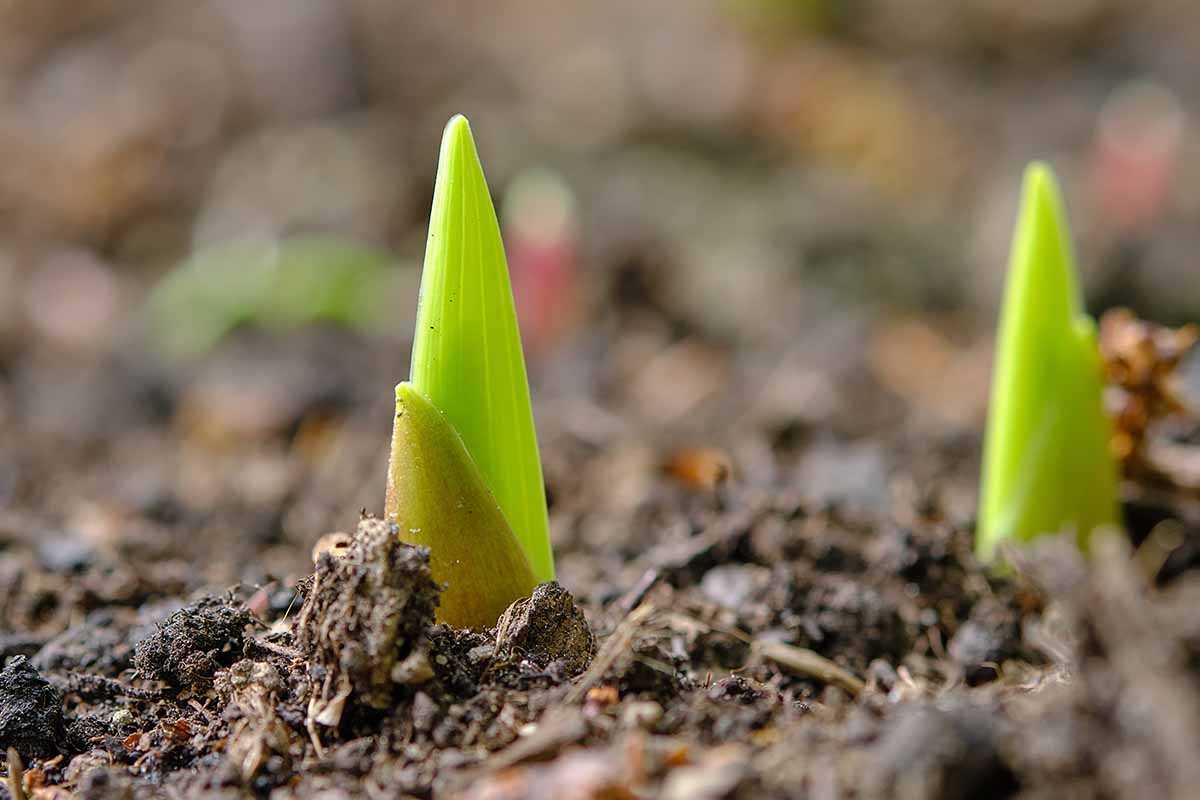
Within a few weeks to a month, you should see new growth popping out of the soil.
Once the nighttime temperatures are at least 60°F and the gladiolus plants have at least three leaves, you can bring them outdoors.
Before you can put them in the soil and soak up the beauty, you need to harden the plants off as they’re used to the easy life of an indoor environment.
To harden them off, take the growing container outside and set it in or near the spot where the gladiolus will eventually be planted. Leave the pot there for an hour and then bring it back inside.
The next day, leave it out there for two hours before bringing it in.
You’re going to need a helper with a strong back if you used a large storage container! You can probably skip ab day after the workout you’re going to have.
Keep adding an hour each day until the plants can stay outside for a full eight hours.
At this point you can transplant your gladiolus (or leave them growing in their pots).
Prepare the planting area by digging enough holes for all your corms. It’s better to dig a larger hole than you think you’ll need so you don’t have to try and wedge the corm into it.
Gently push your hands into the soil and dig down underneath the roots of each plant. You can also use a trowel, but I like to use my hands because I can really feel the root system and it helps to avoid damaging the roots.
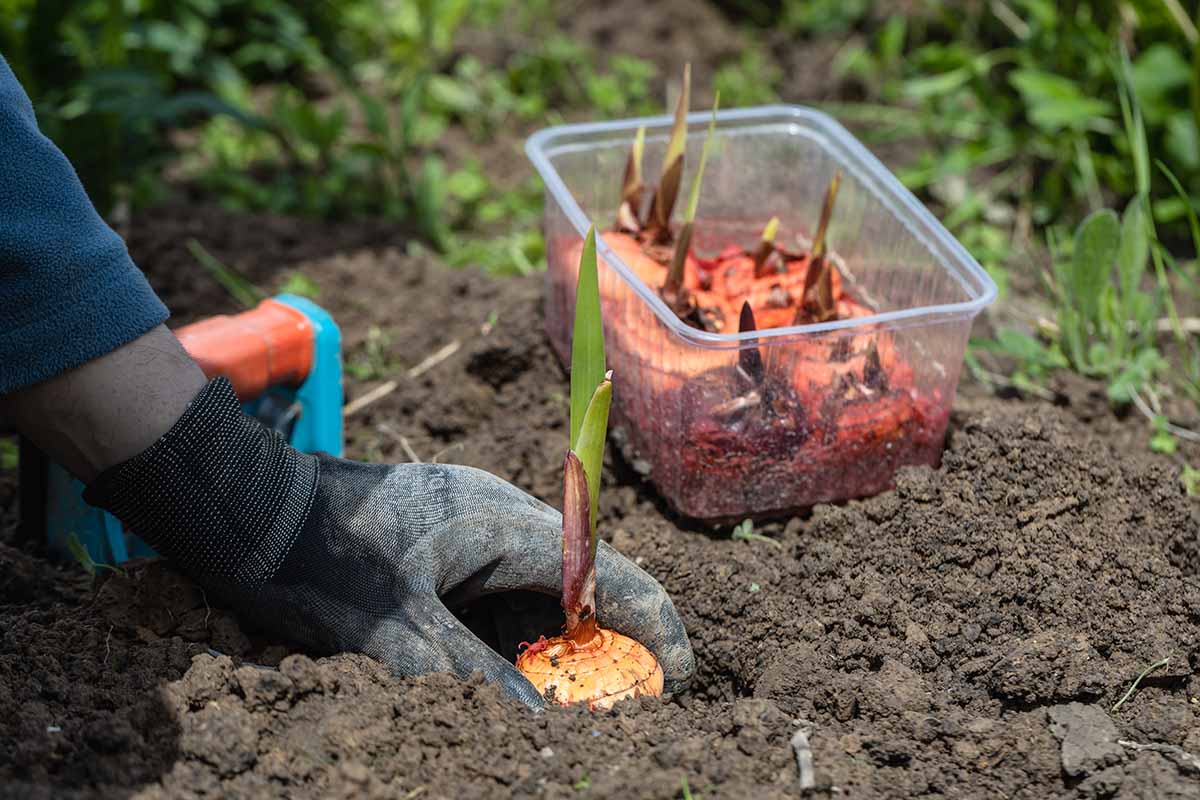
Lift the gladiolus out of the soil and place it in the ground. The corm should be sitting at the same depth as it was in the growing container. Repeat until all your corms are in the ground.
Firm the soil up around the corms and water in well. You might need to add a little more soil if it settles.
Visit our comprehensive guide to growing gladiolus for tips on how to grow and care for this ornamental beauty.
Growing gladiolus indoors
FAQ
How to grow gladioli inside?
Press the gladiolus corm into the soil pointy side up so that only half of the corm is in the soil. Water the soil and gladiolus corms so that the soil is damp, but not soaked. Keep the soil damp while the gladiolus are indoors. Place the container of gladiolus corms in a location with bright, indirect light.
Can gladiolus live indoors?
Trying to keep one plant blooming nonstop indoors won’t work well, but you can stagger plantings in cycles to get near-continuous blooms. Indoors only is possible, but they’ll do better if you can grow them outside during the warm months and store them inside in the winter.
Do gladioli do well in pots?

Yes, gladiolus can be grown successfully in pots, provided the containers are large and deep enough to accommodate their root systems and tall stems.
Are gladioli indoor plants?
If you can’t wait for spring to get started, starting gladiolus indoors will give you the leg up you’re craving.