I’m always eager to get into the garden once signs of spring start to emerge – but there are a number of reasons to start certain seeds indoors beforehand.
You may want to grow crops that need to be started indoors before they can safely be planted out in your garden in your growing zone.
Or, you want to spare the expense of buying seedlings. Perhaps the varieties you want to grow aren’t even available at your local nursery.
Whatever the motivation for planting seeds indoors, putting together a simple seed starting setup is helpful.
I’m walking you through my affordable seed starting setup in this post to help you get started. We’ll cover the supplies you’ll need, some tips for choosing grow lights, picking trays and inserts for planting seeds indoors, the best soil for seed starting, and the basics of when to start your seeds.
Starting seeds indoors allows gardeners to get a head start on the growing season. By nurturing seedlings inside, you can transplant mature plants outside after the last spring frost This extends the harvest period for fruits, vegetables, and flowers However, commercial seed starting kits and supplies can be pricey. With some creativity and resourcefulness, you can successfully sprout seeds on a budget using common household items.
Why Start Seeds Indoors?
Here are some of the main benefits of starting your own seeds rather than purchasing transplants
-
Cost savings – Packets of seeds are far cheaper than buying seedlings from a nursery.
-
Wider variety – Starting seeds yourself allows you to grow uncommon heirloom or exotic varieties typically not found at garden centers
-
Custom schedule – You control when you sow seeds and when you transplant outdoors based on your climate and last frost date.
-
Healthy plants – You avoid diseased stock from the store and control growing conditions.
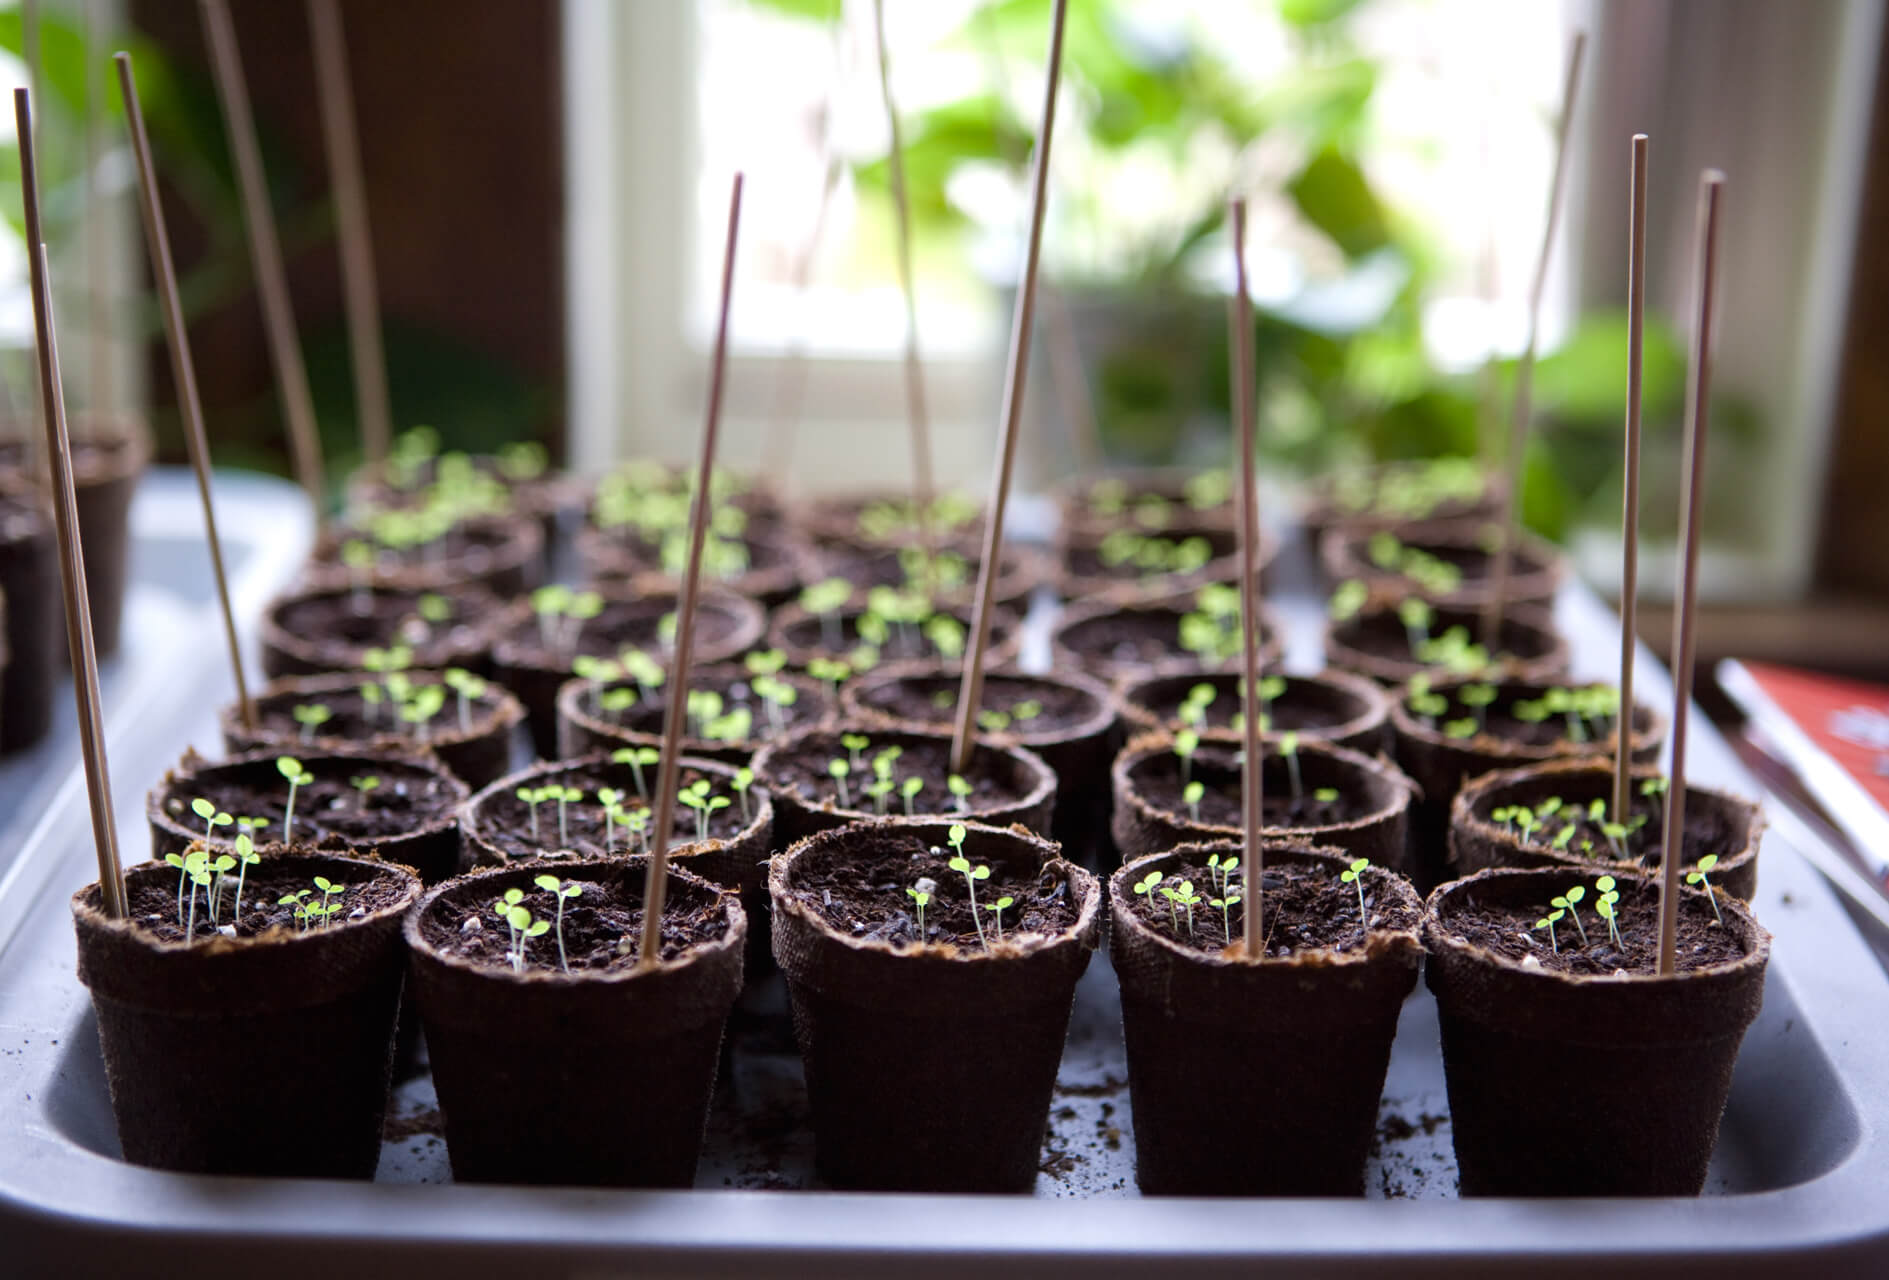
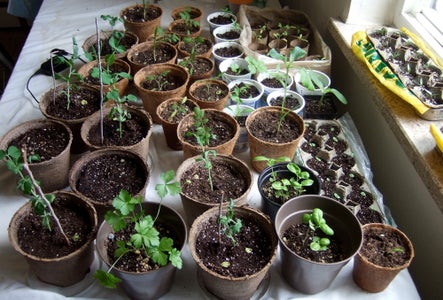
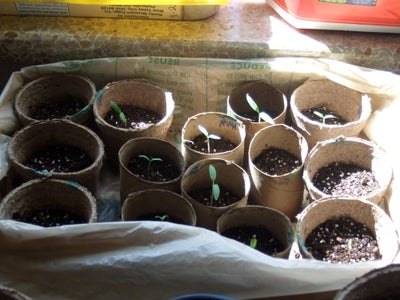
Choosing Low-Cost Containers
You don’t need fancy pots or trays to sow seeds. Consider repurposing these household items:
- Yogurt cups or margarine tubs
- Cottage cheese containers
- Milk or juice cartons
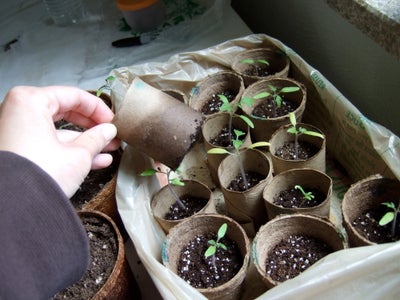
- Egg cartons
- Takeout containers
- Ceramic mugs or cups
- Cans or tin cans
- Cut plastic bottles or jugs
Thoroughly clean and sanitize any used containers. Use a nail or skewer to poke drainage holes in the bottom.
DIY Seed Trays
Instead of buying seed trays, create your own from:
- Aluminum roasting pans, baking sheets, or disposable pans
- Broken ceramic plates glued back together
- Reused plastic container lids
- Egg cartons
- Melted plastic lids as molds
- Old food trays or boxes
Line trays with plastic wrap, trash bags, or newspaper with drainage holes poked through.
Cheap Soil Alternatives
You don’t necessarily need commercial seed starting mix. Try these frugal soil options:
- Screened, sterilized garden soil
- Coconut coir or coco peat
- Compost sifted through a wire mesh strainer
- Perlite or vermiculite mixed into compost
- Finely crumbled newspaper or shredded paper
- A 50/50 mix of compost and vermiculite
Avoid straight garden soil which may harbor diseases.
Homemade Heat Mats
Rather than buying heating mats, make your own from:
- A heating pad wrapped in aluminum foil set to low
- A hot water bottle wrapped in a towel
- Milk jugs or water containers replaced daily to provide warmth
- Light bulbs enclosed in an insulated box
- Fresh compost which naturally generates heat as it decomposes
Aim to maintain a consistent 70°F to 80°F temperature range.
Providing Light on a Budget
Ideal lighting for starting seeds is a sunny, south-facing window if available. If not, consider these budget-friendly options:
- Shop lights with alternating cool and warm fluorescent bulbs
- Adjustable desk lamps or gooseneck lamps with CFL bulbs
- LED bulb sets or strings in the proper wavelength for plants
- Sheer curtains to diffuse intense sunlight through windows
- A mirror positioned to amplify and reflect natural light
Seedlings need 14-16 hours of daily light exposure.
Low-Cost Germination Aids
You can skip specialized seed warming mats or trays. Try these techniques instead:
- Make mini greenhouses from plastic wrap or cut plastic bottles
- Place seed trays above appliances that emit heat like refrigerators or heaters
- Top containers with plastic bags or lids to retain humidity
- Use dark containers that absorb heat; paint recycled ones black
- Create hot beds by mixing fresh manure into soil
Maintain temperatures around 75°F and consistent moisture.
Frugal Irrigation Methods
While fancy equipment isn’t necessary, seeds need consistent moisture to sprout. Consider these options:
- Plastic bottles with small holes in the lid make watering wands
- Use a clean paintbrush, Q-tip, or eyedropper for precise seed watering
- Recycle an old spray bottle for gentle seedling misting
- Make a perforated bag waterer from a ziplock with a corner cut off
- Line trays with soaked newspaper or moist paper towels
Always use room temperature water, not cold tap water.
Economical Supports and Covers
Once sprouted, seedlings need various supports. Improvise with:
- Popsicle sticks, chopsticks, or twigs as mini stakes and trellises
- Strips of pantyhose, tulle, or mesh bags to gently tie up seedlings
- Extra LEGO blocks, toys, or craft items for props
- Recycled plastic or wood for labels and markers
- Sheer fabric or plastic bag scraps to create protective tents
Scour your home for items to support and shelter your seedlings.
Tips for Success
Follow these tips to successfully start seeds on a slim budget:
- Scout thrift stores and garage sales for cheap containers and trays
- Swap seeds with other gardeners to expand your variety
- Reuse yogurt cups, jugs, cartons, and egg crates for planters
- Position trays near appliances like fridges that release warmth
- Maximize free sunny windows or porches for natural light
- Monitor soil moisture closely; mist leaves to increase humidity
- Turn containers frequently so all sides get even light exposure
- Stake and trellis plants as needed once they sprout
With ingenuity and resourcefulness, you can start a diverse array of flowers, herbs, and vegetables without expensive kits. Follow these budget-friendly guidelines for thriving indoor seedlings. Let creativity and reuse boost your homegrown garden for pennies.
Introduction: Seed Starting: a Comparative Study on Cheap Indoor Methods
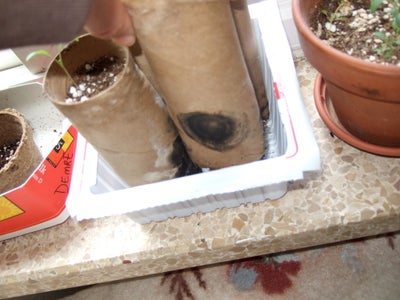
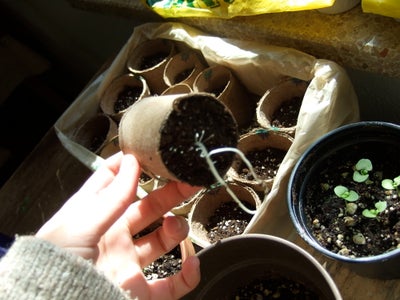
Step 3: Toilet Paper Tubes
BUDGET Indoor Seed Starting Setup THAT WORKS!
FAQ
How to start seeds indoors cheaply?
Newspaper Seed-Starter Pots
Fold the newspaper strips up and around the outside of a small glass to make a miniature pot, then remove the glass, add soil and seeds. Keep the paper pots in a tray near a sunny window until it’s warm enough to plant outside.
Is it better to germinate seeds in soil or paper towel?
-
Pros:
- Faster Germination: The tightly controlled environment of a paper towel bag can lead to quicker germination compared to soil.
- Visual Inspection: You can easily see root development and identify any seed viability issues before transplanting.
- Space-Saving: It’s a compact method for starting multiple seeds at once.
- Easy to Manage: Maintaining consistent moisture is straightforward with a paper towel and bag.
- Faster Germination: The tightly controlled environment of a paper towel bag can lead to quicker germination compared to soil.
-
Cons:
- Transplant Stress: Roots may become entangled in the paper, potentially damaging them during transplanting.
- Not Suitable for All Seeds: Some small seeds or those requiring light for germination might not be well-suited to this method.
- Transplant Stress: Roots may become entangled in the paper, potentially damaging them during transplanting.
Can I just throw seeds on the ground?
- Prepare the soil: Clear away any existing plants, debris, and weeds.
- Loosen the soil: Rake or lightly till the soil to create a seedbed.
- Consider covering the seeds: Depending on the seed type, you might want to cover them lightly with soil or add a thin layer of mulch.
- Water gently: After planting, water the area lightly to keep the soil moist.
- Be patient: It may take some time for seeds to germinate and grow, so be patient and monitor the area regularly.
What month should I start my seeds indoors?
-
Longer-maturing plants (e.g., tomatoes, peppers):Start these indoors 8-10 weeks before the last expected frost date, which is typically mid-February to early March in Los Angeles.
-
Shorter-maturing plants (e.g., lettuce, spinach):Start these indoors 6-8 weeks before the last frost date, which would be roughly late February to early March.
-
Annual flowers:Start these indoors 6-8 weeks before the last frost date, also in late February to early March.
Can you start seeds on a budget indoors?
With a bit of creativity, starting seeds on a budget indoors is easy! When I first started gardening, I didn’t want to start seeds because I felt like I had to purchase all of this special equipment that was going to cost me too much money. I’m cheap, and I’m not embarrassed to admit that.
How to start seeds indoors?
It’s time to make a shopping list. Here’s everything you need to start seeds indoors: A good light source is a must-have for an indoor seed starting setup. A light table, light stand, or any quality grow light system is essential to the seed germination process.
How to start seeds at home cheaply?
Here are the 9 steps to start your seeds at home cheaply. 1. Decide How Many Plants of Each You Want The first thing you want to do is decide how many plants of each type you want to have. You can use a calculator or just decide randomly how many of each you need. It’s better to overestimate than underestimate, in my experience.
Should you buy a seed starting kit?
There’s no reason to go out and spend any significant money on seed starting kits and fancy seed starting containers. The simple black plastic trays used commonly in greenhouses and nurseries are pretty much perfectly suited to the task.
What are the best DIY seed starting hacks?
Check out these amazing DIY Seed Starting Hacks that will help you save a lot of time and money! 1. DIY Lemon Rind Pot 2. Paper Pulp Seed Starters 3. Eggshell Pots 4. DIY Newspaper Seed-Starter Pots 5. Toilet Paper Roll Pots 6. K-Cup Coffee Containers 7. DIY Heat Mat 8. DIY Greenhouse Tote 9. Pre-Sprout Your Seeds 10. DIY Seed Tape 11.
How much does it cost to start a plant from seed?
Starting plants from seed is a huge money saver. Plant starts can run $3-4 a piece, which is about the same price as a single packet of seeds. In addition to starting our own seeds, we can also save money by DIYing or upcycling the containers we start our seeds in.