Ginger has a versatile history – ancient Chinese used the root of ginger as a tonic to treat common ailments while Romans used it to make sweets.
Ginger is a versatile and aromatic spice that can add a touch of warmth and flavor to drinks meals, and desserts during the cold winter months. While ginger is traditionally grown as an annual crop outdoors in tropical regions it is possible to cultivate fresh ginger indoors all year round, even in frosty climates. With the right setup and care, you can have homegrown ginger rhizomes to harvest for cooking, DIY remedies, and more.
In this comprehensive guide we’ll cover everything you need to know about successfully growing ginger indoors in winter.
Choosing the Best Ginger Variety for Indoor Cultivation
There are many ginger plant varieties to choose from. Look for these types that are best suited for growing in containers indoors:
-
Hawaiian yellow ginger – A vigorous grower with pale yellow flesh. An excellent potted variety.
-
Rio de Janeiro ginger – Prolific producer of large rhizomes with white flesh.
-
Chinese yellow ginger – Winter hardy with smooth yellow skin and a spicy bite when raw.
-
Nigerian ginger – A dwarf variety that thrives in pots with dense aromatic rhizomes.
-
Baby ginger – Mini knobs with thin skin make harvesting easy. Nice for cooking and teas.
Avoid using supermarket mature ginger rhizomes which may harbor disease. Purchase certified disease-free ginger starts from reputable suppliers for best results.
Providing Optimal Conditions for Growing Ginger Indoors
Ginger plants need warm temperatures, high humidity, filtered light, nutrient-rich soil, and ample moisture to thrive when grown indoors over winter.
-
Ideal temperature range: 70-80°F
-
Ideal humidity level: 40-60%
-
Light requirements: Bright indirect light or 2-4 hours of morning sunlight.
-
Soil: Loose, well-draining potting mix amended with compost.
-
Water: Keep soil consistently moist but not soggy.
Monitor conditions daily and make adjustments as needed to maintain ginger’s preferred environment. Supplement natural light with grow lights. Use a humidifier to regulate humidity.
Planting Ginger in Containers for Indoor Cultivation
Choosing a pot: Select a container at least 12” wide and deep with drainage holes. Dark pot colors help absorb heat.
When to plant: Late winter through early spring.
Planting steps:
-
Fill pot 2/3 full with amended potting mix.
-
Place a 2-4 inch piece of fresh ginger rhizome sideways in soil with growth buds facing up.
-
Cover lightly with 1⁄4 inch more potting mix.
-
Water well initially then keep moist.
-
Add more potting mix as stems and leaves form, keeping rhizome tips just covered.
For higher yields, plant multiple rhizome pieces spaced 4-6 inches apart in a large container.
Caring for Ginger Plants Indoors Through Winter
-
Watering: Check soil daily. Water when just dry to the touch 1-2 inches down. Avoid overwatering.
-
Fertilizing: Use balanced liquid fertilizer every 2-4 weeks during active growth.
-
Light: Rotate pot weekly for even growth. Gradually introduce to morning sun.
-
Support: Stake stems as needed. Indoor ginger can reach 3-4 feet tall!
-
Pruning: Remove yellow leaves and spent stems to encourage new growth.
-
Repotting: Shift to a larger container in early spring if rhizomes fill the pot.
-
Pests: Inspect weekly and treat for pests like aphids, spider mites, fungus gnats, or mealybugs. Quarantine new plants.
-
Cleaning: Wipe leaves with a damp cloth to remove dust that blocks light.
Troubleshooting Common Problems with Indoor Grown Ginger
-
Yellow leaves – Usually signals overwatering. Allow soil to dry out more between waterings.
-
Brown leaf tips – Caused by low humidity. Increase humidity levels around the plant.
-
Few leaves/leggy stems – Needs more sunlight. Supplement with grow lights.
-
Failure to sprout – Rhizome may have dried out. Maintain even moisture during sprouting stage.
-
Slow growth – Night temperatures may be too low. Aim to keep temps above 65°F.
-
Root rot – Waterlogged soil. Allow soil to dry out further between waterings.
-
Pests – Treat immediately with organic sprays once spotted on foliage. Monitor closely.
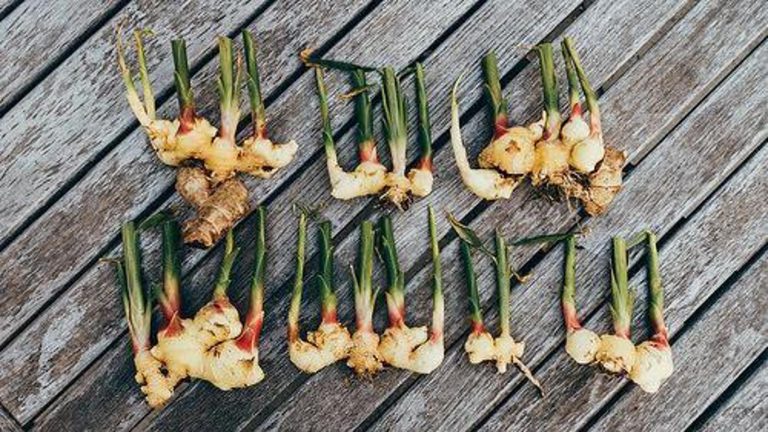
Harvesting and Storing Ginger Rhizomes
-
When to harvest: After 10 months of growth when pot is full. Foliage will yellow at end of growing period.
-
Harvesting method: Carefully tip ginger plant from pot. Select rhizomes for replanting. Break off the rest.
-
Curing: Lay harvested rhizomes out to dry for 1-2 weeks.
-
Storage: Place dried rhizomes in an open ziplock bag in the fridge crisper. Will last for several months.
-
Replanting: Select a few pencil-sized side rhizomes with visible growth buds to replant for the next crop.
With the right variety, conditions, and care, it is possible to cultivate a productive potted ginger plant indoors through the winter months. Pay close attention to providing ample warmth, humidity, moisture, and light. Troubleshoot issues quickly to maintain vigorous growth. In 10 months or so, you can harvest homegrown ginger rhizomes bursting with flavor to enjoy in cooking, teas, and other uses all winter long. Growing ginger indoors requires some effort but yields a flavorful and versatile edible crop.
Month 3: Check Your Seedlings
There’s no need to thin Ginger, but you should check on your seedlings’ progress to make sure you’ve got enough light. They should be about 2 inches tall by the end of Month 3. If they aren’t you likely need a bit more light.
Starting your Ginger: Seed vs Propagate vs Nursery Plant
Ginger is easy to start from a ginger root. If you are feeling impatient – they’re also easy to propagate by dividing an established clump or buying a pot of them.
Plant 2 sites in an 8″ / 1 gal container. In larger containers, space sites 6″ apart. For each site plant 1 rhizome (~1-inch piece of the root) 3 inches deep. Keep the soil warm (60-90°F, ideally 70°F). Sprouts typically appear in 7 weeks but can be as quick as 6 weeks or as long as 8 weeks depending on your conditions.
Ginger replicates underground – so if you’ve already got an established plant you love (or a friend does!) you can easily “clone” it by dividing the bunch. First, give it a good watering to loosen up the roots. Then pull the entire cluster out and gently tease the roots apart. That’s it!
Live starter plants give you a big jump start on your first harvest. When you’re in a garden center – pick the bushiest plant available (tall and lanky ones will be weak growers) and give it a good inspection for pests. Leaves should be dark green without holes, spots, or curled edges. A best practice is to actually “quarantine” your plant for about a week after bringing it home to make sure it’s free and clear of ride-on pests.
Ensuring it’s pest and disease-free, it’s time to transplant your seedling into its final home.
- Remove some soil from its final planter – leaving enough space for the bottom of the seedling to be just higher than the soil surface.
- Hold on to the base of the stem with one hand, and turn the pot over while gently pulling the seedling. Giving the pot a few squeezes can help dislodge it.
- Place in its final container and fill around it with soil so that it’s tight, but not compacted.
How to Grow Ginger in a cold climate Garden (Yes, You can!)
FAQ
Can you grow ginger indoors in winter?
It contains gingerol, a major natural compound reported to possess anti-inflammatory, antiviral, antitumor, antioxidant and antiemetic effects. An exotic indoor plant, a delicious spice and an herbal medicine all-in-one, ginger is the perfect plant to grow this winter.
Can you keep ginger as a houseplant?
Ginger is one of my favorite spices to have in high supply around my kitchen, and lucky for me, this tropical plant can easily be grown indoors all year, even during the long, cold Vermont winters.
What temperature is too cold for ginger?
Many types of ginger are winter hardy to 20ºF (-6ºC), but none can tolerate frozen soil.