Learn how to draw a great looking Olive Branch with easy drawing instructions and video tutorial.
By following the simple steps, you too can easily draw a perfect Olive Branch. [mbr_is_for tags=CUSTOMER – EDG Member – Active]
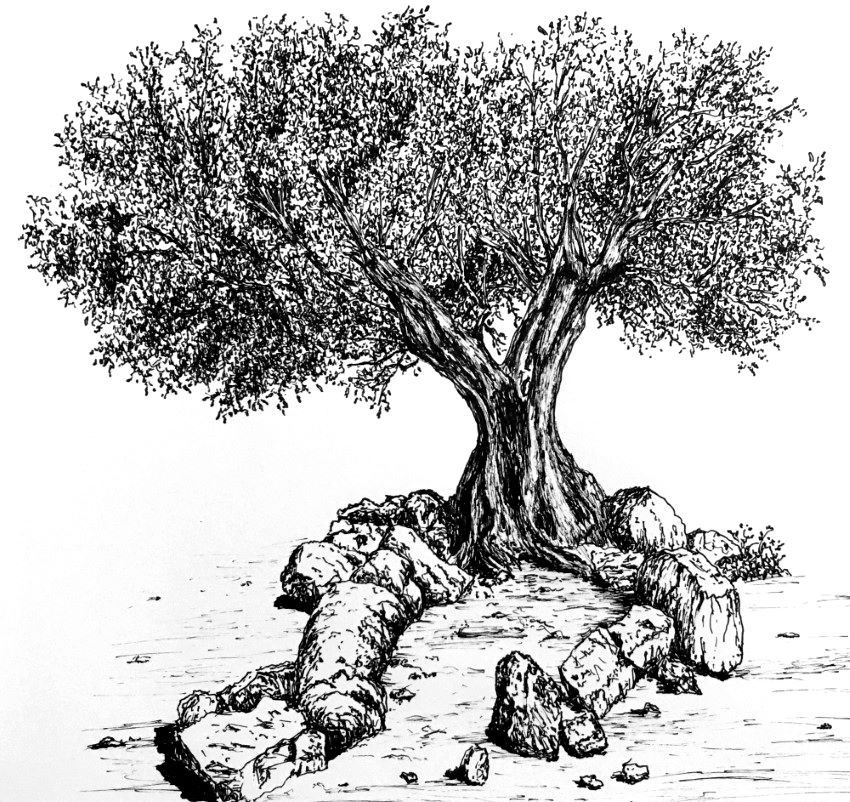
As an artist and blogger, I’m always looking for new and interesting subjects to draw Recently, I’ve become fascinated with sketching olive trees Their gnarled trunks andbranches, silvery green leaves, and plump fruit make them fun to depict in pencil or paint.
In this article, I’ll walk you through how to draw an olive tree step-by-step. I’ll share tips on sketching the trunk, leaves, and olives so you can create your own beautiful olive tree art. Whether you’re a beginner or more advanced, you’ll find this olive tree drawing tutorial helpful.
Gather Your Drawing Supplies
Before we start the step-by-step instructions you’ll need to gather some basic drawing supplies
- Drawing paper – Sketchpad or drawing pad
- Pencil – HB and 2B
- Eraser
- Ruler or straightedge (optional)
For shading the olive tree, you may also want colored pencils, crayons, or markers
Now let’s get started with the first step of this olive tree drawing guide!
Step 1 – Draw the Olive Tree Trunk
We’ll begin our olive tree drawing with the trunk since it provides the foundation. To draw the trunk:
-
Lightly sketch a vertical line near the center of your paper. This will represent the trunk’s main axis.
-
On the left side, sketch a curved line that angles outwards from the vertical trunk line. This line will form the wide base of the trunk.
-
On the right side, sketch another curved line that angles inward toward the vertical trunk line.
-
Connect the two curved lines with a horizontal line at the bottom. This completes the basic shape of the olive trunk.
-
Draw a few bumps and knots on the trunk to show the aged, gnarled texture of olive wood.
Step 2 – Draw the Main Branches
Next, let’s add the main branches:
-
On the left side, sketch a thick branch extending from the upper part of the trunk at about a 45 degree angle.
-
Draw a second thick branch on the right side, also at roughly 45 degrees.
-
Make the branches slightly curved rather than straight lines.
-
Add some smaller side branches sprouting from the main branches.
Step 3 – Draw the Foliage Shape
Now we’ll create a basic shape for the olive tree’s foliage:
-
Lightly sketch an irregular cloud-like shape above the main branches.
-
Make this shape wider at the bottom and more tapered toward the top.
-
Erase any early sketch lines visible within the foliage shape.
Step 4 – Draw the Leaves
Time to bring the olive tree to life with leaves! Here are some tips for drawing olive tree leaves:
-
Focus on each main branch, lightly sketching small leaf shapes sprouting from the branch.
-
Olive tree leaves are oblong and pointed. Draw leaves in clusters of 2-4 leaves or solo leaves.
-
Angle the leaves in different directions – some pointing up, some down, some sideways.
-
Draw the leaves as simple tapered shapes rather than detailed. We’ll add details later.
-
Layer leaves slightly rather than flat – this adds depth.
Step 5 – Erase Early Sketch Lines
Now let’s clean up the olive tree drawing:
-
Erase any remaining early sketch lines you don’t need.
-
Also erase the guidelines for the foliage shape and any lines inside the shape.
-
Lift out the eraser frequently so you don’t smudge the leaf sketches.
-
Make sure to keep the main branch structure.
Step 6 – Add Detail to the Leaves
To make the olive tree leaves more realistic:
-
With your HB pencil, add a center vein line down the middle of each leaf shape.
-
Lightly draw some smaller side veins extending from the center vein.
-
Add some curved detailing on the sides of the leaves.
-
Shade the areas between the veins to enhance the leaf patterns.
-
On some leaves, draw the stems attaching them to branches.
Step 7 – Draw Olives
What’s an olive tree without olives? Let’s add some fruit:
-
Lightly sketch olive shapes hanging from small stems sprouting from branches.
-
Draw olives in small clusters or solo. Vary the sizes.
-
Make the olive shapes oval or teardrop shaped rather than perfectly round.
-
Allow some olives to be partly hidden by leaves to create depth.
Step 8 – Shade the Olive Tree
Shading adds life and dimension to artwork. Here are suggestions for shading your olive tree drawing:
-
Shade the trunk and main branches using your 2B pencil or a crayon/colored pencil. Apply heavier shading on one side.
-
Add lighter shading throughout the foliage shape. Vary the shading intensity throughout.
-
Use stippling (small dots) to shade the olives.
-
Shade larger olive leaves more darkly. Apply only light shading to smaller leaves.
Step 9 – Add Finishing Touches
To finish your olive tree drawing:
-
Soften any hard edges with a kneaded eraser.
-
Blend shading with a blending stump or tissue.
-
With pen or marker, reinforce the main trunk/branch lines.
-
With colored pencils or markers, lightly color the olives and leaves.
-
Sign your artwork! You created a lovely olive tree drawing.
I hope you’ve enjoyed learning how to draw an olive tree step-by-step! With practice, you can develop your own artistic olive tree drawing style. You may want to sketch olive trees in different seasons – with spring blossoms or fall harvest. Olive trees make for both fun artistic studies and beautiful landscape subjects.
Step-by-Step Instructions for Drawing an Olive Branch[thumbnail]

1. Begin by sketching the stem. Draw two long, curved lines that run relatively parallel to one another. Bring them together at a point on one end. Connect them with a short curved line on the other.

2. Draw some olives. Extend short curved lines from the stem, and draw an oval at the end of each one. [mbr_is_for tags=CUSTOMER – EDG Member – Active][ELSE_is_for]
Add More Details to Your Olive Branch Picture – Step 8

8. Draw another leaf. Use three curved lines to form the leaf vein and outline.
How to Draw a Olive Tree Easy step by step
FAQ
How many years does it take to grow an olive tree?
… olive tree care requires little maintenance! Under good growing conditions, you should expect to harvest some olives by the time the trees are 3-6 years oldOct 9, 2021