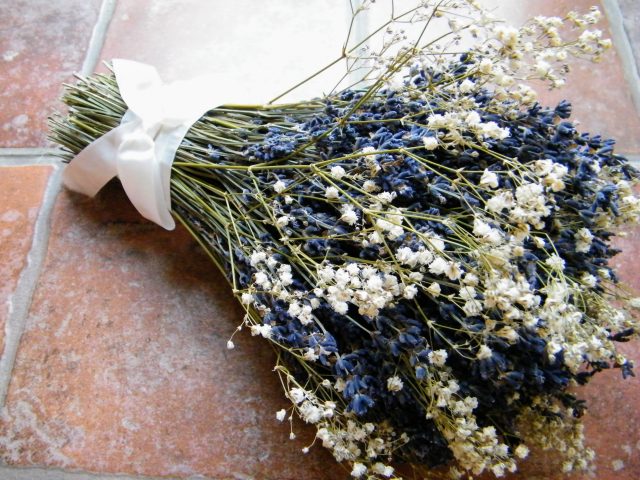
Gypsophila, commonly known as baby’s breath, is beloved for its wispy, cloud-like blooms that add airy texture and romance to floral arrangements. While gypsophila looks beautiful fresh, it also dries very well. Drying allows you to enjoy this delicate flower long after it is cut. With the right techniques, you can dry gypsophila quickly and efficiently. This guide will walk you through everything you need to know for preserving gypsophila’s ethereal beauty.
Choosing the Best Gypsophila for Drying
The key to quick drying starts with choosing the right gypsophila blooms. Look for stems with flowers that are fully opened. Harvest in the morning after the dew has dried, when flowers are hydrated but not wet. Carefully select blooms that are vibrant and pristine, avoiding any that are wilted or damaged. Fresh, healthy gypsophila will dry the fastest. If you don’t grow your own, buy freshly cut stems from your local florist.
Proper Preparation is Crucial
To set your gypsophila up for quick, even drying, the stems need some prep work Start by cutting the stems and immediately placing them in warm water mixed with floral preservative Let them hydrate for at least an hour, allowing the stems to absorb plenty of water. Next, trim the stems to your desired length using a sharp knife or pruners. Remove any leaves, side shoots or secondary blooms. Recut the stems underwater – this prevents air bubbles from forming over the cut ends which would block water flow. Proper hydration and trimming encourages quick, uniform drying.
Effective Drying Methods
There are a few different techniques you can use to dry gypsophila rapidly while preserving its delicate beauty
Air Drying
The simplest approach is air drying. Gather your prepped stems into small bunches secured with rubber bands or string. Hang them upside down in a warm, dry, dark space with good airflow. Ambient temperatures of 70°F-80°F are ideal. The blooms will fully dry in 1-2 weeks depending on humidity levels. Gently shake the bunches periodically to redistribute the flowers as they shrink.
Desiccant Drying
For faster drying, use a desiccant like silica gel. Place a layer of desiccant in an airtight container. Lay paper towel over the desiccant and arrange a single layer of flowers face-up. Cover completely with more desiccant. Seal the container and leave for 4-7 days until dry. The desiccant pulls moisture from the blooms rapidly.
Microwave Drying
Microwave drying is ultra-fast. Place blooms face up on a paper towel and cover with another towel. Microwave in 30 second intervals until dry and crisp, checking frequently. This takes 1-3 minutes. Let cool completely before handling. Use this flash drying method with care to avoid over-drying.
Glycerin Drying
For realistic, flexible dried flowers, use a glycerin solution. Combine 1 part glycerin and 2 parts hot water. Remove lower 2 inches of stem and submerge the rest in the solution for 1-2 weeks until firm. Glycerin replaces moisture in the blooms so they remain vivid and supple.
Caring for Dried Gypsophila
Once dried, take steps to preserve your gypsophila:
-
Gently brush away any debris with a soft paintbrush.
-
Spray lightly with floral sealant or hairspray and let fully dry to prevent shedding.
-
Bundle stems with floral tape or bands. Trim ends evenly.
-
Store in an airtight container away from light, heat and moisture to prevent damage.
With proper drying and care, your gypsophila will remain beautiful for many months or even years!
Handling Dried Gypsophila with Care
Dried gypsophila is delicate and requires gentle handling. Here are some tips:
-
Avoid crushing or bending the dried blooms and stems.
-
Reshape carefully by hand if needed rather than using wires or tape.
-
Apply adhesives like hot glue sparingly so it doesn’t soak into the blooms.
-
Wire stems if needed using thin, flexible florist wire. Wrap connections with tape.
-
Dust occasionally with a soft brush to remove debris without damaging the flowers.
Get Creative with Dried Gypsophila
Dried gypsophila has so many creative uses:
-
Use in rustic floral centerpieces and arrangements along with other dried flowers.
-
Craft wedding bouquets, boutonnieres, corsages and headpieces.
-
Embellish wreaths, garlands, candles and lanterns.
-
Make pressed flower art and shadow boxes using flat gypsophila.
-
Use in homemade potpourri, sachets and fragrance bags.
-
Add to DIY bath and beauty products like bath teas and body powder.
-
Decorate ornament hangers, gift tags and holiday decorations.
-
Incorporate into cards, bookmarks and other paper crafts.
Common Questions about Drying Gypsophila
Here are answers to some frequently asked questions about preserving these delicate blooms:
How long does it take to dry gypsophila?
With proper air circulation, gypsophila dries in 1-2 weeks. Higher humidity can extend the time needed. Desiccant and microwave drying are much faster.
What’s the best way to dry gypsophila for a wedding?
Air drying works beautifully. For a faster option, use silica gel. Just ensure flowers are dried 1-2 months prior to the wedding to allow time for preparation.
Can dried gypsophila get wet?
Avoid exposing dried gypsophila to moisture. Water will cause the blooms and stems to lose their crisp texture. But with careful handling, dried gypsophila can withstand brief exposure to low humidity.
How do I get a flat gypsophila for pressing?
Gently compress fresh stems between sheets of absorbent paper under weight for 2-4 weeks. Check periodically until flat and dry. Store pressed flowers out of direct light.
How do I dry gypsophila without it shedding?
Pick perfect, fresh blooms. Dry thoroughly using desiccant or by air. Mist lightly with sealant spray once fully dry. Avoid crushing blooms when handling dried stems.
Conclusion
Drying gypsophila properly preserves its delicate, dreamy appeal. With the right timing and techniques, these flowers dry quickly and beautifully. Air drying works great, but desiccants, microwave drying and glycerin solution speed the process. Take care in handling the fragile dried blooms. Let your preserved gypsophila enhance floral designs, crafts and events for years to come!
Step 3: Bunch The Stems
Gathering and securing the stems into small, manageable bunches is essential to ensure your Babys Breath dries evenly and retains its delicate beauty. Start by carefully selecting stems of similar length and thickness, which will aid in creating a uniform bunch. Its important to avoid overcrowding the stems within each bunch, as this can impede airflow and lead to moisture buildup, potentially causing mould. A good rule of thumb is to limit each bunch to about 5-10 stems, depending on their thickness. To secure these bunches, consider using rubber bands or twine. These materials are ideal because they allow for the slight shrinkage that can occur as the stems dry, ensuring the bunch remains tight without damaging the stems. This step is crucial for preserving the flowers natural shape and beauty, preparing them perfectly for the drying process.
Step 5: Monitor The Drying Time
The perfectly dried Babys Breath usually spans over 2 to 3 weeks, but this time frame can be influenced by environmental factors such as humidity levels and air circulation within the drying space. The drying process may extend beyond the usual period in areas with high humidity, requiring additional patience. Conversely, spaces with excellent air circulation and lower humidity can expedite air drying, nudging closer to the two-week mark. An example of this variability can be observed when comparing a well-ventilated attic to a damp basement. With its dry and airy environment, the attic would likely facilitate a faster drying time. The key here is patience and allowing the flowers to dry undisturbed. Frequent checks or adjustments can disrupt the drying process, potentially compromising the quality of your dried Babys Breath.