Daylilies are popular perennial garden plants that produce colorful flowers throughout the summer. They are easy to grow from roots and make a great addition to flower beds, borders, and containers. Here is a step-by-step guide on how to successfully grow daylilies from roots.
When to Plant Daylily Roots
The best time to plant daylily roots is in early spring, after the last frost date in your area. This gives them time to establish before summer’s heat. Fall planting can be done in warmer climates, but roots need 6-8 weeks of growth before winter dormancy.
In colder zones, spring planting is recommended so roots have time to anchor before winter. Some gardeners in the north do fall plant, providing winter mulch protection. In the south plant in early spring or late fall avoiding summer’s heat and humidity.
Where to Plant Daylily Roots
Daylilies grow best in full sun, needing at least 6 hours of direct sunlight daily. In warmer zones, they tolerate partial shade if sunlight is intense. Prior to planting loosen and amend the soil with compost or organic matter to provide nutrients and improve drainage.
How to Plant Daylily Roots
-
Prepare the planting bed by loosening soil and mixing in compost or organic material. Daylilies thrive in fertile, well-draining soil.
-
Dig holes 2-3 times the width of the roots and 6-8 inches deep. Space holes 18-36 inches apart depending on desired fullness.
-
Place roots in holes, spreading them outward. Plant the crown 1 inch below soil surface.
-
Backfill holes halfway and water thoroughly to settle soil around roots and eliminate air pockets. Finish filling holes.
-
Water thoroughly after planting. Daylilies require 1 inch of water per week during first growing season to establish.
Caring for Daylilies
-
Water plants 1 inch per week until established, then only during extended droughts. Use mulch to retain soil moisture.
-
Fertilize with a balanced organic fertilizer in early spring. Extra summer feeding can encourage reblooming.
-
Remove spent flowers by twisting off to promote continued blooming. Cut back foliage after first frost.
-
Divide crowded clumps every 3-4 years in spring or fall to rejuvenate. Replant divisions 18-36 inches apart.
-
Prune out diseased or damaged foliage as needed. Remove foliage that yellows to encourage new growth.
Troubleshooting Common Daylily Problems
Leaves turning yellow – This indicates insufficient water. Ensure plants receive 1 inch of water weekly.
Few or no flowers – Can be caused by too much shade or overcrowding. Give plants full sun and divide when clumps get too big.
Foliage decline – Prune affected leaves and improve drainage. Water thoroughly and fertilize to encourage new growth.
Pests – Aphids, thrips, mites, and slugs can sometimes be problems. Remove by hand or use insecticidal soap sprays.
Tips for Growing Healthy Daylilies
-
Choose disease resistant varieties for best performance. Popular options include ‘Stella de Oro’, ‘Catherine Woodbury’, and ‘Mary Todd’.
-
Mix early, mid, and late season bloomers for an extended display. ‘Autumn Minaret’ and ‘Fooled Me’ rebloom in fall.
-
Give plants room to reach mature size. Crowding causes foliage decline and reduced blooms.
-
Remove spent flowers promptly to encourage more blooming. Deadheading prevents seed production.
-
Grow different color varieties together for a colorful, complementary display. Try mixing reds, oranges, yellows, purples, and bi-tones.
-
Avoid excess fertilizer which can cause floppy growth. Use organic fertilizers at recommended rates.
The Reward of Growing Daylilies
Daylilies are hardy, long-lived perennials that provide a welcome burst of color in the garden year after year. Although they require little care once established, proper planting and culture will keep plants healthy and floriferous. With their vibrant diversity of flower forms and colors, daylilies are sure to beautify your garden when grown from roots.
Where To Plant Daylilies
Choose a site with the following characteristics: 1. Full sun to partial shade (for instance, morning sun and afternoon shade, or dappled sun throughout the day). Daylilies need at least 6 hours of direct sunlight per day to bloom. 2. Neutral to slightly alkaline soil. Daylilies tolerate a wide range of pH, but soil with a pH of 6.5-7 is ideal. Adjusting the pH is normally not necessary. 3. Moist, well-drained soil of any type, from clay to sand. Daylilies tolerate a wide variety of soils but perform best in those that are moist and well drained.
Your cart is empty
Your daylilies are shipped as a bareroot. The plants are field grown and have been harvested recently.
If you dont have time to plant immediately, keep the daylily roots in their original bags at about 40°F [5°C] for no longer than three weeks. The vegetable drawer of a refrigerator is ideal for this purpose.
Quick planting, however, will give the best results. Daylilies harvested in late summer for fall planting are best planted before the first frost of fall. Daylilies for spring planting are best planted in early to mid spring.
Its possible that the daylilies will have sprouted during shipment. This is quite normal and will not affect the growth of your plants. If this has occurred, we suggest that you trim the shoots back to approximately 1-2″ immediately after unpacking.
Dont worry if the roots appear to be dry when they arrive. We suggest you soak the roots in cold to lukewarm water for about 30 minutes prior to planting. Fall-planted daylilies will form additional new roots this fall, immediately after planting.
Daylily Growing Guide! How to Plant, Grow and Divide Daylilies // Bare Root Daylilies
FAQ
How to plant daylily bare roots?
-
1. Soak the roots:Before planting, soak the bare root daylily in cool or lukewarm water for about 30 minutes to rehydrate the roots.
-
2. Prepare the planting hole:Dig a hole that’s wide enough to spread the roots out without bending or circling, and deep enough so that the crown of the plant (where the roots meet the foliage) is about an inch below the soil surface. You can also create a mound of soil in the bottom of the hole.
-
3. Plant the daylily:Place the daylily on the mound of soil, spreading the roots out around the mound. The crown should be about one inch below the surface when the hole is filled in.
-
4. Backfill and firm the soil:Fill the hole with soil, making sure there are no air pockets. Gently firm the soil around the plant.
-
5. Water thoroughly:Water the newly planted daylily thoroughly to settle the soil and encourage root growth.
Should I soak daylily roots before planting?
Don’t worry if the roots appear to be dry when they arrive. We suggest you soak the roots in cold to lukewarm water for about 30 minutes prior to planting.
Can you grow daylilies from cuttings?
There are other techniques that can be used to propagate daylilies. Individual ramets can be cut into pieces that have some shoot and some root tissue. If handled in a sanitary manner these ramet cuttings will grow and after approximately 6 months growth can be made into cuttings (Foret and Nelson, 1967).
Do bare root daylilies bloom the first year?
If you are planting bare root daylilies, remember that those planted in the spring will provide only moderate bloom the first summer but will bloom at full strength in subsequent years.
How do you grow a daylily?
To grow a daylily, dig a hole large enough to accommodate your Daylily bare root and plant it evenly with the soil. Press down firmly. Daylilies form vigorous clumps with strap-like leaves around the outside of the plant. Over the course of a single summer, each plant produces an abundance of flower stalks—known as ‘scapes’. Growth habit: Daylilies
When should I plant daylilies?
In the South, plant daylilies in fall or early spring when temperatures are still cool, and plant in the spring in the North. Prepare your roots for planting Store your roots in a cool place until you’re ready to plant them. Before planting, soak the bare root in water for an hour or two.
How do you plant a daylily in a pot?
Remove the daylily clump from its nursery container and tease out the roots if potbound. If planting bare root specimens, make sure they are clean and free of pests or damage. When digging a hole, make it slightly wider and deeper than the root ball. Set the plant in the hole so the top of the root ball is level with the surrounding soil.
Do daylilies need a lot of care?
Daylily needs minimal care once established, making it a good choice for low-maintenance borders, beds and containers. Here’s how to grow and use them in your landscape. How to plant: Daylilies grow in clumps that are comprised of fibrous tuber-like roots. Plants are available as container grown or bare root daylily bulbs.
How do you make daylilies re-bloom?
To make daylilies, especially Flower Power varieties, re-bloom, apply an extended-release fertilizer to the root area in late spring. This will help the plants repeat their flowering cycle throughout the season. Additionally, lightly mulch the root area without covering the crown of the plant.
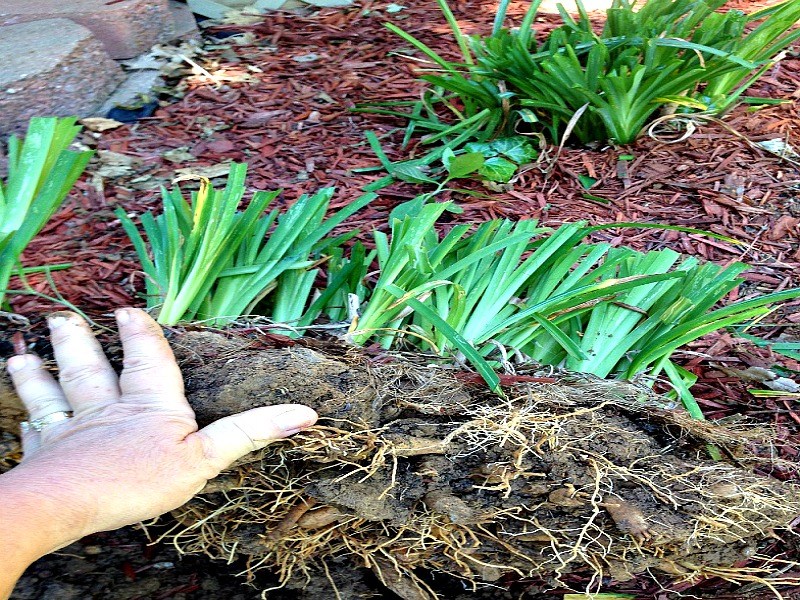
How do you divide daylilies?
Divide daylily clumps in early spring as new growth is emerging, or after plants have finished flowering in late summer. Pull the dense, fleshy clumps apart, or use a sharp knife to cut the root system into pieces. Replant divisions in newly amended soil. When to plant daylilies?