If you’re wondering whether you can dry green loofah off the vine once harvested before they’re brown, follow these step by step instructions.
Unlike growing radishes or microgreens, growing loofahs is a long term commitment. In my temperate Sydney climate, I sowed seeds in August and the vine was still bearing fruit in July of following year.
Loofahs are best left to dry on the vine. They’re ready to harvest when their skin turn brown and brittle and the fibrous flesh has dried to what we know as the loofah sponge, as seen in the above photo.
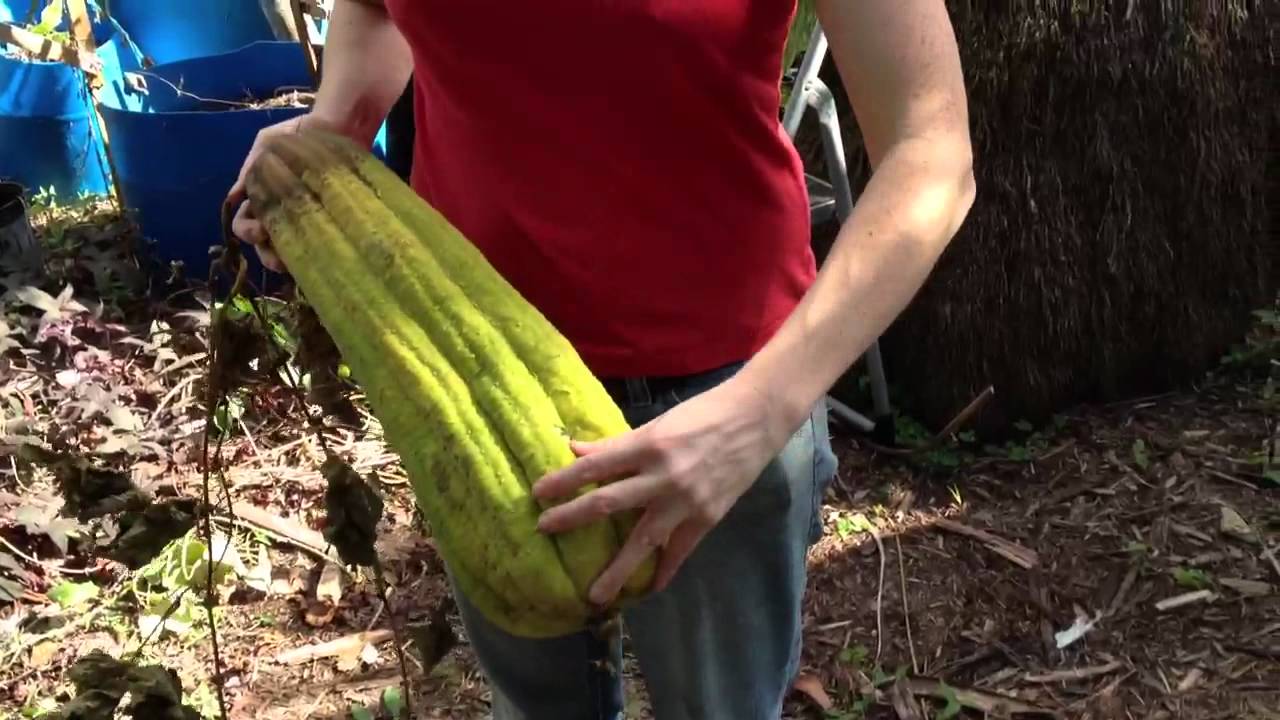
I have been harvesting gourds since summer and by mid-July, although the plant was slowly dying in the cold, I still had three left on the vine, green and heavy with no sign of turning brown. After a bout of solid and heavy rain, two started to rot and the time had come to remove them.
The third was still green and heavy, and it took a little over a month of daily sunbathing it when it wasn’t raining, and bringing it indoors at sunset.
I had previously harvested semi-dry gourds and left them to dry by the windowsill (see photo above), turning them every so often. This method worked well, however in this case, the smaller gourd had turned black at one end while it was green on the other, and the larger gourd (in the first photo) developed a horrible slimy mess at the bottom that leaked sap. There was no chance these could be dried indoors.
Could they be saved? I’m pleased to say that my trial was a success. I documented every step of how to dry a green loofah that was starting to rot but in my rush, I didn’t take photographs of the process.
Hey there fellow gardeners! I’ve been growing and harvesting loofah (also spelled luffa) for several years now, and let me tell you – there’s nothing quite like producing your own natural sponges. Today I’m gonna share everything I’ve learned about harvesting these amazing plants properly.
What is a Loofah Plant?
Before we dive into harvesting, let’s quickly cover what these plants actually are Loofah is part of the gourd family (like cucumbers and squash) and produces long, fibrous fruits that can be used as natural sponges The scientific names are Luffa aegyptiaca or Luffa cylindrica.
When to Harvest Your Loofah
Timing is super important when harvesting loofah Here are the key signs that your loofah is ready
- The gourd turns from green to yellow or light brown
- It feels lighter in weight compared to when it was green
- The skin begins to feel loose or papery
- When you shake it, you can hear seeds rattling inside
- The gourd feels slightly soft when squeezed
Pro tip: Don’t wait until the gourd is completely brown and dry on the vine – this often leads to moldy sponges, especially in humid climates.
Step-by-Step Harvesting Guide
1. Gathering Your Tools
You’ll need:
- Sharp pruning shears or knife
- Garden gloves
- Large bucket or container
- Garden hose with spray nozzle
2. Picking the Loofah
- Cut the loofah from the vine using your pruning shears
- If possible, harvest in the morning when temperatures are cooler
- Handle gently to avoid damaging the fibers inside
3. Peeling and Cleaning Process
Here’s my tried-and-true method:
-
Test the skin: If it’s still a bit green but yellowing, give it a gentle squeeze. It should feel slightly soft.
-
Remove the skin:
- For softer loofahs: The skin should peel off easily
- For tougher ones: Soak in water for 5-10 minutes to loosen the skin
- Start from the bottom and peel upward
-
Clean out the seeds:
- Cut off one end of the loofah
- Shake out the seeds (save them if you want to grow more!)
- Use water pressure to remove remaining seeds
-
Wash thoroughly:
- Use a strong water spray to remove the slimy sap
- Continue spraying until water runs clear
- You might need to squeeze and rinse several times
4. Drying Your Loofah
This step is crucial for preventing mold:
- Place on a drying rack or mesh screen
- Position in a well-ventilated area
- Keep out of direct sunlight
- Rotate occasionally for even drying
- Allow 2-3 days for complete drying
Common Problems and Solutions
| Problem | Solution |
|---|---|
| Mold spots | Harvest earlier next time; use bleach solution if needed |
| Too fibrous | Harvest when younger |
| Won’t peel | Soak longer in warm water |
| Seeds stuck inside | Use stronger water pressure |
Tips for Different Climates
Warm Climates
- Harvest before complete browning
- Watch for mold in humid conditions
- May need faster processing
Cold Climates
- Harvest before first frost
- Can allow to dry more on vine
- May need to ripen indoors
Storage and Use
Once your loofahs are completely dry:
- Store in a dry, well-ventilated area
- Keep away from moisture
- Can last several years if properly dried
- Cut into smaller pieces as needed
My Personal Experience
I gotta tell ya, my first attempt at harvesting loofah was pretty interesting (read: messy). I waited too long and ended up with some moldy ones. But hey, we learn from our mistakes! Now I know to harvest them when they’re just starting to yellow, and I’ve gotten much better results.
Final Thoughts
Growing and harvesting your own loofah is super rewarding. Sure, it takes some practice to get the timing right, but once you do, you’ll never want to buy store-bought sponges again! Just remember – don’t wait too long to harvest, keep things clean, and make sure they dry properly.
Have you tried growing loofah? I’d love to hear about your experiences in the comments below! And if you’re just starting out, don’t be afraid to experiment – that’s how we all learn.
Happy harvesting, y’all!
Note: Want to learn more about using your harvested loofah? Check out my upcoming post about creative ways to use these natural sponges around your home!
How to Dry Green Loofah / Luffa
- Using rubber gloves, peel the loofah starting from one end and working your way down. It’s a slippery slimy process so it helps if your hands are protected.
- Make sure you remove all the peel as any remaining will cause it to brown and turn mouldy.
- Cut away the rotting sections, anything dark brown or black, all the slimy parts and discard.
- Once it’s completely peeled, use the hose with a strong spray attachment to give it a thorough rinse inside and outside, flushing as much of the slimy sap and seeds as possible. You may need to repeat this step a few times. Discard the seeds as they’re not viable.
- At this stage, the loofah is a little cleaner buy it’s still slimy on the inside and needs a thorough clean. You could cut thought it lengthwise and remove the centre core but I had other plans. Otherwise, soak it in water with a little eco-friendly detergent overnight.
- The next day, squeeze as much of the remaining pulp and seeds out as possible then give the loofah a thorough rinse under running water then rinse again.
- If the loofah is discoloured, you may want to soak it again, this time in a mixture of 10% bleach solution. I left mine soaking overnight.
- The next day, rinse the loofah well under running water to remove remaining seeds and sap, and squeeze it all over to express as much of that as possible.
- Once the loofah is completely clean, leave it to dry it in the sun or hang it on a clothes line. Rotate it every so often to expose all sides to the sun. As it starts to dry, keep shaking it to remove the seeds. You could dry it in a very low oven at 50oC or place it in front of a fan but I haven’t tried this method.
- Once the loofah is completely dry, and you’ve removed all the seeds, it’s ready to use.
Here’s the end result. I’m very pleased I was able to salvage some of what I have spent months growing and nurturing.
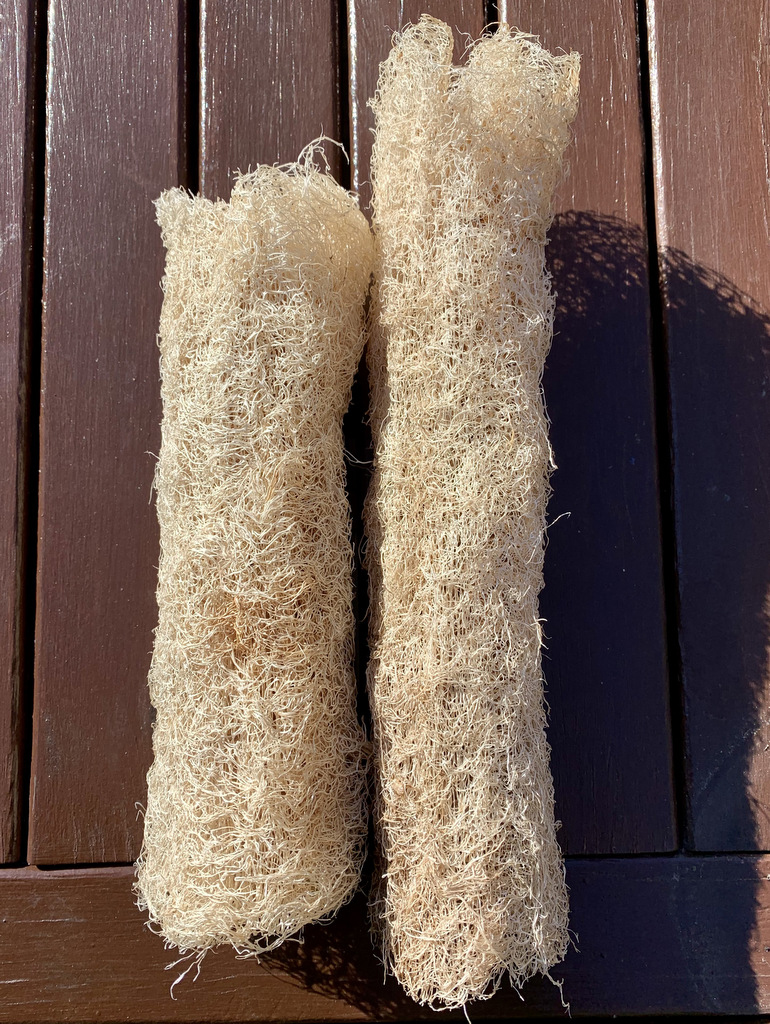
The process of drying a green, ripe and in this case rotting loofah takes time but if you’ve invested months growing the fruit on the vine, it’s well worth a few extra days’ work.
Harvest Luffa (loofah) and Make Sponges!!
0