Martyn Wilson, designer of The RSPCA Garden, describes how to make this traditional structure, useful for gardeners and wildlife alike.
“Were often told that leaving piles of wood, stones or garden cuttings around is good for wildlife, And its true that wild areas like these make great habitats. But what if, like me, you prefer your garden a bit tidier?
“A dead hedge is the perfect compromise. Made from upright stakes of wood and filled with horizontal prunings, it adds structure to your garden and becomes a feature in itself. Contrary to its name, itll soon be teeming with life, providing habitats for many species of wildlife. Plus it recycles pruning matter thats too hard to compost, so you dont have to burn it or throw it away.”
In The RSPCA Garden, the dead hedges sit inside bench-like open structures made from rust-effect, weathered steel. Weve even included hedgehog boxes in the bottom of ours! If youd like to have a go at making one in your garden, heres how.
A dead hedge also known as a deadwood hedge or Benjes hedge is an eco-friendly type of decorative fence you can make yourself using fallen branches, prunings, and other yard waste. Weaving discarded woody materials into a loosely packed row creates an attractive, natural-looking structure that provides food and shelter for birds, pollinators, and other wildlife. Dead hedges are inexpensive to build, easy to maintain, and a great way to repurpose plant debris from your landscape. If you want to add a beautiful rustic element to your garden while supporting nature, learning how to make a dead hedge is a fun weekend project!
What is a Dead Hedge?
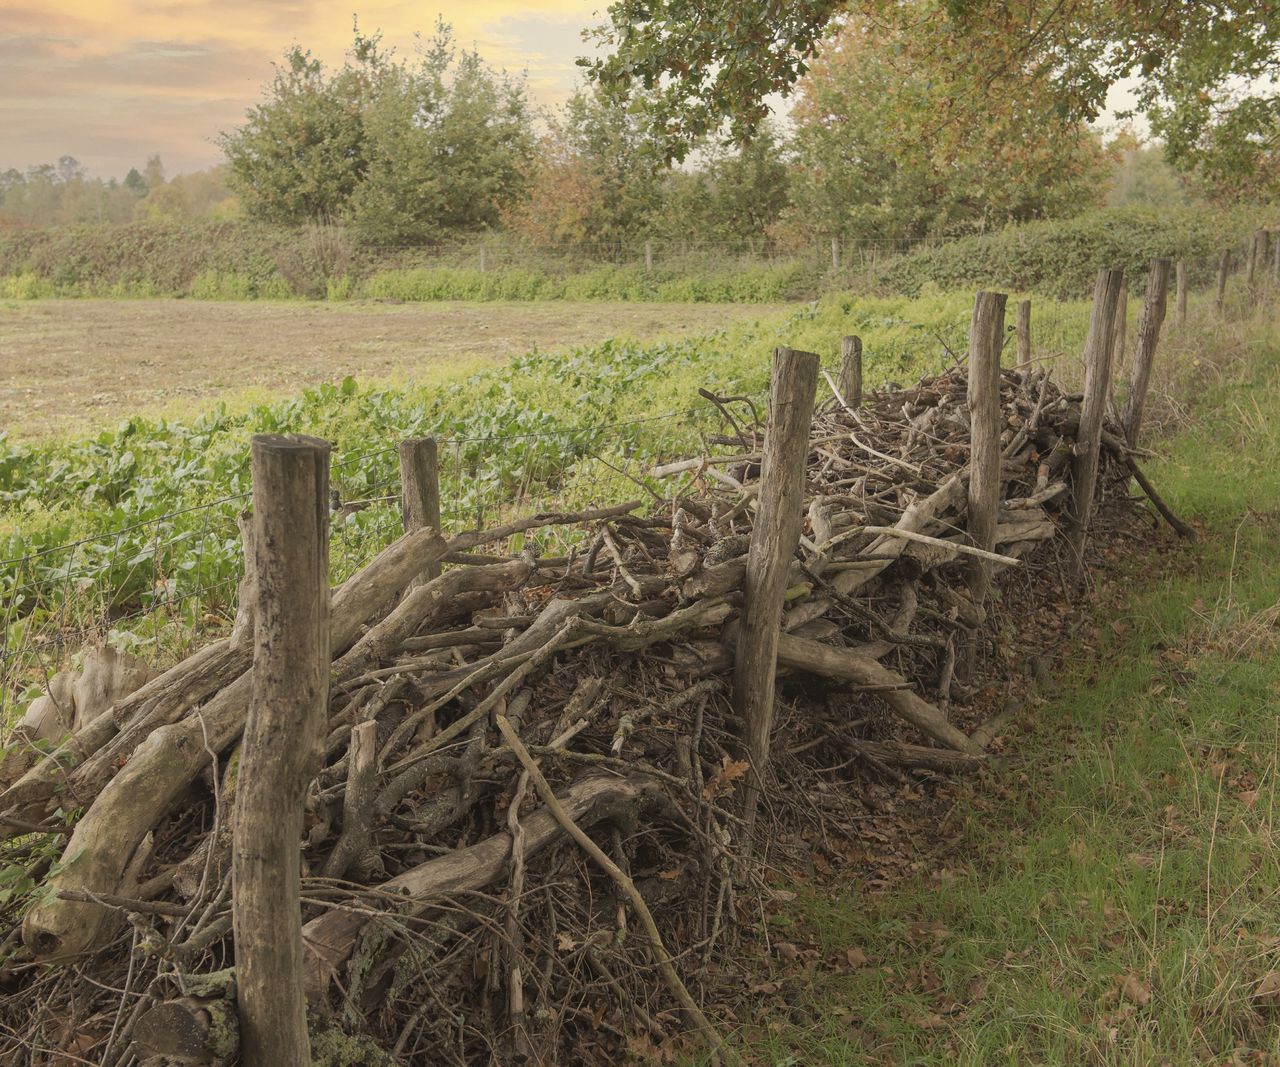
A dead hedge consists of a row of interlaced sticks, vines, and brush sandwiched between wooden posts or living trees. Unlike a neatly clipped privet or boxwood hedge, a dead hedge has an intentionally wild, informal look. Dead hedges can be used to define spaces, provide privacy, or decorate gardens with their textural beauty. As the materials slowly decay, a dead hedge will shrink over several years before needing to be rebuilt. But during its lifetime, it provides excellent habitat for all sorts of creatures!
Dead hedges have been used in Britain since medieval times, often paired with coppicing. After coppiced wood was harvested, the waste branches were bundled into dead hedges circling the coppice to keep livestock out until the next cutting. Traditional materials included hazel, willow, and blackthorn. Today, dead hedges are gaining popularity once again as gardeners discover their versatility and ecological benefits.
Benefits of Installing a Dead Hedge
There are many excellent reasons to incorporate dead hedges into your landscape
-
Cost-effective – Make them at no cost from your own prunings and trimmings.
-
Eco-friendly – Reduce yard waste sent to landfills. As they decay, nutrients are returned to the soil.
-
Low-maintenance – No watering pruning, or fertilizing required once built.
-
Great for wildlife – Provide shelter, nesting sites, and food sources for many creatures.
-
Visually appealing – Add seasonal interest with their varied textures and natural look.
-
Increase privacy – Block views when planted densely along a property line.
-
Support pollinators – Attract bees, butterflies, and other beneficial insects.
-
Protect plants – Can serve as windbreaks around delicate flowers and vegetables.
-
Fun project – Building them is easy, creative, and satisfying!
Choosing the Best Location
When selecting a spot for your dead hedge, consider:
-
Purpose – Do you want screening, bordering a garden, improving wildlife habitat?
-
Sunlight – At least 6 hours of sun daily is best to help materials dry out.
-
Access – Pick a site you can reach easily for construction and maintenance.
-
Soil – Well-draining soil is ideal so the hedge won’t rot. Avoid wet areas.
-
Spacing – Leave 1-2 feet between the hedge and fences, trees, or other structures.
Situate your dead hedge thoughtfully to take advantage of its unique benefits. Use it to hide an eyesore, buffer a private sitting space, or edge a property line.
Gather Your Materials
A wide variety of plant debris can be used to build dead hedges:
- Fallen branches
- Trimmings from shrubs and trees
- Old woody ornamental grasses
- Brushy weeds like blackberry canes
- Bark peeled from logs
- Twigs
- Vines
- Evergreen prunings
- Hollow plant stems like bamboo
Aim for 1-6 inches in diameter. Avoid diseased or poisonous plants. Allow materials to dry for 1-2 weeks after cutting before using. For structure, gather 5-6 foot branches or wooden poles to use as stakes.
Build Your Dead Hedge Step-By-Step
Follow these simple steps to create your own dead hedge:
-
Install support poles about 3-5 feet apart in a straight or curved line. Drive them at least 1 foot into the ground.
-
Begin layering in larger branches and crisscrossing them between poles.
-
Fill gaps by densely packing in smaller twigs, vines, evergreen clippings, and other woody debris.
-
Alternate materials as you build upwards for varied colors and textures.
-
Tamp each layer down firmly to compact the pile.
-
Keep adding debris until you’ve reached the desired height, up to 5 feet.
-
Allow plant matter to extend past the stakes for a natural look.
-
Weave pliable stems through the structure for stability.
-
Let the dead hedge settle for 1-2 weeks, then add more material if needed.
-
Sit back and watch your new habitat come to life!
Maintaining Your Dead Hedge
With little effort, your dead hedge can provide many years of beauty:
-
Add fresh trimmings as older materials decay to maintain fullness.
-
Replace broken stakes or poles as needed.
-
Lightly prune to remove wayward stems or shape as desired.
-
Pull weeds around the base to prevent overgrowth.
-
Water occasionally during drought to speed decomposition.
-
Plan to rebuild every 4-6 years as woody parts break down.
-
Watch for wildlife moving in – your dead hedge is now a lively ecosystem!
Get Creative with Shape and Plant Selection
Beyond a simple straight line, dead hedges can be shaped into curves, circles, or zigzags. Mix up plant materials for unique textures and seasonal interest:
-
Twigs with peeling bark for winter appeal
-
Light birch branches for brightness
-
Twisting vines and flexible stems
-
Large fallen branches as base structure
-
Bushy evergreen clippings for fullness
-
Hollow stems full of insect holes
-
Seed heads left on dried perennials
-
Bundles of ornamental grass stems
Have an eyesore you want to hide? A dead hedge is the perfect camouflage! Use it to disguise water tanks, AC units, or other unsightly elements. Get creative with these versatile, sustainable structures.
Enjoy the Rustic Beauty and Ecological Benefits
Now that you know the basics of building dead hedges, it’s time to start collecting materials from your yard! Repurposing fallen debris and trimmings into a habitat-friendly hedge is deeply satisfying. As your creation matures, you’ll enjoy watching birds flit in and out while bees buzz nearby. With a little imagination, dead hedges can become beautiful additions to landscapes of all kinds.
Take our pledge!
If you build a bird box in your garden or outdoor space, don’t forget to tell us! Share a photo, tag us on social media, and use the hashtag #WildlifeFriends
There are loads of easy ways to get involved and help wildlife. Sign up as a volunteer and start making a difference today.
How to make your dead hedge
- First, choose where youd like to put your hedge and how long you want it to be. Dead hedges can make great windbreakers around vegetable patches, flower beds or seating areas.
- Mark out the area with string. The hedge should be around 50cm wide.
- Add at least three stakes at regular intervals (around 50cm apart) on each side of the hedge – if theyre offset theyll help keep more material in place. Once youre happy with the design, use the mallet to knock the stakes firmly into the ground.
- This is now the frame or cage that will hold all your garden prunings and fill up to become a ‘hedge.
- Its a good idea to put some longer, thicker branches and sticks in first, to create a stronger structure. Use your loppers or secateurs to cut them to the right length and place them inside.
- Over time you can add in any woody cuttings you have. As they rot down, theyll add nutrients to the soil below. Keep topping up your hedge – but try not to disturb it.
Please enter a valid video URL.
The URL can point to any Facebook, Twitch, Vimeo or Youtube video.
“Dead hedges are clever ways to divide your garden or hide things like compost bins,” says Martyn.
“Birds, insects, reptiles, invertebrates, amphibians and small mammals like hedgehogs will soon move in to make it their home or forage for food. You can even grow flowering climbers like clematis up the outside. That way youll be welcoming pollinator insects too.”
How to Build a Dead Hedge With Garden Waste
FAQ
What is the purpose of a dead hedge?
Dead hedges can provide enclosures for livestock. They can also play a role in biological pest control (for example, in organic farming and sustainable agriculture). Dead hedges provide a carbon-efficient way of recycling biomass, without the need for transport or burning.
How long will a dead hedge last?
Less effort, better results. Unlike a pile of ashes, the hedge feels like something lasting. I’ve read that you can expect a dead hedge to last 3-5 years, but I’ve decided that is nonsensical internet echo chamber information. The reality is that this is something that we will continue to add to over the years.
How tall can a dead hedge be?
a really good dead hedge will only give you about 2foot to 2 1/2 foot height. Go higher and you can get issues I find. I mean they work a lot higher but they are harder to maintain. However this is good enough for a lot of smaller farm animals.
How to get rid of an old hedge?
Removing them will be a lot of work. You would have to (or pay to)cut them just above the ground with a chainsaw, haul away the debris(maybe use a chipper,) dig out the roots, haul that out, and then level the soil so you can lay down grass seed. That’s why I recommend maintaining the hedge.
How do you build a dead hedge?
Dead hedges can be built in a straight line to follow the perimeter of your garden, or they can be constructed in curves, circles, or other fun shapes. Typically, hedges stretch between 3 and 5 feet tall and can be as long as needed. Here’s how to build a basic dead hedge: Step 1: Prepare the site. Select a flat location and clear away large rocks.
How to make a dead hedge fence?
To create a dead hedge fence, start by selecting the right branches. Choose flexible branches that are easy to work with. Look for thicker branches for better support. Deciduous trees like willow or hazel are great choices. Ensure the branches are not too dry. Freshly cut branches will last longer. For the job, gather these essential tools:
What is a dead hedge fence?
A dead hedge fence is a unique and eco-friendly alternative to traditional living hedge fences. It offers privacy, security, and aesthetic appeal while making use of dead wood and branches. We will talk about what a dead hedge fence is and how it is different from a living hedge fence in this article.
Are Dead hedges a good idea?
Unlike traditional fences, dead hedges support biodiversity and encourage wildlife activity in your garden, offering food, shelter, and breeding grounds for beneficial creatures. To be clear, it’s not actually alive (hence the name “dead”), but it becomes a thriving ecosystem of its own.
What can you do with a dead hedge?
Less waste. After pruning shrubs and trees, add those prunings to your dead hedge to reduce yard waste. Soil improvement. As the materials in dead hedges break down, they add nutrients to the soil and boost garden fertility. Inexpensive. Dead hedges are less expensive than standard fences.
What is dead hedging?
Dead hedging is a way to make barriers out of piles of branches and twigs that is good for both people and wildlife. (Source: woodlands. co. uk). ✅ Small mammals, birds, and insects can hide in dead hedges, and the hedges also act as a linear eco-pile. (Source: woodlands. co. uk).