One of the things I love about being a full time homemaker is that I have time to be creative with my hands. Instead of grabbing what I need on my way home from work, I get to savor the process of making the desired items for my home.
There’s something so unique and beautiful about handcrafted homes, furniture and décor. And right now, I want to walk you through an easy, DIY project that anyone can do! I’m going to show you how to make a wreath out of branches!
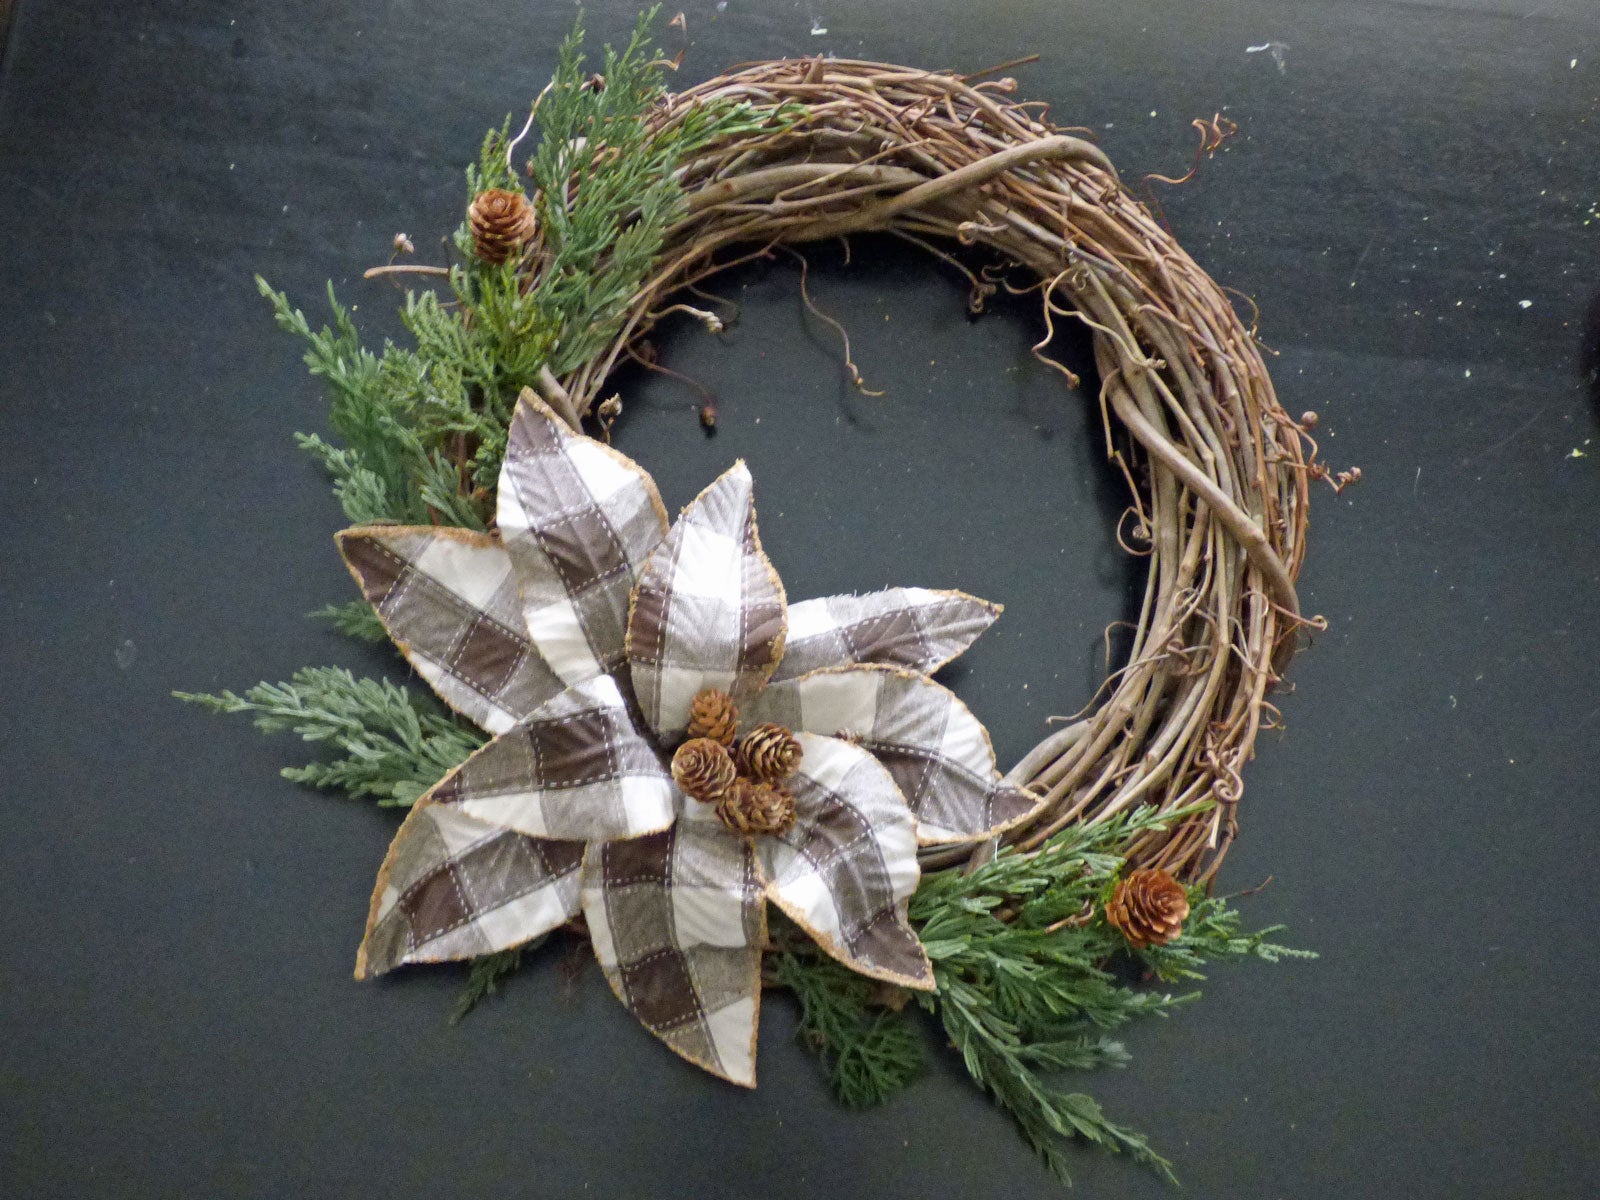
A natural wreath is a gorgeous way to decorate your home for any season, Making a wreath from natural materials you gather yourself makes it even more meaningful Natural wreaths also allow you to get creative with elements found in your own backyard
In this article, I’ll walk you through the steps and tips for crafting a stunning natural wreath for your front door or interior. Let’s get started!
Gather Your Materials
The first step is to head outside and collect elements to include in your wreath. Take a walk through your garden, yard, or nearby woods to find:
- Evergreens like cedar, pine, fir, spruce
- Berries
- Acorns
- Seed pods
- Dried grasses and flowers
- Grapevine
- Twigs
- Moss
- Bark
- Feathers
Gather a variety of textures shapes, and colors to make your wreath interesting. Collect more materials than you think you’ll need to allow for flexibility in designing.
Choose a Wreath Base
You can purchase a pre-made grapevine, wire, or straw wreath base from a craft store. Or get creative and make your own base from flexible branches or a wreath ring.
If using a pre-made base, attach a wire loop to the back for hanging before you start decorating.
Design Your Wreath
Lay out your materials on a flat surface and play around with placement. This allows you to visualize how things will look before attaching them.
Think about texture, color, and visual weight as you arrange materials. Use larger pieces like pinecones as focal points and intersperse with delicate grasses and flowers.
Attach Materials
Once you have a design in mind, attach materials to the wreath base using hot glue, floral wire, or by tucking pieces into a grapevine base. Here are some tips:
- Start by attaching a lush base layer of evergreen branches around the entire wreath
- Use hot glue for moss, pinecones, seed pods, and delicate dried flowers
- Tuck pieces into grapevine or use floral wire to attach stems and twigs
- Wrap wire tightly around the base and any stems for security
- Work in sections, completing one area before moving to the next
Fluff and adjust pieces after attaching to get the look you want. Fill any holes with additional material to achieve an overall balanced design.
Add Decorative Touches
Add final decorative touches like ribbon, bows, small ornaments, or sprigs of berries. These details add pops of color and visual interest to take your wreath to the next level.
Customize with decorations that suit your style or theme. For example, add burlap bows and mini gourds for a rustic fall wreath.
Preserve and Display
To help your natural wreath last longer:
- Spray with hairspray to preserve dried materials
- Store in a cool, dry place when not in use
- Mist with water if materials dry out
Hang your completed wreath outside on the front door, indoors on a wall, over the mantel, or on a wreath stand. Enjoy its natural beauty!
Making your own natural wreath is deeply satisfying and a great DIY project for crafters of all levels. With an abundance of natural materials and a bit of creativity, you can fashion an absolutely gorgeous wreath to display with pride.
Get out and start gathering – your dream wreath is waiting to be created! Let us know how your wreath turns out.
Helpful Tips for Making Natural Wreaths
Here are some additional tips to help make your natural wreath fabulous:
Selecting Materials
- Look for pieces with interesting shapes like curly willow or unusual seed pods
- Choose a variety of textures – smooth and prickly, feathery and woody
- Vary heights by including tall grasses or flowers on long stems
Arranging Materials
- Place larger focal pieces first, then fill in around them
- Alternate sizes and shapes as you work around the wreath
- Add lighter, airier pieces towards the edges and bottom
Securing Materials
- Use hot glue at the base of each piece for a strong hold
- For grapevine bases, wedge pieces tightly between vines
- Wrap wire horizontally around wreath for a natural look
Adding Embellishments
- Choose ribbon colors to coordinate or contrast with wreath
- Tie bows firmly; make them proportional to the wreath size
- Nestle ornaments, berries, and pinecones throughout for pops of color
Displaying Your Wreath
- Hang wreaths outside under cover of porch or eave
- For indoor use, avoid direct sunlight to prevent premature drying
- Refresh with a light mist of water if your wreath starts to fade
With these tips and a dash of creativity, you’ll be able to craft a showstopping natural wreath! From your front door to mantel, a wreath made from foraged materials is a unique way to celebrate every season.
5 Steps for Making Your Own Wreath Frame
Making your own wreath frame is simple. All you need is a number of tree boughs, floral wire and a pair of pruning shears. And this tutorial, of course! Let me walk you through the process!
Step 1: Choose Wood Types Suitable for Wreath Frames
If you have trees growing on your land, you can go out and collect your boughs (or saplings) for wreath making, so long as they’re the right type!
Cedar, willow, dogwood, poplar and birch are all excellent options. But stay away from tree types that release resin (pine, spruce, fir) or have sticky buds (like cottonwood). Why? Because if your wreath is hanging against a wall, window or door, these boughs will likely leave resin or sap behind. And it’s very difficult to get off!
How to make a wreath form for free (with foraged materials)
0