Today I’m sharing how to make a wreath from garland. This is the perfect, festive Christmas craft that is easy and affordable to make!
I had a bit of an “iced” theme tossed into our casual homemade Christmas this year. From the iced berries on our tree to the wreath that’s hanging on our kitchen cabinet, “iced” was a little here and a little there.
You may have noticed this too! Those big, beautiful Christmas wreaths can sometimes be really expensive… especially the ones I’m always drawn too.
But, I was determined. And so I started thinking of ways I could still create a really beautiful wreath, but on a budget.
Garland wreaths are a fun and easy craft project that allow you to create a custom wreath for your home. With just a few simple supplies, you can make a beautiful wreath out of garland that will impress your family and friends. In this article, I’ll provide a step-by-step guide to making a garland wreath, as well as tips on how to customize your wreath and make it look professional.
Supplies Needed
Making a garland wreath is simple and only requires a few supplies
-
Garland – The main component of your wreath! Choose a garland made of greenery, ribbons, beads, or other materials you like. Make sure you have enough to wrap around your wreath frame.
-
Wreath frame – A circular wire frame that will give structure to your wreath Get one 12-18 inches across.
-
Floral wire or pipe cleaners – To attach the garland to the frame.
-
Decorations (optional) – Items like ribbon, pinecones, ornaments etc. to embellish your wreath.
-
Scissors – For cutting garland and wire.
-
Pliers (optional) – Helpful for twisting wire tightly.
Step-by-Step Instructions
Follow these simple steps to create your garland wreath:
1. Form the Base Shape
Bend your wreath frame into a circular shape Twist the ends together securely with floral wire or pipe cleaner,
2. Wrap the Garland
Begin wrapping your garland around the wreath frame, keeping it tight as you go. Every 6-12 inches, use floral wire or pipe cleaner to attach the garland to the frame. This will keep it neat and prevent slipping.
3. Hide Ends and Attachments
When you’ve gone all the way around, trim any excess garland so the ends meet cleanly. Then tuck the ends into the wreath to hide them. Also hide any pipe cleaners or wires attaching garland by tucking them under.
4. Fluff and Shape
Once wrapped, fluff and shape the garland so it looks full and even. Fill any gaps by re-positioning pieces.
5. Embellish (Optional)
Now’s the time to embellish with decorations! Accents like ribbon, pinecones, bells and more can be wired or tied onto your wreath anywhere you like. Get creative with colors and textures!
6. Hang Your Wreath
Add a hanging loop to the back with wire and hang your finished garland wreath on a door or wall. Step back and admire your handiwork!
Design Tips
Follow these tips to make your garland wreath look professionally designed:
-
Mix textures by using ribbon, beads, pinecones etc. along with greenery for interest.
-
Incorporate seasonal elements like poinsettias or pumpkins for holidays.
-
Cluster decorations in small groups around wreath rather than spacing evenly.
-
Use color theme and vary sizes/shapes of embellishments for visual appeal.
-
Accent with a pretty bow or bouquet at bottom or top of wreath.
-
Light it up with battery-operated string lights wrapped throughout.
Ideas for Garland Wreaths
The great thing about garland wreaths is how versatile they are. You can create one for any season, theme or occasion! Here are some ideas:
Holiday Wreaths
-
Christmas – Use evergreen garland with red berries and pinecones. Accent with ribbons, ornaments, bells.
-
Halloween – Make it spooky with black garland and creepy embellishments like spiders and bats.
-
Easter – Pastel ribbons and faux eggs and flowers make a charming spring wreath.
Seasonal Wreaths
-
Fall – Garland with orange and yellow leaves, mini pumpkins and gourds feels autumnal.
-
Summer – Bright floral garlands pop against lemons, seashells and sunflowers.
-
Winter – Sparkling silver or white garland with snowflake accents evokes winter wonder.
Everyday Wreaths
-
Rustic – Twigs, burlap and woodsy elements like pinecones create an earthy look.
-
Tropical – Create a beachy vibe with garlands of palm fronds, starfish and seashells.
-
Modern – Sleekly designed with monochromatic color scheme for a contemporary look.
The options are endless when making a garland wreath! Use your imagination and favorite materials to design a custom wreath that suits your style. With just a few supplies and following the easy steps, you can quickly DIY an elegant wreath out of garland.

How To Make A Wreath From Garland
While wandering the aisles of Hobby Lobby, an idea struck and I couldn’t load my cart up fast enough! Those big, beautiful wreaths may have been out of my budget, but the garland wasn’t.
I knew I could create a large full wreath for half the price of what the other ones were! And I did just that!
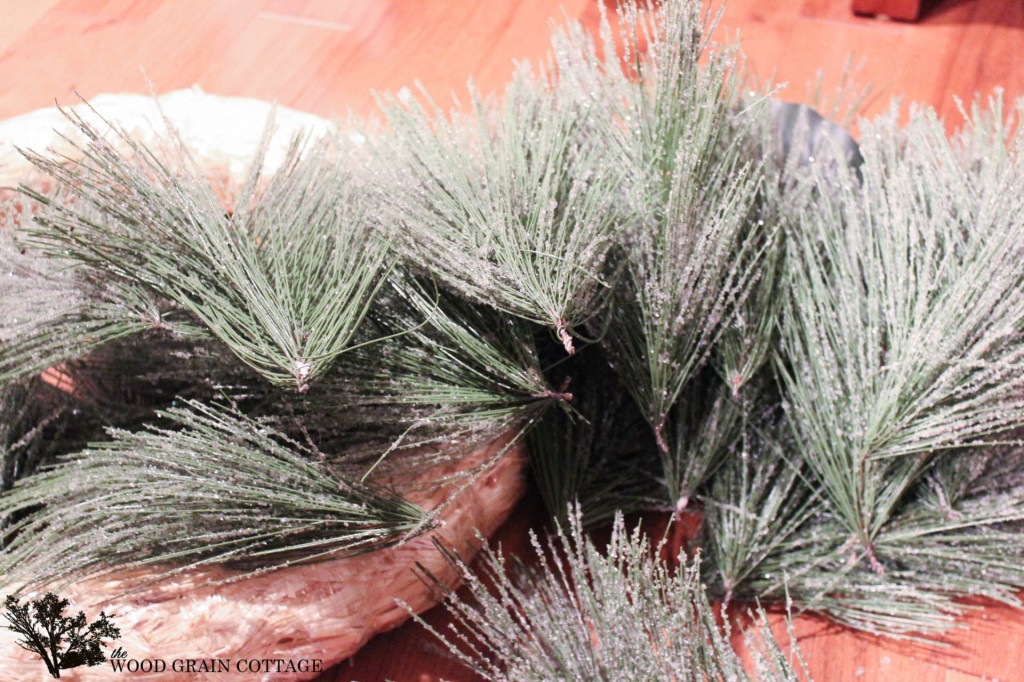
I started with a big strand of iced garland, which I bought at Hobby Lobby while it was 50% off…

Next, I used a pair of needle nose pliers and removed all the icy bundles…
Then, after trial and error with the straw wreath form, I bought a green styrofoam wreath form…
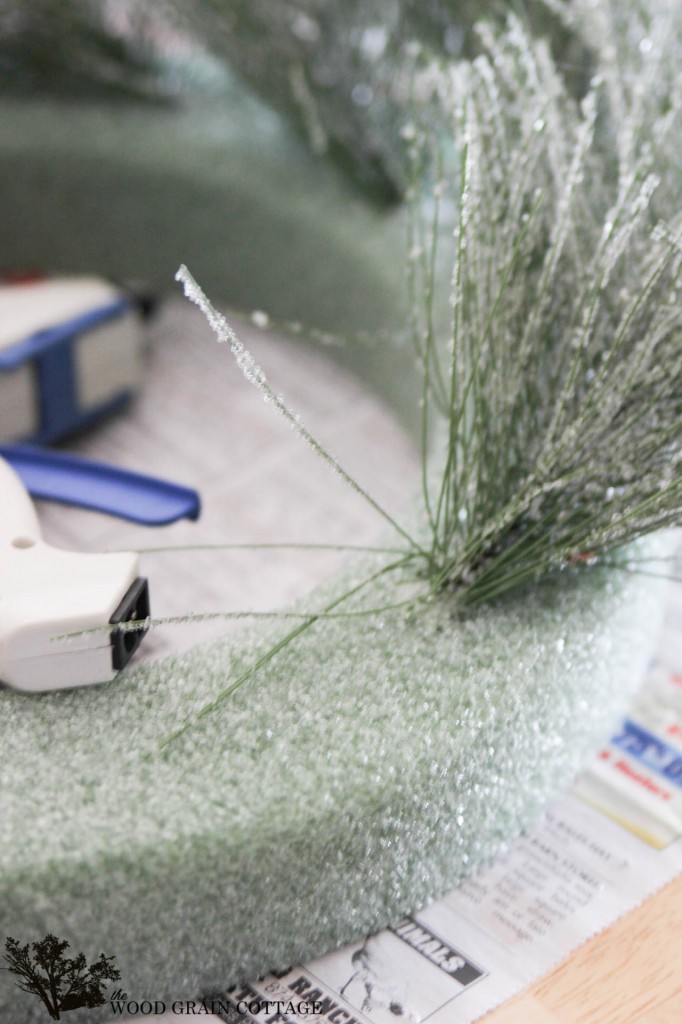
I simply shoved the metal end of the greenery into the wreath form as far as it would go and then hot glued the heck of it with my portable hot glue gun! (Seriously, if you don’t have one of these, you need one! This one is like mine!)
I started on the top, then moved to the side…
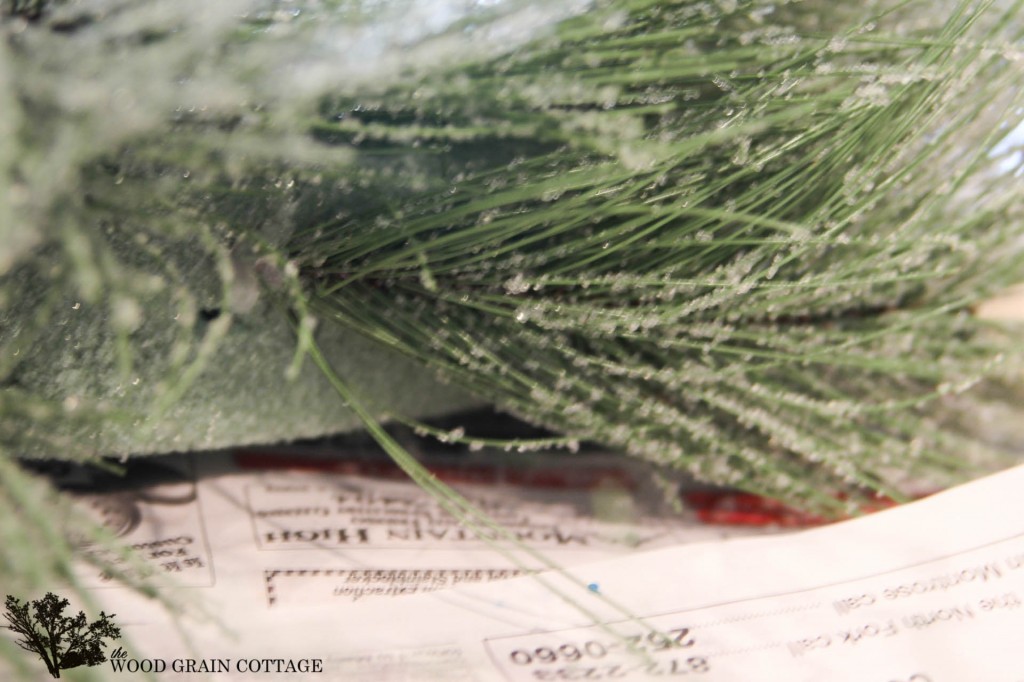
And I didn’t have to worry about the wreath form peeking out since it matched the color of my iced branches. Score!

I just kept adding and gluing the branches until it was completely full…

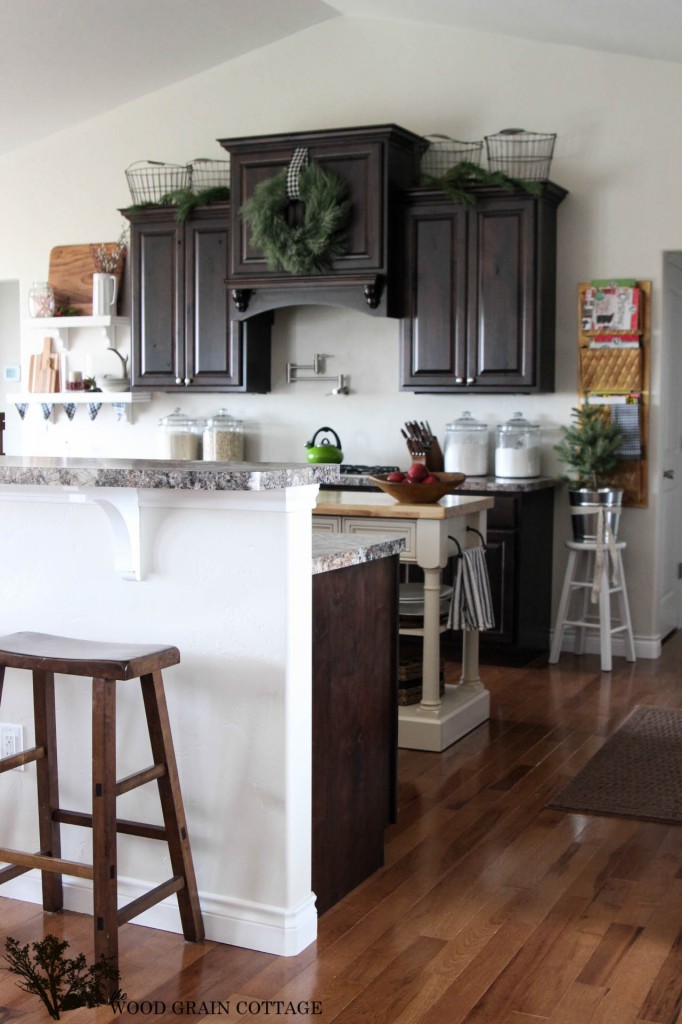
Then I just wrapped a bit of my grapevine wire around the wreath and used that to hang the wreath over our cabinet door. I just covered the grapevine wire with the plaid ribbon. Simple!
I love how it looks in the kitchen!

And I love how full the wreath is… and it seriously looks real!

I also love that this was such an easy, affordable craft!

How to make 2 different greenery wreaths with garland! Easy wreath DIY tutorial
FAQ
How to make a wreath without a form?
All you need is florist wire to secure branches together, pruners and wire snips. If the plant material is very bendy, such as weeping blue atlas cedar, just wire overlapping branches together in one long, 6-to-8-foot strand and then coil it into a circle and wire the layers to hold its wreath shape.
How do you make a wreath for beginners?
- Build a Bouquet or Bundle. To begin making a wreath, you first begin by making a small bouquet or a bundle of greenery and decorative items that look good in a small bunch. …
- Add Bouquet to Wreath Form. …
- Repeat Until the Wreath is Full. …
- Add Final Bundle & Fill In the Gaps. …
- Cut & Secure Wire. …
- Add Decorations.
How long to soak garland before hanging?
Tip 1: Soak Your Garland or Wreath Before Hanging Essentially, give your greenery a long, cold bath. Put the garland in the tub and fill with enough water to cover the greens. Let soak for 12-24 hours. There’s a great in-depth soaking tutorial here.