This shop has been compensated by Collective Bias, Inc. and its advertiser. All opinions are mine alone. #CreateWithCommand #CollectiveBias Now that my kids are a little older, they are really starting to get into the holidays. With Christmas right around the corner, I wanted to create a cute, inexpensive and kid-friendly craft. I created this DIY Christmas garland using paint sample cards from the local hardware store.
I love this craft idea because it is so easy to make, even my kids could get in on the action. You only need a few items to create this adorable DIY Christmas garland. Plus, this craft is totally adaptable to your style. If you don’t celebrate Christmas, you could turn this into a winter craft. You could even wait until Valentine’s Day and make a mini-heart garland using the same idea.
How to Paint Beautiful Christmas Garlands for Your Home
The holiday season is fast approaching, which means it’s time to start decorating! Christmas garlands are a classic way to add festive flair to your home. Whether draped across the mantel, wrapped around a staircase railing, or adorning the Christmas tree, garlands instantly impart a celebratory spirit. But plain greenery garlands can become boring after a while. An easy way to spruce them up is by giving them a fresh coat of colorful paint. Painted Christmas garlands are fun, inexpensive, and can match any decor style.
Supplies Needed
Painting garlands is an easy craft that requires minimal supplies. Here’s what you’ll need:
-
Garland base – Purchase plain green garland or use an old one You can also upcycle ribbon, rope, string lights, etc
-
Acrylic craft paint – Works best Have a few color choices on hand
-
Sponge brushes – Disposable foam brushes to apply paint. No cleanup required.
-
Paint palette – A plate or tray for pouring out paint colors.
-
Newspaper – To cover work surface from drips and splatters.
-
Clothespins or clips – To secure garland for painting if needed.
Optional items that can add interest:
-
Glitter, glitter glue, glitter spray paint
-
Fabric scraps, raffia, ribbons to attach
-
Hot glue gun
-
Clear acrylic sealer spray
With this basic DIY painting kit, you’re ready to create!
Instructions
Follow these simple steps:
-
Prep the garland: Cut to desired length if needed. Consider final display spot. Use clothespins/clips to secure garland to a board or surface if painting the entire length.
-
Select paint colors: Choose 2-4 acrylic craft paint colors that complement your decor. Traditional red and green always work, but get creative with pink, teal, silver, gold, white, blue, etc. Pour out paints onto disposable palette. Thin with a little water.
-
Paint the garland: Dip a sponge brush into the first color and dab or lightly brush onto garland working in sections. Let some base garland show through. Switch colors as you work down the garland, overlapping colors. For solid garlands, fully brush on one color then switch as you go. Make some sections denser with paint for an ombre effect.
-
Let paint dry fully before moving or hanging the garland.
-
Optional embellishing: Add glitter accents over base paint. Attach fabric flowers, bows, feathers, ornaments with hot glue. Outline painted shapes with a contrasting paint color. Highlight with metallic pens. Spray with acrylic sealer when completely dry to seal in paint.
Display Ideas
Now it’s time to show off your fabulous creation! Here are some great ways to display painted Christmas garlands:
- Drape above fireplace or mantle as a focal point
- Wind around stair railings or bannisters
- Frame doorways, windows, or archways
- String along kitchen cabinets or shelves
- Outline bookshelves and entertainment units
- Adorn the Christmas tree – weave through and around branches
- Hang as festive backdrop for holiday photo sessions
- Get creative with other display spots!
Paint several garlands in different styles to decorate multiple areas. Let your imagination run wild with possibilities!
Inspiring Painted Garland Ideas
Look to these fun themes and concepts to spark your creativity:
-
Candy Cane – Traditional red and white stripes are easy to paint. Add polka dots!
-
Plaid – Checkerboard or buffalo plaid patterns in red, black, and white. Freehand or use painter’s tape.
-
Monochromatic – Paint a single garland all one color with tonal variation. Soft blue or ivory is soothing.
-
Snowy Pine Branches – Use white and silver paints to resemble snowy pine boughs.
-
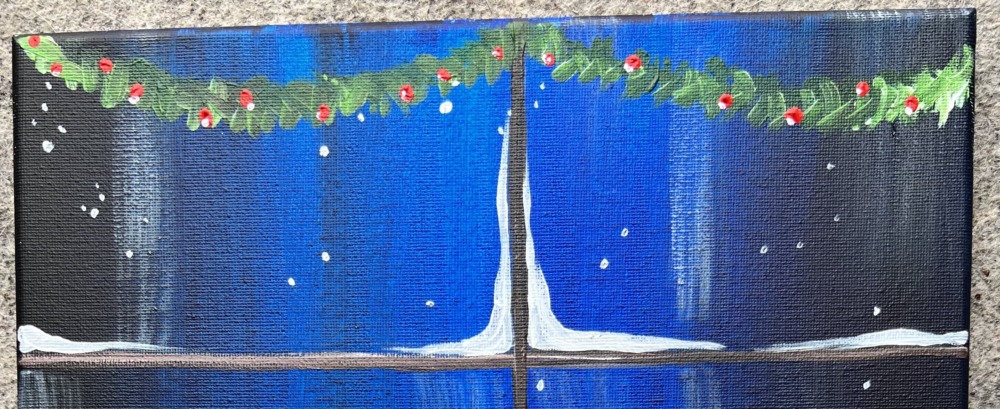
Holly Jolly – Paint green leaf shapes, then dot on red berries for a holly garland.
-
Gnome Homes – Paint colorful mushroom houses for a festive gnome village garland.
-
Joyful Words – Paint “Joy”, “Peace”, or “Noel” in flowing script lettering.
-
Ornaments – Paint different ornament shapes like bulbs, snowflakes, stars, etc.
-
Woodland Winter – Whites, silvers, blues with glitter accents for a magical snowy forest.
Let the holiday creativity shine bright! Painted Christmas garlands add a personalized festive touch to your home.
How to Make the DIY Christmas Garland
 To make the garland, all you need to do is trace the shapes on the paint sample cards and cut them out. I tried to get two shapes out of each paint sample card, when possible. Once you trace the shapes, just cut them out.
Once the shapes are all cut out, you can punch a whole at the top of the shape. If you make larger shapes, I’d suggest poking two holes in the top so you can weave the shapes through. In hindsight, I wish I would have made larger shapes to keep all of the shapes hanging in the same direction. Only have one hole on top meant the shapes sometimes flipped over. If I had punched two holes at the top, it would have stayed put a bit better.
After you’ve punched all the holes, decide on what pattern you’d like your shapes to follow. I laid mine out on a table in the order I wanted them and then strung each shape onto the twine. Once all of your shapes are on the twine, now it’s time to prep for hanging.
What You Need to Make DIY Christmas Garland Using Paint Sample
 To make the DIY Christmas garland, you only need a few items.
- Paint Sample Cards
- Shapes (I used these shapes, but you could also use cookie cutters or any other holiday shapes you like)
- Scissors
- Hole Punch
- Pen or Pencil
- String, Ribbon or Twine (I used gold and white twine from the craft store)
To get the paint sample cards, you can visit any hardware or craft store that sells paint. You can choose whatever color samples you like best to go with the shapes you’ve selected. I chose red, green and brown samples, but I wish I would have also gotten some yellow samples for bells or stars, and maybe some blue samples for ornaments or snowflakes. Be creative and don’t be afraid to add more colors and shapes!
How to Paint a Loose and Easy Watercolour Winter Garland
0