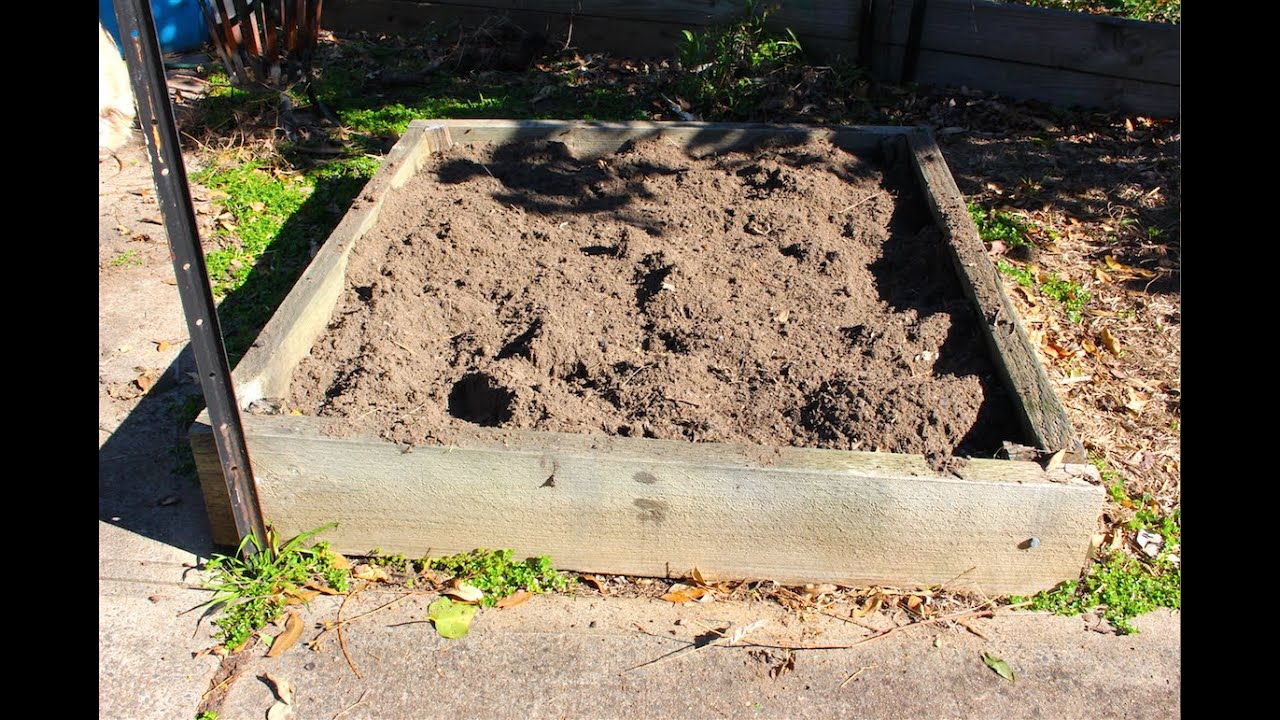
There are many instances where we would need to take an old garden bed (or not so old, but unused for quite some time) and get it back in shape and ready for planting! In most cases, this is nothing short of hard work, but honestly- once you et it done – it’s somewhat smooth sailing afterwards. In collaboration with Fiskars, I’ll show you how to take an unruly garden bed ridden with weeds to a flourishing bed ready to produce amazing harvests. Are you ready?
Preparing your garden bed is one of the most important steps to ensure you have a successful and bountiful vegetable garden each year. Proper preparation helps create the ideal environment for seeds and seedlings to thrive. With some planning and elbow grease, you’ll have your garden bed ready for planting in no time
Choose the Right Location
When starting a new garden, selecting the right spot is key Vegetables need at least 6 hours of direct sunlight per day, so choose an area that gets plenty of sun. Check for buried utility lines beforehand so your garden doesn’t get dug up later And mark off the exact dimensions with landscape paint so you know the boundaries.
Improve the Soil
Good soil is the foundation of every productive garden. Here are some tips for prepping your soil:
-
Remove grass weeds and debris. Cover the area with wet newspaper to smother existing vegetation.
-
Test the pH. Most vegetables prefer slightly acidic soil with a pH between 6.0-6.8. Add lime to raise pH or sulfur to lower it.
-
Loosen the soil by tilling or double digging to a depth of 8-12 inches. Break up large clumps.
-
Mix in 2-4 inches of compost or well-aged manure. This adds nutrients and improves drainage.
-
Rake thoroughly to create an even and smooth bed, removing rocks or debris.
-
Consider building a raised bed if drainage is poor. The soil warms faster for earlier planting too.
Make Permanent Beds and Paths
Creating permanent beds and paths in your garden has many benefits compared to tilling up the space each year:
-
Less work prepping beds every spring. Just pull back mulch and start planting.
-
Prevents soil compaction from walking in beds. Keeps soil loose.
-
Maintains soil structure by not tilling. Promotes soil health.
-
Looks neat and organized. Defines the planting space.
Beds can be mounded rows, framed raised beds, or any structure that keeps its shape. Leave 1-3 feet between beds for paths.
Apply a Protective Layer of Mulch
Maintaining a 3-4 inch layer of mulch over beds is one of the best things you can do:
-
Suppresses weeds which cuts down on laborious weeding.
-
Conserves moisture so you water less.
-
Insulates soil and keeps it cool.
-
As it breaks down, adds nutrients to soil.
Use shredded leaves, straw, hay, wood chips or other organic materials. Reapply more mulch as needed.
Follow Crop Rotation Practices
When planning where to plant vegetables each year, follow crop rotation principles:
-
Don’t plant the same family in the same spot two years in a row. This depletes nutrients and increases disease.
-
Rotate by planting heavy feeders (corn, broccoli) after light feeders (lettuce, beans).
-
Alternate shallow rooted crops with deep rooted ones.
-
Move plants to a different bed each season. Return them to their original spot every 3-4 years.
Crop rotation prevents long term pest and disease issues. Design your garden map accordingly.
Make Succession Plantings
Maximize your growing space by making succession plantings:
-
Follow quick growing cool weather crops like lettuce and spinach with warmer weather crops like beans and squash.
-
Replant emptied spaces several times throughout the season. For example, follow early zucchini with late summer beans.
-
Stagger plantings of the same crop every 2-3 weeks for a continuous harvest. Try bush beans, beets and carrots.
With a plan for succession planting, you can grow a lot more food!
Give Plants Enough Room
It’s easy to cram too many plants together, but overcrowding causes problems:
-
Plants compete for water, light and nutrients which reduces growth.
-
Air circulation is restricted which encourages fungal disease and pests.
-
Makes harvesting and maintenance like weeding difficult.
-
Reduces yields.
Follow seed packet spacing guidelines, allow extra room for plants to fill out, and plant in rows to maximize production.
Prepare Earlier for Earliest Planting
You can get a head start on the growing season by prepping your beds weeks ahead:
-
Remove mulch and begin prepping soil 4-6 weeks before your last expected frost date.
-
Cover prepared beds with clear plastic to warm the soil. Remove it a week before planting.
-
Use cold frames or low tunnels to allow earlier planting. Give plants extra protection.
With some extra effort, you can plant crops several weeks earlier than normal. Get your spring garden off to the fastest start possible.
Prepping your garden properly takes some work, but the effort you put in will be rewarded all season long. Good soil preparation, crop planning, and maintenance will lead to a thriving, productive vegetable garden. Follow these tips and you’ll be on your way to gardening success!
How to Plant Spring Seedlings & Seeds
If you have some experience gardening then you know that some vegetables are best planted as plants (or seedlings) and some grow better when they’re sown as seeds.
If you’re not sure whether you need a seed or a plant for the vegetables you’re growing, this article breaks it all down for you: How to Know When to Sow a Seed or Plant in Your Garden.
How I prep a garden bed depends on what I’m planting in it and what the weather has been in my garden. Let’s start with how to plant a seedling, otherwise known as a baby plant.
How to Plant a Seedling in Your Garden
I have two ways for you to learn how to plant a seedling:
You can read this article which takes you through the eight steps I use for planting every time: 8 Steps to Expertly Planting a Seedling.
Or watch the accompanying video that I filmed in my garden demonstrating planting a seedling in real-time. The video talks a bit more about how I don’t dig or flip any of my soil before planting. I simply pull the mulch aside and plant. So easy!
How to Sow Seeds in Your Garden
In the article I wrote about above regarding planting seedlings, I show how I usually leave the mulch in place when I’m planting a seedling instead of taking it off the garden bed.
When you’re planting seeds you’ll want to approach it a little differently by removing the mulch that’s covering the garden bed before you get started planting.
This is a case where it’s okay to have some bare soil in your garden for a short period of time while you’re waiting for seeds to germinate.
I think the best way to learn how to plant seeds is to watch me actually do it in my garden in the accompanying video. I explain how to prep the soil, figure out the spacing, and more.
Watering Newly Planted Seeds & Plants
Once you have your baby plants and seeds tucked into your garden don’t ignore them! When they’re young they can be vulnerable, so you’ll want to offer them some extra loving care, especially with watering.
Newly planted seedlings don’t have an established root structure yet, so it’s going to be more difficult for them to forage for water in the garden soil.
You should be paying attention to the weather after planting seedlings. If you’re getting regular spring rains like my garden does Wisconsin, you might not have to water much.
But, if it’s unseasonably hot after you plant them, or there’s an extremely windy day, go out and give them some extra water while they’re working hard to settle into your garden.
Newly planted seeds need even more attention than seedlings. In order for them to germinate, you must keep them evenly moist for anywhere between 5-21 days depending on the vegetable you planted. Some seeds germinate much more quickly than others.
I suggest watering newly planted seeds every 1-2 days depending on the weather. On a day where your garden receives rain, you won’t have to water. If it’s hot and sunny water you should water more frequently.
Because seeds are so small you only need to keep the top few inches of soil moist for them to germinate.
Once they’re established, most vegetable plants only need about 1 inch of water per week, but this definitely depends on what kind of soil you have and where you live. Read more: Secrets to Watering Your Vegetable Garden the Right Way.
When I used to have a plot in a community garden, every spring I noticed my fellow gardeners spending lots of unnecessary time prepping their spring garden beds for planting.
This does not have to be your gardening reality!
If you create a garden with permanent beds and paths and keep it weeded and mulched throughout the year, you’ll be able to waltz into your garden in spring and just start planting. No hours of weeding, bed layout or soil prep needed.
Remove All Unwanted Weeds
More than likely, you’re starting with a bed that is covered with weeds. The first step is getting rid of them. Weeds are plants too and although they don’t need much – they can depleted your soil of nutrients and compete with with your food you wish to grow. We always want to remove them and keep them at a minimum. Depending on the native weeds in your area this process can take anywhere from 10 minutes to hours. The best approach is to find a system to removing weeds and remove all weeds by the root. In this instance, I battle the undefeated crab grass and it’s imperative to remove all of this weed by it tap root. I used Fiskars Weeder to unroot the weed and/or cut it at the root. I’m pretty sure this tool cut my weeding time in half.
5 Steps to Prepare Raised Beds For Spring Planting! // Garden Answer
FAQ
How do you prepare the ground for a garden bed?
- Remove debris: Clear the area of rocks, weeds, grass, and any other debris.
- Consider weed barriers: If you’re installing raised beds, consider using a weed barrier fabric or cardboard to prevent weeds from growing through the bottom.
- Remove existing vegetation: If you’re planting directly into the ground, remove any existing vegetation, including sod or grass, to prevent competition for nutrients and water.
What is the best way to prepare a garden bed?
- Mark out the beds.
- Remove existing lawn and plants.
- Work the soil.
- Do a soil test.
- Improve your soil.
What do I add to my garden bed before planting?
When filling a raised garden bed, consider adding organic matter like compost, well-rotted manure, and aged compost to enrich the soil. These amendments improve soil structure, fertility, and moisture retention, promoting healthy plant growth.
How do you prepare a garden for beginners?
- Consider What to Plant.
- Pick the Best Garden Spot.
- Clear the Ground.
- Test and Improve Your Soil.
- Prepare Your Planting Beds.
- Pick Your Plants.
- Start Planting.
- Water at the Right Time.
How do I prepare my garden beds for planting vegetables?
Adding compost and other amendments, tilling or turning the soil, and mulching are all important steps to prepare your garden beds for planting vegetables. Once you get into the habit of doing it every year, it’ll be quick and simple.
What does preparing a new garden bed mean?
Preparing your new garden bed means creating a healthy growing environment for your vegetables. Mainly, preparing a new garden bed means preparing the soil. The procedure can be long and exhausting, especially if done manually, but the rewards will be worth it if you take the time to do it right.
How do I get my beds ready for planting?
Below are the steps you should take to get your beds ready for planting. Step 1 – Remove weeds and grass: The first thing to do is to remove all of the established weeds and any grass that’s creeping into the beds. You don’t need to get every single tiny little weed, just pull the large ones.
When should I start preparing my raised beds for planting?
Late winter is the ideal time to begin to prepare your raised beds for planting in the spring – because before you know it – garden season will be here! Taking the time to improve and prepare your soil early can make a huge difference in just how well your plants grow later this spring and summer.
How do you make a new garden bed?
Turn the soil. Use a tiller, spade/shovel, or garden fork to turn the soil over. A spade or shovel may be the best to use for a very new and firm bed. The soil should be damp, but not wet when you are working with it. It should break apart, look moist, and not stick to your tools. If the soil is not moist, you can add water with a garden hose.
How do I prepare my Spring Garden for planting?
One of the best ways to cut down on the time it takes to prepare your spring garden for planting is to keep it weed-free. And the best way to keep those weeds at bay to make sure your garden beds and paths are mulched all year round.