Putting plants into the ground is probably one of the things I enjoy most about spring and early summer. I grow my tomatoes from seed so it’s somewhat of a relief to get the plethora of young seedlings out of my house and into the dirt!
Knowing how to correctly transplant your tomatoes will set your plant up for success and a bountiful harvest. Transplanting is so much more than digging a hole, plopping your plant inside, and hoping for the best.
Here are the 7 steps I use for transplanting my tomatoes each year. After a lot of years of trial and error, I have found these to be the most important actions and considerations you can take. But before we dive into those steps, first things first…
Every single year in my local gardening groups, I see people who eagerly plant their tomatoes when temperatures start to warm up. Invariably, after a week or two of temperatures in the 70s or low 80s, we have 3 weeks of temperatures in the 50s with heavy winds. The gardeners who were so full of joy are now a ball of stress as they see their young plants struggling in suboptimal conditions.
So although the general rule of thumb for planting warm season crops like tomatoes is to plant once you’re 2 weeks past your final frost date, there are some nuances to consider.
Tomatoes like to be outside once soil temperatures have warmed to 55-60 degrees. This usually happens when nighttime temperatures don’t fall below 60 and daytime temperatures are well into the upper 70s.
In my area, Mother’s Day is a key milestone for planting tomatoes outside even though we’re technically far past our frost date. If you’re not sure when to plant outside, I encourage you to join local gardening groups and ask! Gardeners are generally a friendly lot and are eager to share their wisdom, especially when it can save you from a lot of heartache.
Transplanting tomato plants is an important step to ensure you get a bountiful tomato harvest. With the right techniques, you can help your tomato plants thrive and produce lots of delicious tomatoes In this comprehensive guide, we’ll walk through the key steps for transplanting tomato plants successfully
When to Transplant Tomatoes
Timing is critical when it comes to transplanting tomato plants. If you transplant too early or late it can stress the plants and negatively impact yields. Here are some tips on timing
-
Wait until after the last frost date in your area Tomato plants are very sensitive to cold temperatures Transplanting when it’s too cold can shock the plants.
-
Ideally, transplant when soil temperatures reach 60-65°F. This usually occurs 4-6 weeks after the last frost. You may need to use a soil thermometer to check the temperature.
-
Don’t transplant too late either. If the plants get rootbound in their pots, it will stunt growth after transplanting.
-
In most climates, transplanting in late April to mid May is ideal. Adjust timing based on your local conditions.
Selecting Tomato Plants for Transplanting
Not all tomato seedlings are created equal when it comes to transplanting. Here’s what to look for:
-
Choose stocky seedlings with thick stems and robust, green leaves. Avoid thin, leggy plants.
-
Select plants that are 4-6 inches tall. Larger plants can suffer more transplant shock.
-
Look for healthy white roots filling the container but not getting rootbound.
-
Determinate/bush varieties can be planted closer together than indeterminate/vining types.
-
Pick disease-resistant and healthy tomato varieties suitable for your climate.
Preparing Tomato Transplants for Planting
Before transplanting your tomatoes, it’s important to properly harden them off:
-
Start hardening off plants about 1-2 weeks before transplanting.
-
Move plants outside gradually to acclimate them, starting with just a few hours a day.
-
Slowly increase the time outside over a week. Bring plants in at night if it’s cold.
-
The last few days, leave plants outside overnight but protect from frost. Avoid exposure over 85°F.
-
Harden off plants in a sheltered, partially shady spot, protected from wind and rain.
-
Reduce watering but don’t allow plants to wilt. Hardening off helps thicken stems and cuticles.
Choosing the Right Transplant Location
Picking the optimal spot for your tomato transplants is critical. Things to consider:
-
Tomatoes need at least 6-8 hours of full sun daily. Anything less will reduce yields.
-
Good airflow and spacing is important to prevent disease. Avoid enclosed, humid areas.
-
Rotate planting location each year to prevent disease buildup in soil.
-
Plant companion crops like basil, onions or marigolds which deter pests.
-
Ensure the site has fertile soil with good drainage. Amend if needed.
Preparing the Soil for Transplanting
Preparing the soil properly before transplanting is key to tomato success. Here’s how:
-
Loosen soil to a depth of 12+ inches with a shovel, rototiller or garden fork. Break up large clumps.
-
Mix in 2-4 inches of compost or well-aged manure to enrich the soil.
-
If soil is dense, add perlite or vermiculite to improve drainage.
-
Rake smooth any furrows or low spots so plants aren’t lower than soil level.
-
Consider putting down black plastic mulch to warm soil and prevent weeds.
-
Just before planting, sprinkle fertilizer like tomato tone in planting holes.
How to Transplant Tomato Plants Step-by-Step
Once your tomato plants are hardened off and your soil is prepped, it’s time to transplant! Follow these steps:
Dig Generous Holes
- Dig holes 12-18 inches wide and deep where plants will go.
- Space holes 18-36 inches apart depending on variety.
- Loosen soil at bottom of holes so roots can spread easily.
Add Fertilizer to Holes
- Put a couple handfuls of granular fertilizer like tomato-tone in each hole.
- Mix some compost or worm castings in too.
- This gives young roots an immediate nutrition boost.
Remove Lower Leaves & Stems
- Carefully pinch off bottom 2-3 sets of leaves.
- You can remove lowest 2 inches of stem too.
- This allows you to plant deeper for a stronger root system.
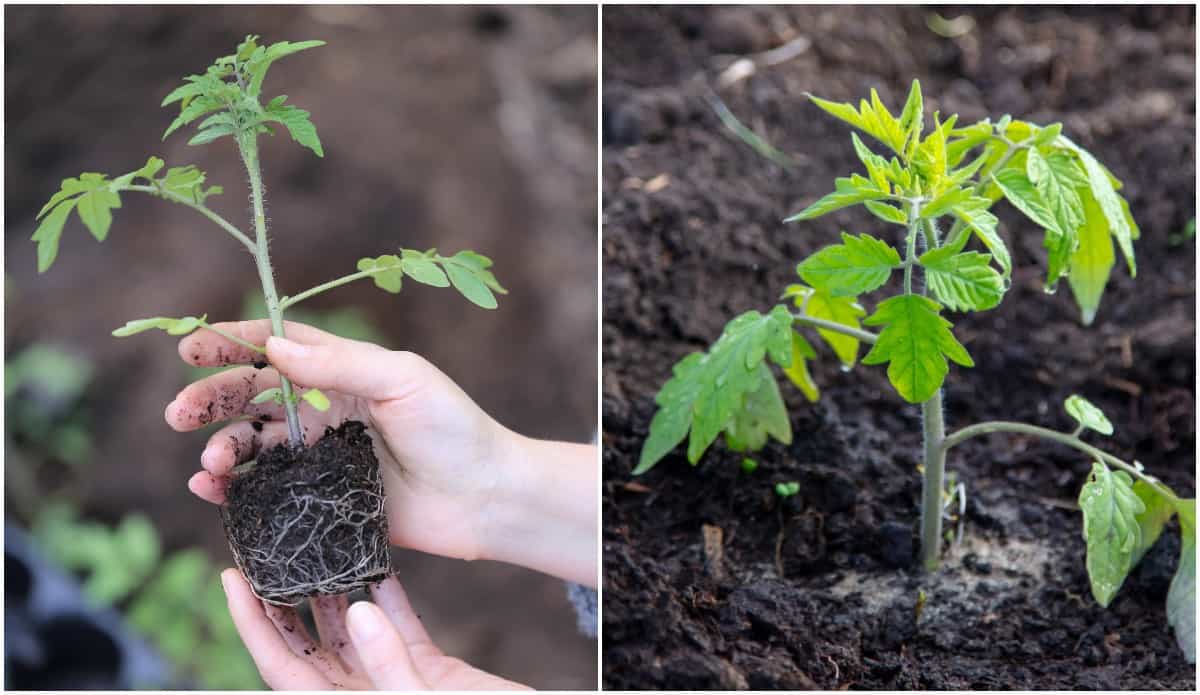
Place Plant & Backfill Soil
- Carefully place plant in hole slightly deeper than pot level.
- Fill soil in around stem and roots, tamping down gently to remove air pockets.
- Don’t let any roots be exposed; bury lower stem too.
Water Thoroughly
- Water slowly and deeply right after planting.
- Soak entire root zone to remove air pockets.
- Check that soil is moist 4-6 inches down.
Provide Support
- Put cages or stakes in place right after planting.
- Avoid damaging roots later when plants are larger.
- Support ensures plants grow upright and avoid damage.
Caring for Transplants After Planting
Proper aftercare ensures your transplants establish successfully:
-
Water transplants daily the first week, then 2-3 times a week if rainfall is lacking.
-
Use mulch like straw around plants to retain moisture and reduce weeds.
-
Shade transplants on very hot, sunny days at first to prevent wilting.
-
Protect from any late frost with covers, tents or fabric row cover.
-
Pinch off any flowers or suckers that form early to encourage root growth.
-
Fertilize weekly with something gentle like fish emulsion or compost tea.
Avoiding Transplant Shock
Even when transplanting carefully, some shock is common. Here are tips to minimize it:
-
Harden off plants well so they adjust to outdoor conditions.
-
Avoid transplanting during periods of heat, drought, heavy rain or frost.
-
Plant in the late afternoon or evening so plants aren’t exposed to hot sun immediately.
-
Bury plants a bit deeper than pot level to protect roots and lower stems.
-
Water transplants daily until they are well established.
-
Provide partial shade for newly transplanted plants.
-
Use transplant fertilizer and mycorrhizae products when planting.
Following proper techniques for transplanting tomato plants will set your garden up for success. Hardening off plants, preparing soil, and caring for transplants after planting are all key steps. Avoid transplant shock by planting at the right time when weather conditions are suitable. With a little patience and care, your tomato transplants will thrive and reward you with a bountiful harvest.
Step 1: Harden Off Your Plants
Before planting in the ground, carry out the process of hardening off by taking them outside to adapt to the environment.
Up until now, your tomato seedlings have lived in a very sheltered environment. Perfect indoor or greenhouse temperatures, ideal light exposure, and only the most gentle of breezes. This is a far cry from what your plants will experience outside. This is where hardening off comes into play.
Hardening off is a simple, but necessary process that allows your tomato seedlings to acclimatize to heat, wind, and sun. During this period, your young tomatoes will ‘grow up’ a bit. Their stems will thicken, leaves will reach out strongly, and roots grow more quickly. All of this helps the plant deal with temperature changes, strong gusts of wind, and direct sun without any problems.
The hardening off process should take a week or two. The longer you give your tomatoes to adjust, the healthier and stronger they’ll be when you finally plant outside.
Start by setting your tomato seedlings in a protected shady area for about an hour. The next day, put them in the same location, but for 2 hours. The day after that, you can let them experience a little bit of gentle morning sun. Gradually increase sun exposure and time outside each day. The idea is to introduce new things in manageable chunks that allow the plant to adjust in small ways each day.
A note on wind. It’s important to protect your young tomatoes from wind in the first week of hardening off. Too much wind too early will cause dramatic leaf curling. This can cause issues with growth since the leaves are not absorbing as much sun as they should.
After the first week outside, allow them to experience normal gentle wind currents, but move them immediately if you experience extreme wind gusts.
Step 3: Gently Prune Your Seedlings
Before transplanting, carefully trim at least one set of leaves from the bottom of the plant to bury it deeper into the ground.
Just prior to transplanting your tomato seedlings, take a few minutes to gently prune and clean up the plant. I always trim off at least one set of leaves to allow me to bury the plant a little deeper in the ground. If your seedlings are a bit on the tall side, feel free to trim off 1-3 sets of leaves as long as you leave 2-3 sets intact above the soil line.
Although it goes against all your basic instincts, this is also a time to pinch off any flowers that may have formed on your young seedling. At this stage, your plant needs to put all its energy into overall growth, root expansion, and foliage generation. Your tomatoes will start to flower again in no time.
Transplanting Tomatoes 101: Simple & Fast Method
FAQ
How do you prevent transplant shock in tomatoes?
An overcast day with calm wind is ideal for transplanting. If the weather doesn’t cooperate, be prepared to cover the plants immediately with garden fabric to protect them from windburn, sunburn and chilly temperatures. Even an hour or two of wind or hot sun is enough to cause harm.
How big should tomato plants be before transplanting?
Tomato seedlings should be transplanted from the seed starter tray when they have three sets of leaves and are about three inches tall. The plants should be transplanted to the garden when the last chance of spring frost has passed.
Should you water tomato plants after transplanting?
Water your seedlings heavily immediately after transplanting; then hydrate them only when the soil dries out.May 19, 2018
What do you put in a hole when transplanting tomatoes?
Exactly what I do too. Two cups of worm castings, 1/2 cup tomato tone, mix with back fill and water. You could also add a handful of rock phosphate.Feb 3, 2015