Living in the desert, growing your own food can seem daunting. But with a little planning and know-how, you can have a thriving vegetable garden right in your own backyard! Raised garden beds are the perfect solution for Phoenix gardens. They make gardening accessible, help you control growing conditions, and let you make the most of your space.
In this comprehensive guide, we’ll cover everything you need to know about raised beds from materials and construction to care and maintenance. By the end, you’ll be ready to build your own beautiful and productive raised bed garden in Phoenix!
What Are Raised Beds and Why Use Them?
A raised garden bed is simply a frame or container built above ground level and filled with soil. The frame keeps the soil contained, allowing you to provide the ideal growing environment for your plants.
Raised beds provide a number of advantages over planting directly in the ground:
- Better drainage and aeration since you can fill the beds with quality soil mixtures Phoenix soils tend to be very compacted with poor drainage
- Easier access without having to bend over or kneel as much. The height takes stress off your back.
- Allow for more control over the soil quality. You can fill your beds with nutrient-rich soil mixtures perfect for vegetables.
- Help prevent soil compaction since you don’t walk directly on the growing area.
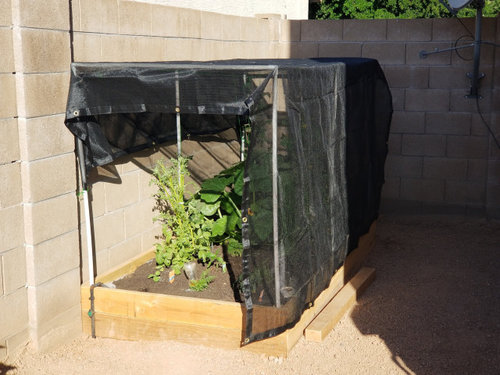
- Provide a barrier to pests like snails and slugs,
- Warm up faster in spring and stay warmer in winter than in-ground planting.
- Make gardening accessible for those with mobility challenges. You can garden right from a chair or wheelchair.
- Allow you to grow in places with bad native soil or contaminated soil. Simply build up clean soil in the frame.
- Keep plants organized and make care and maintenance easier compared to sprawling in-ground beds.
For these reasons, raised beds are ideal for Phoenix. They let you create a customized growing environment perfect for vegetables even in challenging desert soils.
Choosing the Right Site
When selecting the site for your new raised bed, there are a few important factors to consider:
Sun Exposure
Vegetables need at least 6-8 hours of full sun per day. Morning sun is especially valuable. If possible, pick a site with few shadows from buildings, trees or fences. South or west-facing locations are best for sun exposure.
Access to Water
Your raised bed will need regular irrigation, potentially daily during hot summer weather. Position it close to a spigot or invest in an automatic drip system. Group multiple beds together to make watering more convenient.
Air Circulation
Avoid placing beds right against a hot, south-facing wall or structure. Leave 1-2 feet of space for airflow to prevent overheating.
Convenience
Locate your raised bed somewhere you’ll see and visit often for frequent care and harvesting. Near a seating area works nicely. Easy access is key!
Soil Drainage
Make sure your site doesn’t collect standing water after rains. If needed, dig a gravel trench around the perimeter to divert excess moisture.
With a little planning, you can find the perfect spot for your raised bed garden even in a small Phoenix yard. Focus on sun, irrigation, airflow and convenience when selecting your site.
Choosing Raised Bed Materials
You can construct raised beds from a wide variety of materials like wood, plastic lumber, cinder blocks, bricks, stone and more. Consider the pros and cons of each when selecting materials:
Wood
Cedar and redwood are ideal choices for raised beds since they are naturally rot-resistant. Avoid using treated lumber which may leach harmful chemicals. Use 2×10 or 2×12 boards secured with galvanized screws.
Pros:
- Naturally long-lasting
- Easy to work with and customize sizes
- Attractive natural appearance
Cons:
- On the pricier side
- Requires periodic maintenance as wood ages
Plastic Lumber
HDPE and poly lumber provide a low maintenance option perfect for raised beds. Look for food-safe, BPA-free versions.
Pros:
- Completely maintenance-free
- Cost effective in the long run
- Doesn’t degrade or rot over time
Cons:
- Less attractive appearance for some
- Can become brittle and degrade over decades with UV exposure
Concrete Blocks
Using concrete masonry units (CMUs) is an affordable option for quick raised bed construction. Avoid using cinderblocks which may leach minerals.
Pros:
- Inexpensive and easy to source
- Long lasting
- Can be disassembled and reused
Cons:
- Heavy and difficult to move once assembled
- Not the most decorative option
Stone
Using natural stone can create an attractive, decorative raised bed though initial costs are higher. Granite, sandstone and limestone all work well.
Pros:
- Highly durable and decorative
- Excellent heat retention
Cons:
- Heavy and permanent once constructed
- Higher upfront investment
There are good options for every budget. Wood is attractive and versatile while plastic lumber provides maximum durability.
Figuring Out the Size
When planning your raised bed dimensions, consider:
- How much growing space you need
- Your site constraints
- Convenience of access on all sides
For newcomers to raised bed gardening, a 3×6 foot bed is a great starter size with room for around 10-16 vegetable plants depending on spacings. This allows you to gain experience without getting overwhelmed.
You can always expand and add more beds over time! Typical bed widths are 3 or 4 feet to allow easy access from the sides without stepping inside the bed.
Bed length is adaptable based on your space, but keep in mind that you need to be able to reach the center from at least one side. Anything beyond 6-8 feet makes that difficult. For large, permanent beds it’s helpful to include internal access points.
In terms of height, consider your own physical capabilities. Shorter 1 foot deep beds require more bending. For taller beds around 2-3 feet, most people can garden standing up comfortably. This reduces back strain.
Maximize your growing space while keeping the beds conveniently accessible when planning dimensions. Start small as a beginner!
Construction and Installation
Building your own raised beds from scratch is very rewarding, though you can also purchase pre-fabricated kits. Refer to our raised bed construction guide for step-by-step instructions and material requirements.
Here are some quick tips for a successful installation:
- Level the ground and remove all vegetation before setting up the frame
- Use galvanized hardware to resist rusting
- Double up corner posts for extra strength
- For taller beds, sink posts 1-2 feet into the ground for support
- Line the bottom with cardboard or hardware cloth to retard weeds
- Top off beds with at least 6 inches of quality growing mix
Take your time constructing the frame and make sure it’s level, square and sturdy before filling. This creates the foundation for many years of gardening enjoyment!
Filling With the Right Soil Mix
The key to growing thriving vegetables in raised beds is filling them properly with a light, nutrient-rich soil mix. Don’t just use native soil! A quality commercial blend or homemade mix with plenty of compost and organic amendments is ideal.
Look for a mixture of:
- Compost, leaf mold and other organic material to provide nutrients. Compost comprises up to one third of the total volume.
- Coarse sand, perlite or vermiculite to improve drainage and aeration. Aim for around 20%.
- Finely sifted top soil to provide the base. This will account for the remaining 40-50% of the mix.
- Additional organic fertilizers like alfalfa meal, kelp meal and bone meal. Follow package rates.
Alternatively you can purchase a high quality organic vegetable garden soil blend from a garden center. Load up your newly constructed raised beds with at least 6 inches of loose soil mix for vegetables.
Caring for Your Raised Bed Garden
With properly built and filled raised beds, much of the hard work is already done! Here are some tips for ongoing care:
- Irrigate daily during the growing season to maintain ideal soil moisture. Drip irrigation on a timer makes watering effortless.
- Apply 2-3 inches of organic mulch like wood chips, shredded leaves or straw around plants to retain moisture and suppress weeds. Replenish annually.
- Fertilize organically with compost tea, fish emulsion, worm castings or aged manure every 4-6 weeks to nurture plants.
- Repair aging wood frames with fresh boards and galvanized screws as needed to keep beds intact.
- Weed weekly to prevent competition, especially when plants are young and vulnerable. Weed by hand or use landscaping fabric.
- Renew soil annually each fall by blending in 1-2 inches of finished compost. This replenishes nutrients and organic matter.
- Control pests organically by hand picking, using row covers
Soils
You can make your own soil, or you can use a high-quality already prepared mix like:
Consider the size and growth habits of your plants. Plant the higher plants in the middle and the lower-growth plants on the outside. Consider succession planting so that you have an abundance of crops available throughout the season.
If you have more questions on how to design or plant a raised garden, stop into your local SummerWinds Nursery today and speak with one of our Trusted Garden Advisors!
Raised Beds and Their Benefits
Creating a raised garden is ideal for a number of reasons. Raised garden beds can be used for most types of plants—from seasonal edibles to annuals, perennials and small shrubs. Perhaps you have an area where the ground is difficult to dig. Maybe elevated garden beds would be beneficial for your tender back or knees. Or perhaps you just like the styling of raised planter boxes. Whatever the reason, DIY raised garden beds are easy to build and even easier to use! There are many other benefits, including: controlling soil conditions, better drainage, soil depth and limiting soil compaction. It also serves as a pest barrier and gets warm faster in the spring.
Raised garden beds can be made to fit any location and can even be built with supplies you may have laying around. Pre-made boxes are available for purchase and come in a number of sizes for your convenience. Some are metal—like Birdies Metal Raised Garden Beds, wood, or made from recycled materials. You can also make a DIY raised garden bed from rock, straw bales, old pallets cut down and lined with burlap and more… We recommend building a raised garden with cedar or redwood since they do not rot or break down like other woods.
The minimum height of a raised garden should be 1 foot. If you are using wood, you can use more than one plank to build taller raised garden beds or to create multiple levels for planting different types of plants. When designing your elevated garden beds, you can be as creative as you’d like and even incorporate a bench to sit on for easy garden maintenance and enjoyment.
Pick a location that will allow for 6 to 8 hours of sun daily; more sun in the winter and less sun in the summer. Consider the placement in terms of having easy access. If you will only have access to one side of your raised garden, a depth of no more than 2 feet is ideal.
9 Beginner Raised Bed Garden Mistakes to Avoid
FAQ
What is the best type of raised garden bed in Arizona?
We recommend building a raised garden with cedar or redwood since they do not rot or break down like other woods.
Is it cheaper to buy or build raised garden beds?
-
Cost per square foot:
Building your own raised beds typically costs much less per square foot than buying pre-made ones, especially if you can source scrap wood or use inexpensive materials like cinder blocks.
-
Customization:
Building allows you to tailor the size and design of your raised beds to fit your specific space and gardening needs.
-
Labor vs. Cost:
While building requires time and effort, the initial cost of materials is usually much lower than buying pre-made beds.
What vegetables should not be grown in a raised bed?
- Corn: Competes with tomatoes for nutrients when planted close together
- Potatoes: Can impact the growth cycle of tomatoes, which are planted later in the season
- Squash: Can get too large and take up too much space in a raised bed
- Mint: Can spread out above and underground, pushing out younger plants
- Fruit canes: Might not be ideal for raised beds
- Sprawling crops: Might not be ideal for raised beds
- Invasive herbs: Might not be ideal for raised beds
- Crops with large root systems: Might not be ideal for raised beds
What do I put in the bottom of a raised garden bed?
-
Organic matter:
The primary focus should be on organic materials that will decompose and improve soil quality.
-
Drainage:
Ensure good drainage by adding a layer of coarse material like gravel or small stones if needed.
-
Weed control:
Consider using cardboard or landscape fabric to prevent weeds from growing up from the ground below.
-
Pest protection:
If you have issues with burrowing pests like voles, you can add a layer of hardware cloth at the bottom for added protection.