An artfully arranged band of bricks handsomely defines the boundary between grass and garden. And if you install the bricks flush with the ground, they also serve as a handy mowing guide: You can run the wheels of a push mower right on top of the border edging and pretty much dispense with the string trimmer.
Some people set the pavers in concrete, but there’s no need if you make a proper dry bed. That means digging down past the loamy topsoil to prevent frost heave from disrupting the bricks come winter; once you do, laying a bed of compacted paver base and stone dust gives the bricks a solid foundation and provides drainage while preventing weeds or roots from coming up.
Follow along as This Old House senior technical editor Mark Powers guides you through the installation of this functional yard accent.
Red brick is a timeless material that can add structure and sophistication to garden beds. Using red brick as an edging for flower beds provides a clean, defined border and complements flowering plants beautifully. In this article, we’ll look at why red brick makes for great edging, design ideas to inspire you, and tips for installation.
Why Use Red Brick for Flower Bed Edging
There are many benefits to using red brick as an edging material:
-
Durability – Brick is very long-lasting maintaining its shape and color for years even in extreme weather. This makes it a sound investment for your garden.
-
Affordability – Basic red brick is relatively inexpensive compared to other edging materials like stone or metal. Brick edging can fit into most gardening budgets.
-
Classic style – The traditional red brick look evokes a sense of permanence and character. It fits well with many home architecture styles too
-
Easy maintenance – Installed properly, brick edging requires little upkeep other than occasional weed removal between bricks. It won’t decay or need repainting.
-
Defined edge – Brick provides a tidy, straight border that clearly separates a garden bed from lawn or other areas. This gives your garden a neat, intentional look.
-
Customizable – Brick edging can be installed in straight lines or curves, allowing creativity in shaping your beds. Different brick patterns add further interest.
Creative Ways to Use Red Brick Edging in Garden Beds
From formal to casual designs, red brick edging adapts well to all garden styles. Here are some fun ideas:
-
Curve it – Use brick to create flowing, curved beds rather than harsh straight lines. The brick contains the bed neatly while the shape feels organic.
-
Go up a level – Try stacking bricks two levels high for a raised bed look. This adds depth and you can plant low-growing flowers in front.
-
Alternate brick colors – Mixing red brick with contrasting brick colors adds visual variation. Try a checkerboard or mosaic pattern.
-
Pair with stone – Blend red brick with natural flagstone for an elegant mixed texture. The red brick edging defines, while stone within the bed provides contrast.
-
Line a path – Flank a garden path with red brick edging for structure. Choose bricks that match walkway pavers for cohesion.
-
Terraced beds – On slopes, use brick to make stairstep garden beds that help control erosion. The brick edges hold the soil in place.
-
Circle round a tree – Ringing a yard tree with red brick edging gives trunk space and a tailored look. Plant flowers around the tree within the brick.
-
Divide garden rooms – Use red brick edging to separate “rooms” like kitchen gardens or kids’ play spaces within your overall landscape.
Installing Tips for Neat and Sturdy Red Brick Edging
With proper installation, your red brick edging will stay orderly and firmly in place for many seasons. Here are some tips:
-
Excavate a trench 6-8 inches deep where you want your edging. This will stabilize the bricks.
-
Fill the trench with a gravel base, compacting it down. This improves drainage under the bricks.
-
Position bricks closely together, alternating the short and long sides for stability. Leave a 1/4 inch gap between bricks.
-
Each foot or so, place bricks perpendicular to the edging to anchor it. This prevents outward movement.
-
Tap bricks gently with a rubber mallet to level and embed them just below soil level. Keep a consistent height.
-
Use landscape adhesive between bricks for a stronger hold. Avoid mortar which can crack.
-
Fill behind bricks with soil, pack down, and water thoroughly. The bricks should stay embedded.
-
Weed barrier fabric placed under the brick can reduce weeds. Cover edging with mulch for a finished look.
Taking time to properly install your red brick edging makes a long-lasting border that neatly defines your garden beds. Just periodic weed removal and sweeping off debris will keep it looking fresh and maintained. Investing in red brick edging can give your landscape the coherent, polished look you want. Let this classic, durable material edge your gardens with style for years to come!

Check the Depth
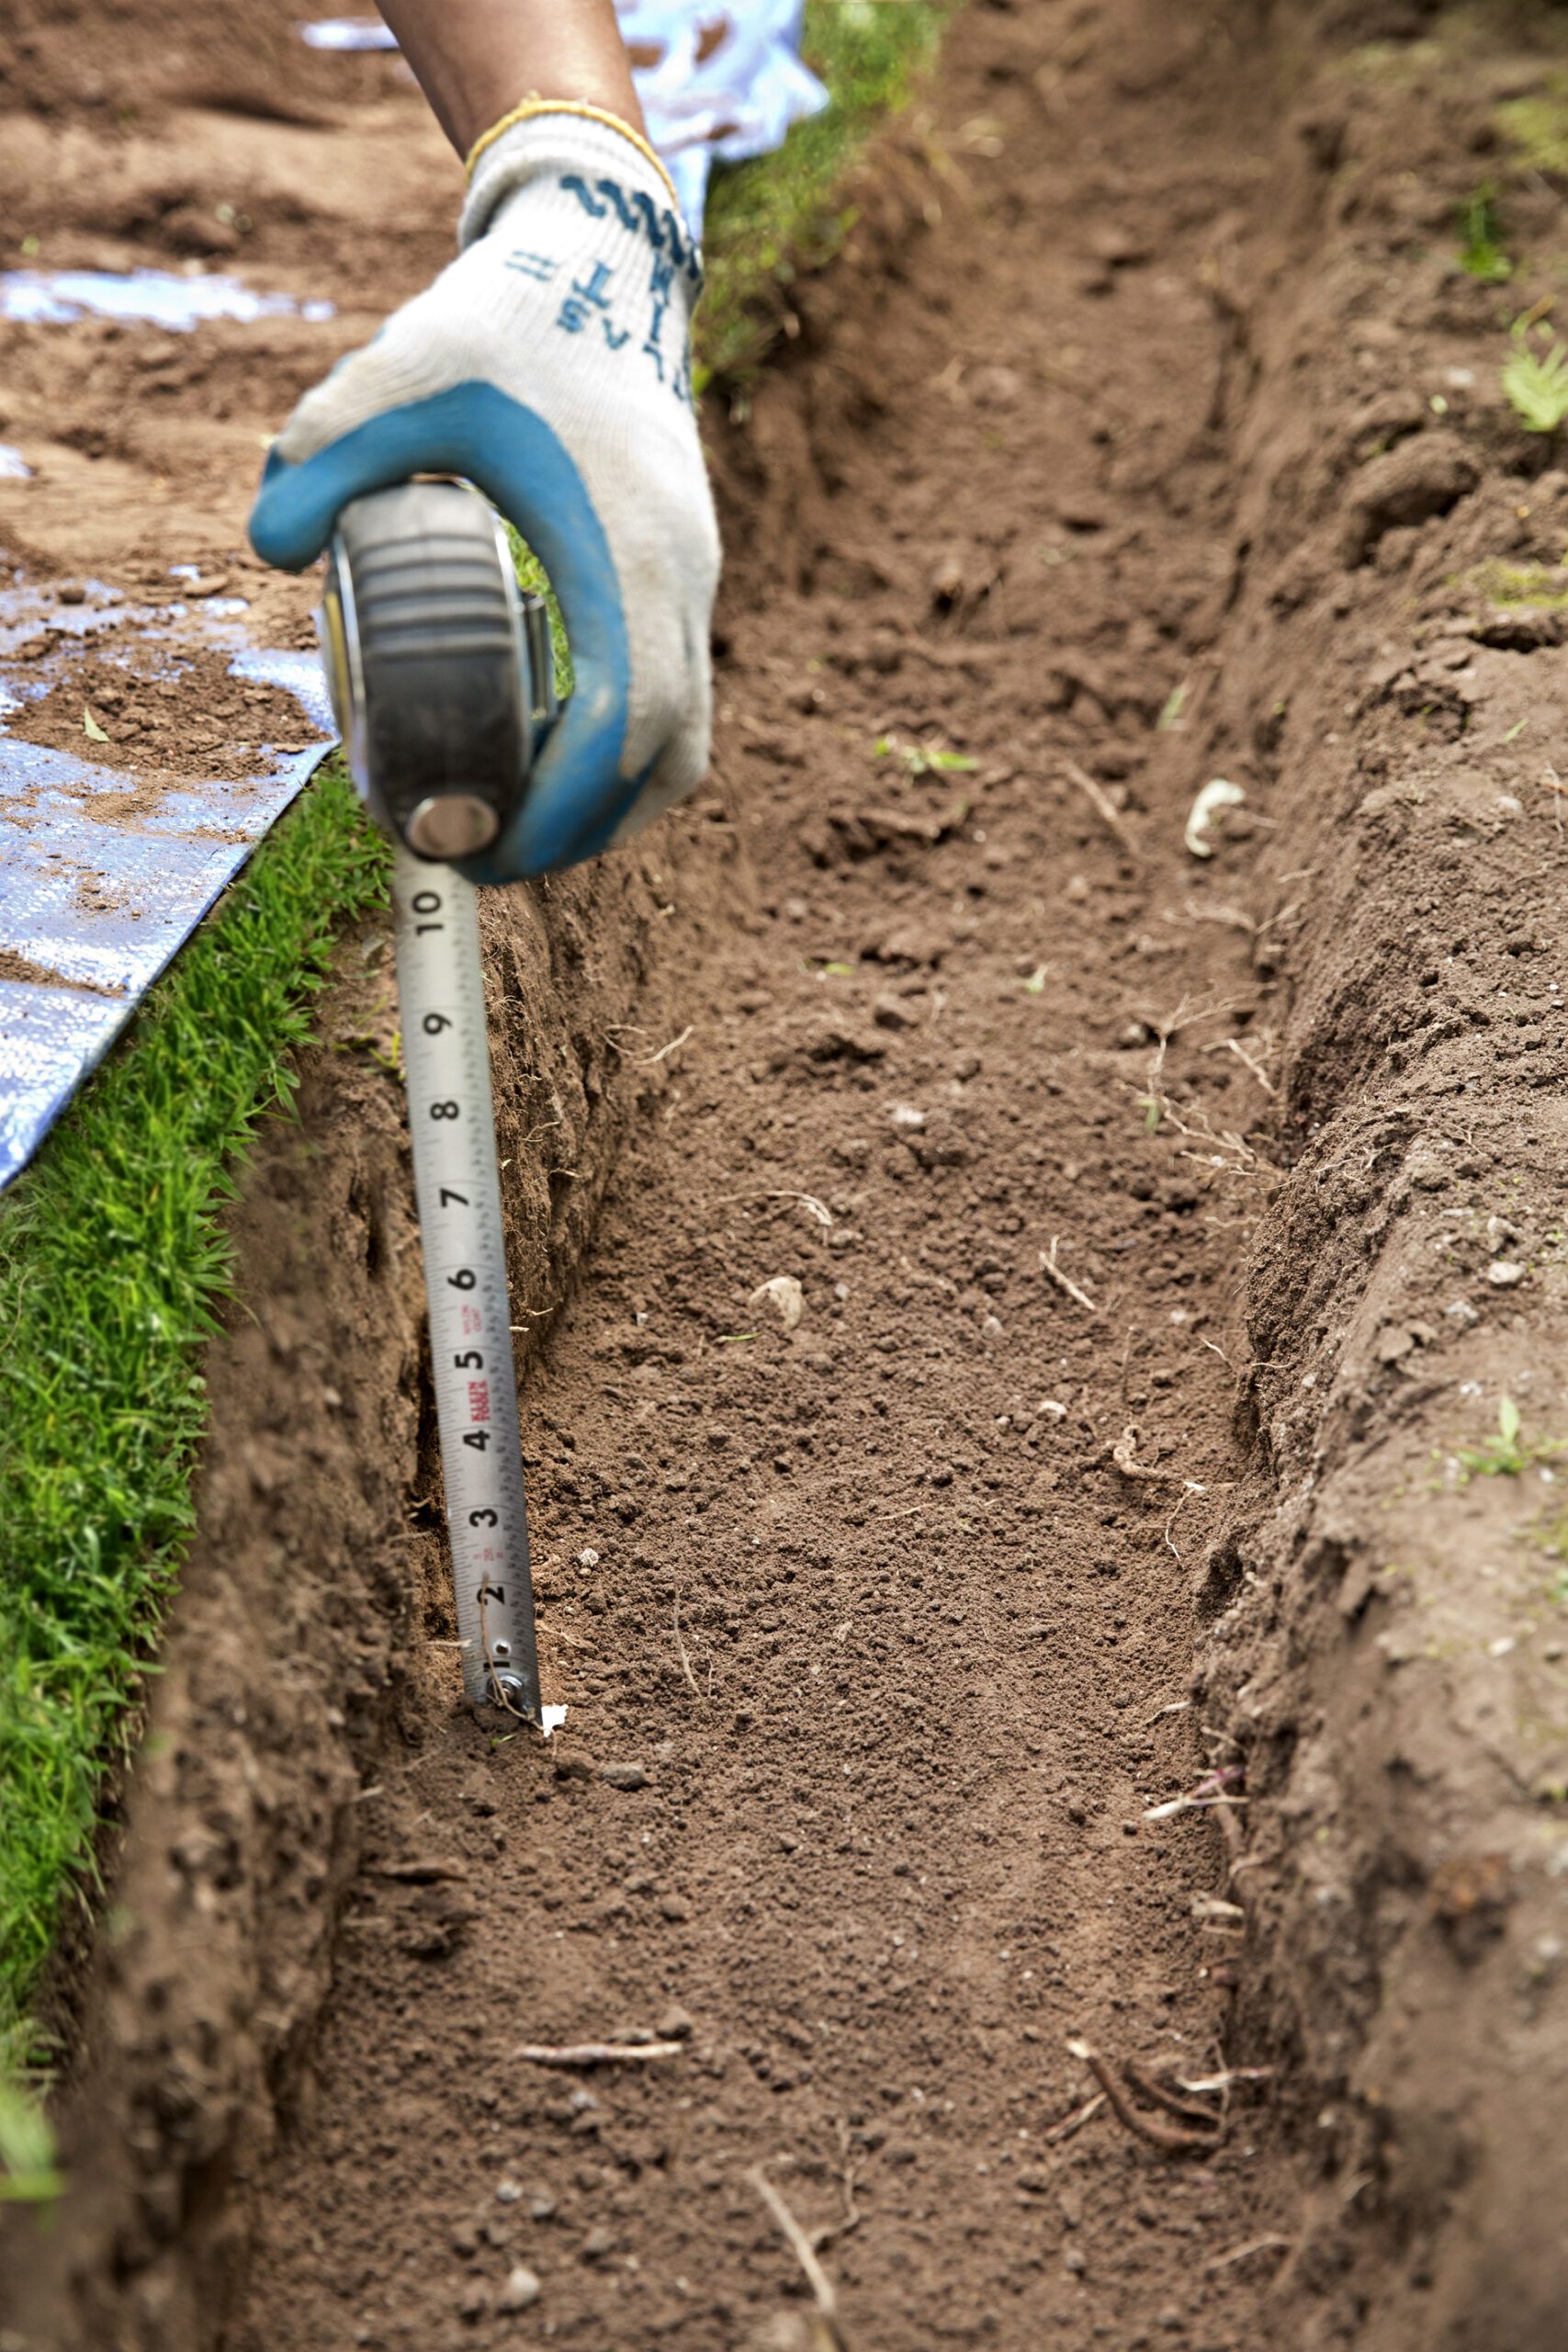
- Dig until the soil changes color, indicating that you’ve gotten past the topsoil.
- Measure the depth of your trench, as shown; it should be at least 6 inches deep to allow for a 2- to 3-inch layer of paver base, 1 inch of stone dust, and the bricks set flush with the ground.
Cut the Keystones

- With the brick marked, rest it on a work surface with the cutlines faceup. Fit the circular saw with the segmented diamond blade. Adjust the depth of the blade so that it will just barely cut through the brick in a single pass.
- To minimize dust, trickle water onto the brick as you cut; use the nail to puncture the bottom of the water bottle to create a steady trickle. Set the cut keystone brick into the opening to make sure it fits.