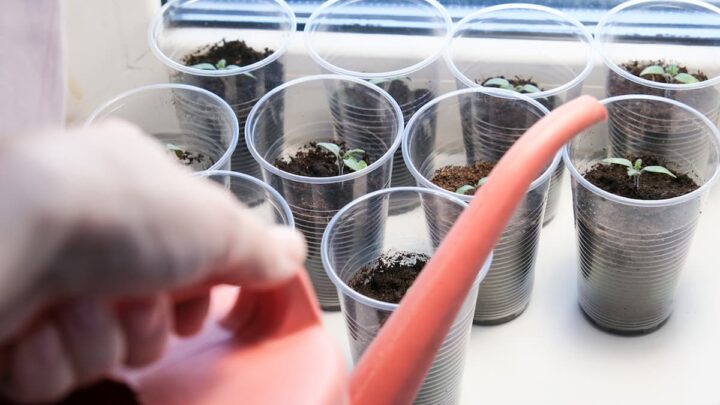
Starting plants from seeds can be an incredibly rewarding process. As gardeners we get to nurture tiny seeds into robust seedlings ready for transplanting. Using plastic humidity domes or plastic wrap over seed trays creates the perfect conditions for germination. But when is the right time to remove these protective covers? In this article we’ll explore when and why you should uncover your seedlings.
The Purpose of Plastic Covers
Clear plastic domes or wrap serve two key functions when starting seeds:
-
Retaining moisture – Covering trays prevents the growing medium from drying out during germination. This provides seeds with evenly moist conditions to sprout.
-
Increasing humidity – As seeds germinate, they release moisture into the air. The plastic traps this moisture over the seeds, maintaining high humidity.
Both moist soil and high humidity are vital for most seeds to germinate successfully. The plastic covering makes a miniature greenhouse right inside your home or greenhouse.
When to Start Removing Covers
Once you notice the first seedlings poking through the soil, it’s time to begin removing the plastic cover. Here’s why:
-
Leggy growth – Insufficient light under the plastic causes seedlings to stretch seeking light.
-
Damping off disease – Excess moisture on seedling stems promotes fungal diseases.
-
Poor air circulation – Still air under the plastic allows mold and fungi to thrive. Airflow prevents disease.
Remove the cover gradually over 2-3 days unless growth is very leggy or signs of fungus appear. A sudden change to lower humidity could shock tender seedlings.
Signs It’s Time to Uncover Seedlings
Watch for these cues that seedlings need more light and air:
-
50-75% of seeds have germinated – Slow, thin germination indicates stale or improperly stored seeds.
-
True leaves are emerging – Seed leaves can handle low light. True leaves need brighter light to develop properly.
-
Leggy, stretched growth – Seedlings reaching for light become spindly.
-
Condensation fogs plastic – Indicates excessive humidity ripe for diseases.
-
Green algae or white mold visible – Signals too much moisture and stagnant humidity.
Taking off the plastic at the first seedling emergence prevents stretched, weak growth and diseases.
Techniques for Gradually Removing Covers
Use these methods to slowly acclimate seedlings when removing the plastic:
-
Prop up one side of the dome or plastic to allow ventilation. After 1-2 days, remove it completely.
-
Cut back the plastic wrap to expose half the tray. After a day or two, remove the rest.
-
For individual cells, make slits in the plastic or remove it completely.
A gradual transition gives seedlings time to adjust to major changes in humidity, temperature, and light.
Caring for Seedlings After Removing Covers
Proper care is essential once the plastic is removed! Seedlings need the right conditions to grow stocky, healthy, and ready for transplanting.
-
Move grow lights closer, 1-3 inches above plants.
-
Carefully water to keep soil moist but not soaked. Allow the surface to dry between waterings.
-
Circulate air with a fan to strengthen stems.
-
Watch for pests like fungus gnats or mites that may attack tender plants.
-
Fertilize with diluted liquid fertilizer once true leaves form.
With the plastic removed at the right time, your seedlings will flourish into vigorous young plants ready to thrive when transplanted.
Frequently Asked Questions
How long should I leave the plastic cover on seedlings?
Remove the covering as soon as seeds germinate. Delicate seedlings can rot if touching damp plastic and will also scorch if left covered in direct sun.
When should I remove the humidity dome from my seedlings?
Remove humidity domes once you see the first signs of germination or sprouting. After this, remove the dome and place trays under light with proper air circulation. Delaying this can cause leggy seedlings.
When is it safe to uncover my seedlings?
It’s safe to uncover seedlings once about half have sprouted. Then move them to a location with ample bright light.
Starting plants from seeds is an extremely rewarding process for gardeners. Using plastic humidity domes or plastic wrap creates ideal conditions for seeds to germinate. But uncovering seedlings at the first sign of sprouting prevents issues like leggy, weak growth and diseases. Gradually acclimating seedlings and providing proper care ensures they’ll grow into vigorous, healthy plants ready for transplanting. Follow these tips to know exactly when to remove covers from your seedlings!

When should I sow my seeds?
When youre starting seeds indoors, timing is everything. The goal is to grow seedlings that are the ideal size for transplanting into the garden at the proper time. Sowing dates depend on:
- your average last spring frost date;
- whether the plant prefers cool or warm growing conditions;
- how quickly the seed germinates and grows.
Most seed packets suggest a planting time, such as “sow seeds indoors six weeks before your average last frost date.” To calculate your planting date, start by determining your average last spring frost date, mark it on a calendar, and count back in one-week increments. Related Article:
Create a planting calendar by counting back from your last frost date.
What type of pot should I use?
Although you can start seeds in any container that has drainage holes, specially designed seed-starting pots and trays provide optimal conditions. They let you start lots of seeds in a small space, and they drain freely to prevent rot. Some people prefer biodegradable pots; others prefer reusable trays. Self-watering, all-in-one seed-starting systems are convenient and foolproof. Related Article:
Basil, pepper and zinnia seeds: different sizes, different planting depths.
