When we start seeds indoors, we are trying to give them a head start before putting them into the harsh world of the out-of-doors. So, when our tender, baby seedlings seem to just pause, or stall in their growth, it can be very stressful.
Hey fellow gardeners! I’ve been growing tomatoes for over 15 years now, and let me tell ya, there’s nothing more frustrating than when those little seedlings just refuse to grow. Today, we’re gonna dive deep into why your tomato babies might be giving you the silent treatment and what you can do about it.
The Common Struggles We Face
Listen up! If your tomato seedlings are just sitting there looking like they’re frozen in time, you’re not alone. Here’s what’s probably happening:
-
Temperature Troubles
- Tomatoes are total divas about their temperature
- They need between 65-80°F (18-27°C) to grow properly
- Too cold? They’ll just sit there and pout
- Too hot? They’ll throw a fit and might even die
-
Light Issues
- These guys are SUPER needy when it comes to light
- Need at least 14-16 hours of bright light daily
- Weak light = weak plants
- If they’re stretching tall and skinny, they’re crying for more light!
Water & Nutrition Drama
Here’s where lots of us mess up (yep, I’ve been there too!):
-
Watering Problems
- Overwatering is a HUGE no-no
- Roots need oxygen to grow
- Wet soil = suffocated roots
- Water only when top inch of soil feels dry
-
Nutrient Issues
- Too much fertilizer can burn those baby roots
- Too little = stunted growth
- Start feeding with 1/4 strength fertilizer after true leaves appear
The Container Situation
Ya know what’s crazy? Sometimes it’s just about the pot:
- Container Size
- Too small = stunted growth
- Too big = overwatering risks
- Start in cells/small pots about 2-3 inches deep
- Transplant when they outgrow their home
Pro Tips from My Garden to Yours
After killing more seedlings than I care to admit, here’s what works:
-
The Perfect Setup
- Use good quality seed starting mix
- Provide bottom heat (seedling mat)
- Keep air moving with a small fan
- Don’t crowd your seedlings!
-
Daily Care Routine
smaliMorning:- Check moisture levels- Adjust light height if needed- Look for signs of problemsEvening:- Quick moisture check- Rotate trays if using grow lights- Feel leaf temperature
Troubleshooting Guide
When things go wrong (and they will!), here’s what to look for:
Common Problems & Solutions
| Problem | Likely Cause | Solution |
|---|---|---|
| Purple leaves | Phosphorus deficiency | Add balanced fertilizer |
| Leggy seedlings | Not enough light | Move lights closer |
| Yellow leaves | Overwatering | Let soil dry between watering |
| Curled leaves | Temperature stress | Adjust growing environment |
What To Do Right Now
If your seedlings are stuck:
-
Check your basics:
- Light levels
- Temperature
- Moisture
- Air circulation
-
Take immediate action:
- Move lights closer if needed
- Adjust watering schedule
- Add gentle fertilizer
- Improve ventilation
The Bottom Line
Look, growing tomatoes from seed ain’t always easy. We’ve all had our fair share of fails (don’t even get me started on my disaster of 2024!). But with these tips and a bit of patience, you’ll get those seedlings growing again.
Remember: Sometimes they just need a little tough love and the right conditions to thrive. Don’t give up – those homegrown tomatoes are worth the effort!
Quick Success Checklist
- Proper light (14-16 hours daily)
- Correct temperature (65-80°F)
- Good air circulation
- Appropriate watering
- Regular monitoring
- Patience (lots of it!)
Final Thoughts
Growing tomatoes from seed is like raising kids – each one’s different, and sometimes they just need time to do their thing. Keep at it, stay observant, and don’t be afraid to make adjustments as needed.
Got any tomato growing stories or tips to share? Drop ’em in the comments below! And hey, if you’re still struggling, remember – even experienced gardeners have their off days. We’re all learning together!
Remember to pin this guide for later – you never know when your tomatoes might decide to take an unexpected growth vacation!
How do I know I’ve fixed the problem?
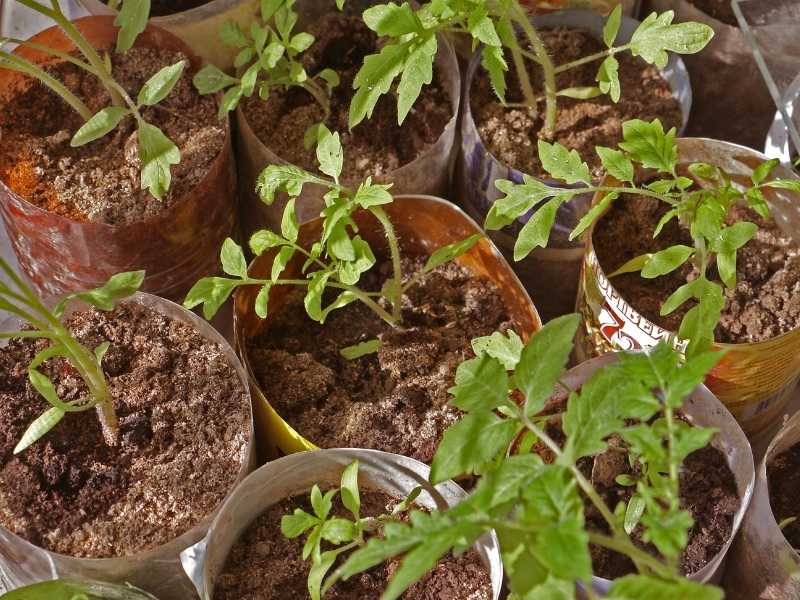
Once the seedlings have access to the right nutrition, they should start growing again. You should see new growth, and any discoloration should fade. Taking pictures daily will help you to see this process as it occurs, since you might not notice changes just by checking every day. Tomato seedlings showing new growth beyond the seed leaves. Now it’s time to thin them out!
What does “seedling stall” look like?
Seed stall is when a seedling that spouted stops producing new growth. With tomatoes, for instance, it can look like the tomato sprouted it’s seed leaves (the first two leaves) and then nothing happens after that for at least a week. It can also happen later, after some true leaves have sprouted, and then the plant just seems frozen in time. Alive, but “stuck” at that same stage. Sometimes you will also see signs of a nutrient deficiency like purple or yellow discoloration of the leaves or stem.
LEGGY Tomato Seedlings & What ALWAYS Works to Fix Them!
FAQ
How do I get my tomato seedlings to grow?
Warm temperatures (70-75 degrees F) help speed up seed germination; place your seed starting containers on a heat mat and cover with a humidity dome to get seeds started. Once seeds have germinated, shut off the heat mat and remove the humidity dome. seedlings grow best in cool room temperature, about 65 degrees F.
Why are my tomato seedlings staying small?
Weak grow lights or lights that are too far away from your plants often lead to stunted seedlings.May 4, 2024
Why are my seedlings not getting any bigger?
Water Issues Again, getting the water right is crucial. Over watering is the number one reason for growth being stunted in seedlings. You will often see stunted growth, yellowing leaves and blisters. Too much water in the soil keeps the roots from bringing in oxygen, which will damage the roots and plant.
How do you fix stunted seedlings?
The roots then struggle to obtain oxygen and nutrients, thereby stunting growth. Solution: Treat your plants to a nutrient-rich, well-draining soil mix, and ensure your planters are equipped with drainage holes. Regularly check soil moisture levels and tweak your watering schedule accordingly.