Growing plants from seeds can be an enjoyable and cost-effective way to add beautiful flowers, tasty vegetables, and fragrant herbs to your garden However, getting those tiny seeds to successfully sprout and grow into seedlings involves paying close attention to factors like consistent moisture, proper soil temperature, and adequate light exposure
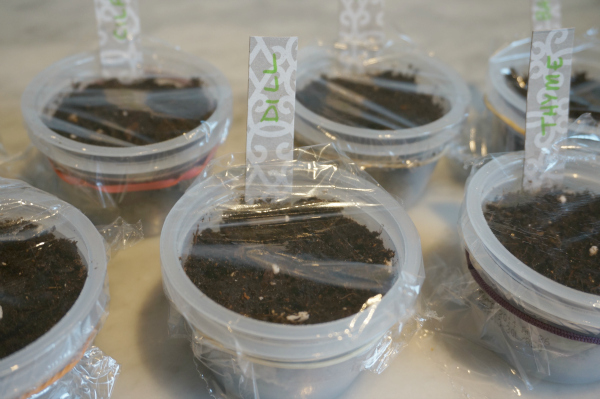
One common question for home gardeners is whether covering freshly planted seed trays with plastic wrap helps or hinders the seed germination process Some experienced green thumbs recommend tenting seed flats with plastic wrap or cling film to retain moisture during the critical germination phase But other seasoned seed starters warn against covering seedlings with plastic wrap due to potential downsides,
So what’s the real deal on using plastic wrap for seed starting – yay or nay? Let’s explore the potential benefits and drawbacks of this polarizing practice to help you make an informed decision for your garden!
Why Some Gardeners Cover Seed Trays with Plastic Wrap
Here are some of the proposed advantages of covering seed flats and pots with plastic wrap:
-
Retains Moisture: Plastic wrap prevents moisture evaporation, helping keep seed starting mix evenly moist. Fluctuating soil moisture levels can cause uneven, spotty germination.
-
Increases Humidity: Higher humidity levels from the trapped moisture are beneficial for seed germination and young sprout growth.
-
Protects From Drying Out: It’s easy to let uncovered seed trays dry out too much between waterings, especially if you don’t check soil moisture daily. Plastic wrap helps maintain moisture.
-
Creates Temporary Greenhouse: The small greenhouse effect generated warms soil and air temps, supporting better germination rates.
-
Prevents Soil Splashing: Direct water contact can splash planting mix onto fragile seedlings. Plastic forms a protective barrier against heavy watering impact.
-
Deters Pests: Pesky fungus gnats, shore flies and other insects are physically blocked from laying eggs in the moist soil when it’s covered.
So in concept, plastic wrap seems like an ideal way to pamper your seeds and give them the best possible start in life. But how does it actually work in reality? As with most gardening practices, plastic wrap has both benefits and some potential disadvantages to consider as well.
Why Some Gardeners Avoid Using Plastic Wrap
Here are a few of the drawbacks that can accompany covering seed flats and pots with plastic wrap:
-
Promotes Fungal Diseases: Excess moisture and humidity foster mold, damping-off and other fungal diseases that can damage seedlings.
-
Causes Leggy, Weak Growth: Lack of airflow causes seedlings to stretch for light, resulting in tall, weak, spindly growth.
-
Risks Overheating: Temperatures can quickly spike to detrimental levels with no ventilation, especially in direct sun.
-
Invites Pests: High humidity and heat also create an ideal environment for fungal gnats and shore flies.
-
Leads to Overwatering: It’s harder to accurately judge when seedlings need more water through the plastic.
-
Causes Soil Crusting: Condensed moisture droplets settling on soil can form an impenetrable crust.
-
Requires Vigilant Venting: You must uncover daily after sprouts emerge to allow for gas exchange.
-
Can Damage Fragile Sprouts: New sprouts and leaves are extremely fragile and plastic can easily stick to and tear them.
-
Makes It Hard to Monitor: It’s difficult to observe seedling progress with flats and pots covered in plastic wrap.
So in actual practice, plastic wrap has some sizable disadvantages that can outweigh the benefits for many gardeners’ needs. Moderation and attentive care are key to avoiding problems if using plastic wrap.
Tips for Successfully Using Plastic Wrap on Seed Trays
If you do want to try covering your seed flats and pots with plastic wrap, here are some best practices to follow:
-
Use very thin, lightweight plastic wrap – thicker plastic inhibits all air exchange.
-
Ventilate covered containers twice a day by lifting plastic to improve airflow once sprouts emerge.
-
Remove plastic carefully at the first true leaf stage when seedlings are still very small and fragile.
-
Support plastic so it doesn’t touch emerging sprouts – use sticks or skewers to prop it up above soil level.
-
Watch soil moisture closely and resist overwatering – check flats daily.
-
Control ambient temperature and humidity – avoid direct heat or sun exposure.
-
Don’t enclose seed trays fully – leave an opening for some air circulation.
-
Reuse plastic wrap over and over – wash periodically to prevent disease transfer.
With attentive care and monitoring, plastic wrap can be used successfully for seed starting. But it requires an added time commitment to avoid common pitfalls.
Alternatives to Plastic Wrap for Seed Germination
If dealing with plastic wrap sounds like more trouble than it’s worth, here are some other effective options for keeping seed trays evenly moist:
-
Clear plastic seed tray dome lids allow airflow and easy monitoring.
-
Individual cell packs or plug flats minimize surface drying.
-
Humidity domes supply ambient moisture without excessive humidity buildup.
-
Frequent, gentle misting maintains even moisture without overwatering.
-
Heated germination mats warm roots without spiking air temperatures.
-
Grow lights prevent leggy, weak growth by providing ample light.
-
Bottom heat cables under trays gently warm roots only.
-
Protective mulches like vermiculite or milled sphagnum maintain moisture while allowing air exchange.
Seed germination involves maintaining the delicate balance of moisture, warmth and air circulation. While plastic wrap can help retain moisture, alternatives that allow gas exchange may provide better results for many gardeners.
To Wrap or Not: Factoring in Your Conditions
The decision on whether to use plastic wrap during seed starting depends largely on your individual growing environment and care regimen.
If your home tends to be cool and dry, plastic wrap may help compensate for a low-humidity atmosphere. But in a naturally humid, warm house it could easily cause fungal problems.
The amount of time you can spend uncovering, ventilating and monitoring covered flats is also key. Meticulous gardeners may have better success with plastic wrap, while busy seed starters are likely better off with less demanding options.
Feel free to experiment with covering portions of flats and trays while leaving some unwrapped for comparison. Just stay observant and remember that perfect is often the enemy of good enough when it comes to starting seeds.
While plastic wrap does offer some benefits for retaining moisture in seed flats, it also requires moderation and watchful care to avoid common pitfalls. For many home gardeners, skipping the plastic in favor of gentler moisture maintenance leads to better seed starting success with less hassle.
The Key is Consistent Moisture and Proper Care
Rather than agonizing over every detailed decision, focus on following sound horticultural practices for seed starting. Maintain gently consistent moisture, good drainage, adequately warm soil temperatures and timely light exposure. With or without plastic wrap, attending to those fundamental necessities is key to robust, healthy seedlings.
Keep records to allow for better planning
An often overlooked aspect of plant propagation is the art of record keeping. Whether you are producing a few plants for your home flower and vegetable gardens or working at a larger-scale nursery, developing a propagation journal will prove indispensable. Here at the Center for Historic Plants, we record when seeds are sown, the germination date and success rate, and when seedlings are ready for transplanting each year.
At the end of the year we evaluate the timing of our production schedule, noting what went right and what went wrong. These observations help us make adjustments for next year to ensure that we are growing our plants under optimum conditions. We also keep track of where we purchase seeds, as their quality and reliability may vary by source.
Use wide, flat containers to avoid overcrowding
Plastic pots or containers are preferable to clay pots when starting seeds, as they retain moisture more consistently. Wide, shallow containers prevent both overcrowding of seedlings and excessive moisture around fragile, young roots. Plants that resent root disturbance when transplanted are best sown into small, individual containers like cell packs or plug trays. Recycled plastic containers, like empty yogurt or margarine tubs, work well, too, provided you’ve poked holes in the bottom for drainage.
No matter what type of container you use, it must be clean and free of pathogens. To sanitize a container, soak it in a 10 percent bleach solution for 15 minutes and let it air dry.
Covering with plastic wrap vs without/ which will germinating parsley seeds best
FAQ
Should I put saran wrap over my seedlings?
Plastic wrap ensures a constant moisture level. If more water is needed, let it wick up from the bottom. Seeds are very sensitive to the extremes of overwatering and underwatering. In addition, heavy-handed watering can disturb newly germinated seedlings.
Should I cover germinating seeds with plastic?
Cover the Seed Containers While the seeds are germinating, you will need to put a cover over the seed containers. If you use a seed starting tray, it should come with a plastic cover. If not you could use another plastic top or even some plastic wrap to keep the seed trays evenly humid until the seedlings emerge.
What should I cover seeds with?
Some very small seeds need specialist ‘seed compost’ to germinate, but multi-purpose compost is fine for most seeds. To maintain an even temperature and keep the soil moist, it’s a good idea to cover the soil with a clear piece of plastic.
How long to leave plastic cover on seedlings?
The greenhouse cover holds in moisture, raising the humidity for fast germination. As soon as you see the first tiny sprout, remove the cover. This allows air to circulate around seedlings, minimizing disease problems. Keep lights 4″ to 6″ above the seedlings.