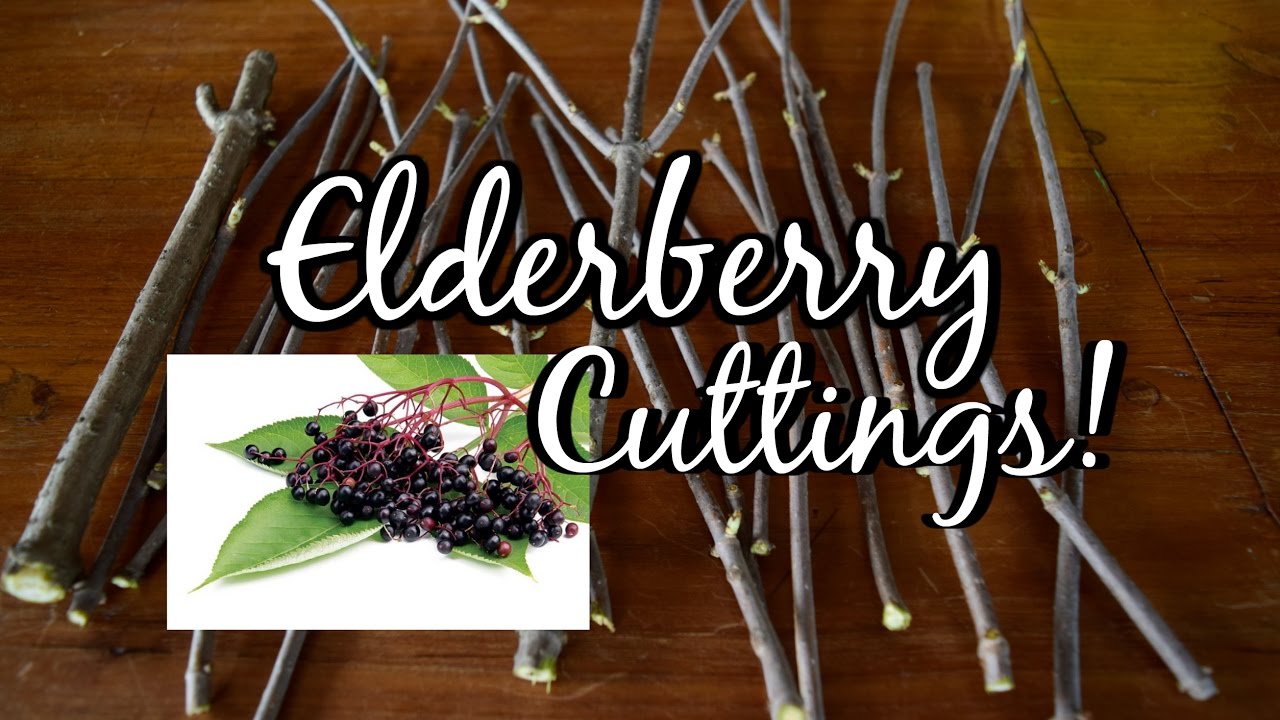
With its highly sought after berries and incomparably fragrant blossoms, elderberries are worth growing in the garden.
Sure, you can buy elderberry plants. But it’s so easy to propagate them from cuttings that there’s no reason not to give it a go.
Incidentally, if you’re new to rooting cuttings taken from trees and shrubs, then you’ve picked the right plant to start with. Elderberry is one of the most reliable plants I have ever propagated this way.
We link to vendors to help you find relevant products. If you buy from one of our links, we may earn a commission.
On top of that, you have lots of options. You can take either hardwood or softwood cuttings, and propagate them in water, a soilless potting medium, or soil in the ground.
If you want, you can forage a plant to take cuttings from. Elderberries grow wild in North and South America, Europe, and Asia, so lots of people may have the opportunity to find one in their neck of the woods.
Alternatively, select branches from a mature cultivated plant in a generous neighbor’s yard, or create new plants from one you’re already growing.
If you have a plant that you particularly love – maybe it produces abundantly or has large berries – I highly recommend propagating it this way.
First, you need a sharp pair of clippers. Clean them with a solution of one part bleach to 10 parts water. This helps to prevent the spread of disease.
If you plan to root them in water, you’ll need several jars to hold the cuttings while they root. Quart or pint-sized Mason jars work great.
You’ll need some rooting hormone powder or gel, containers, and potting medium if you don’t plan to use the water method.
I prefer to use a four or six-inch compostable option like CowPots™, which aren’t made out of peat, a limited resource.
Arbico Organics sells a pack of 42 six-inch pots if you decide to go this route. I find individual pots are easier to work with than a single large container when moving them around or at transplanting time.
If you own the plant, you’re taking a cutting from, you’re all set. If it’s on public land, make sure to check your local regulations before snipping. And of course, if it’s on private land, seek permission from the owner.
Take a basket or bag with you to collect hardwood cuttings in. If you’re taking softwood, have a jar of water with you to store the wood in while you work.
Elderberries are perennial hardwood plants in the Sambucus genus. They go dormant during the winter, and flower in the late spring or early summer. Shortly after, they form fruit that can be used in the kitchen or the medicine cabinet.
Hardwood elderberry cuttings should be taken when the plant is dormant. The timing can vary by region, but this typically takes place from January to March, depending on your climate.
Just peek outside at your plant and look for any green growth or buds breaking. No growth or budding? It’s time.
Look for branches that are about the diameter of a pencil and try to take cuttings that are about six to eight inches in length and include at least two to four nodes. Nodes are the spots where new leaves and branches emerge.
Look for a branch with lots of lenticels. These are the little bumps all over the branch and they work like pores, enabling gas exchange.
You also want to choose a branch that is free of any signs of disease, like mold, mildew, or cracks. The wood should be brown, not green. The top branch in this has fewer lenticels than the branch below it. Photo by Kristine Lofgren.
There are two ways to take your hardwood cuttings. The first is to simply snip the stem with a pair of clippers or a sharp knife. Photo by Kristine Lofgren.
I like to cut the bottom at a 45-degree angle and cut the top straight, so I know which way is up when planting. If it is inserted in water or soil upside down, it won’t root.
Another method is to gently bend the branch and pull it down at the joint so that some of the bark comes with the cutting as you pull it away, creating a sort of heel or tail of bark. Photo by Kristine Lofgren.
Trim that tail with pruners so it’s about half an inch long. This is called a heel cutting.
This method exposes the cambium layer of the plant, which contains hormones that aid in rooting.
Softwood cuttings should be taken in the summer while the plant is actively growing, but before the fruit forms.
This is generally in late June through late July. Softwood is the young, lighter brown or green new growth that has formed during the current growing season.
As with hardwood, look for a branch that is about the diameter of a pencil and take a cutting six to eight inches in length, taking care to include at least two to four nodes.
To plan ahead for the possibility of a few of your starts failing, it’s best to take more than you need. You can always toss or give away the extras if they all survive.
Take softwood cuttings the same way you would hardwood cuttings, using a pair of clippers to cut straight through at a 45-degree angle. Note that heel cuttings don’t work on softwood.
Elderberry shrubs (Sambucus spp.) produce delicious berries that can be used for food and medicine. These fast-growing plants are easy to propagate from cuttings, allowing you to expand your elderberry patch or share these useful plants with friends. While many recommend taking cuttings in late winter when plants are dormant, it is possible to root elderberry cuttings in summer as well.
Taking summer cuttings does have some advantages
- Abundant tender new growth is available for cuttings.
- Higher temperatures encourage faster root development.
- Long summer days provide ample light for photosynthesis.
However, care must be taken to prevent cuttings from drying out in the summer heat With the right methods, summer cuttings can root successfully Here is a detailed guide to propagating elderberry cuttings in summer
Selecting Cuttings
- Look for new green shoots, not previous year’s wood.
- Cuttings should be 4-6 inches long.
- Take more cuttings than needed to allow for failures.
- Use clean, sharp pruners and cut just below a node.
- Remove flowers and all but the top 2 leaves.
Preparing Cuttings
- Recut the base of stems at an angle before planting.
- Dip the angled end in rooting hormone (optional).
- Use a pencil to make planting holes.
- Bury cuttings 2/3 deep in potting mix or soil.
Caring for Cuttings
- Water regularly to keep soil consistently moist.
- Mist foliage daily to increase humidity around cuttings.
- Provide bright, indirect light indoors or dappled shade outdoors.
- Watch for new growth in 4-8 weeks as a sign of rooting.
Troubleshooting Problems
- Rotting stems: Reduce watering and increase light exposure.
- Leaves dropping: Increase humidity with misting and cloches.
- No rooting: Take new cuttings and use rooting hormone.
Potting and Growing On
- Transplant into pots once a good root system has formed.
- Gradually introduce to sun over a week when moving outside.
- Water frequently as young plants have small roots.
- Pinch back tips to encourage bushy growth.
- Plant in garden in spring after frost risk has passed.
Step-by-Step Guide
Follow these simple steps for propagating elderberry cuttings in summer:
Gather supplies: Sharp pruners, rooting hormone (optional), clear plastic bags, small pots, potting mix.
Select cuttings: Look for new green shoots, 4-6 inches long. Strip flowers and lowest leaves.
Prepare cuttings: Recut the base at an angle and dip in rooting hormone. Poke holes in potting mix. Insert cuttings 2/3 deep.
Care for cuttings: Water regularly to keep moist. Mist leaves daily. Provide bright, indirect light.
Transplant rooted cuttings: Pot up once roots are visible. Gradually introduce to sun over a week. Plant outdoors in spring.
Troubleshoot: Rotate cuttings if one-sided rooting occurs. Remove any rotted or shriveled cuttings promptly. Take new cuttings if none root after 6-8 weeks.
With proper care, elderberry summer cuttings can root reliably in 4-6 weeks. You’ll then have young starts to expand your elderberry patch. Follow these simple steps for low-cost elderberry propagation in summer.
Taking elderberry cuttings in summer is certainly possible with a high success rate. The key is using tender new growth, keeping cuttings consistently moist, and providing bright indirect light as they root. Within 6-8 weeks, you’ll have new elderberry plants to expand your patch or share with gardening friends. With this simple, low-cost method, you can propagate elderberries in the warmth of summer.
Rooting in Soilless Potting Medium
Of the three rooting methods that I describe here, this one is regarded as the most reliable method to grow healthy transplants.
I’ve found cuttings tend to grow more quickly and robustly in a soilless medium, and the experts at the Missouri Botanical Garden agree, claiming plants generally develop a better root system when planted in a soilless medium rather than water.
Rooting in a soilless potting medium is a bit more challenging than water since you can’t see if any roots are forming, and you’ll need to do some extra investigation to figure out when it’s time to transplant.
You can purchase a premade mix to put your starts in, like this one from Mother Earth, which contains a mix of 70 percent coco coir and 30 percent perlite.
You can find a 50-liter bag of this medium available on Amazon.
You can also make your own mix by combining half sphagnum peat moss and half vermiculite.
If it has been more than a few hours since you took your cuttings, make a new cut at the base of each and dip it in rooting hormone gel or powder. Photo by Kristine Lofgren.
I find a powder is easiest to work with, and Bontone makes a good option that I’ve had lots of success with.
If you want to try it, you can buy a 1.25-ounce container, which will last you a good long while, at Arbico Organics.
Use a stick or pencil to poke a hole in the medium. This helps ensure more of the rooting hormone stays on the end of the branch as you insert it into the medium.
Place softwood cuttings in the medium so they’re buried by a third. Hardwood should be buried so the lowest node is two inches below the surface of the medium.
You can use individual four- or six-inch containers or use one large container and space them about four to six inches apart.
I prefer to use CowPots™ because they can be put directly in the ground, so there’s less disturbance to the roots.
Water the medium thoroughly so that it feels like a well wrung-out sponge.
Tent some clear plastic over the pot to help retain moisture. Just make sure it isn’t touching the plant at all.
You can also purchase cloches to use as miniature greenhouses. Amazon carries a six-pack of plastic domes that are just the right size.
Every three days, remove the cover and give the plant a misting. Check the medium to make sure it is still moist and add water if it’s starting to dry out.
Place in a cool indoor location out of direct sunlight and keep the medium moist but not wet. The ideal temperature is about 50°F with some indirect sunlight coming in, so a basement spot near a window might be ideal. Photo by Kristine Lofgren.
After eight weeks, gently pull on a cutting. It should resist, indicating that it has developed roots. It may also have developed buds or young leaves by this point. If so, there’s no need to tug on it to check!
Trim away about half of any new growth to encourage the plant to focus its energy on developing healthy roots.
All that hard work paid off, and now it’s time to put your rooted cuttings in the ground. Warning: you’re entering the danger zone! If you’re going to kill your new plant, it will likely be during this stage.
That’s because young plants grown from cuttings have fragile roots – all the more reason to use biodegradable pots to grow your new starts in, since there’s less root disturbance.
Once spring rolls around and the danger of frost has passed, harden them off for a few weeks.
To do that, take your plants outside for an hour and put them in a sheltered spot. The next day, put them in the same spot for two hours. Add an hour each day until they can stay outside all day.
When soil temperatures reach 50°F, it’s time to start digging.
Gently remove a cutting from its container, but don’t tap away or remove any excess soil. Try to keep the soil ball as intact as possible.
Dig a hole that is twice the width of the existing root ball. Lower the cutting in place and fill around it with new soil.
Using a peat container or CowPot™? Dig a hole twice the width of the pot and plant it, pot and all, in the ground. Fill in around it with soil.
Then, treat it as you would an existing elderberry bush. Not sure how to do that? Our elderberry growing guide has got your back.
Just keep in mind that a young cutting has a small root system, so you need to be diligent about keeping the soil moist.
Rooting in the Garden
If you want to skip the extra work of transplanting, you can put cuttings directly in the garden.
Since it’s best to take cuttings in the winter or early spring, you may need to store them until you can plant them.
If this is the case, wrap the branches loosely in plastic and put them in a cool, dark spot until it’s time to plant. They can be stored this way for up to six months.
Then, once the soil is workable and all chances of frost has passed in the spring, soak the cuttings in water for about an hour before planting.
If you live in an area where the soil can be worked in the winter, you may opt to plant directly after taking the cuttings. This allows Mother Nature to decide when to let the plant break dormancy.
Regardless of when you plant, dip the cut ends in powdered rooting hormone and use a pencil or chopstick to make holes in the ground about six feet apart.
Insert each cutting into the ground so the bottom node is covered by two inches of soil.
Pack soil tightly around each cutting so it stays upright. Don’t use sticks or anything else for support. Keep the soil moist if the rain doesn’t take care of it for you.
Optionally, use a cloche and/or heap mulch around the stems to help retain soil moisture. A half inch of compost, straw, or dried grass should do the trick.
It’s also possible to root your cuttings in water, and if you feel more comfortable with this method, I say go for it.
The advantage is that you can see the roots forming so you know whether it’s working or not, and you can more easily determine when your plant is ready to be transplanted.
I’ve planted many water grown starts and have had plenty of success, so feel free to try it out and find what works best for you. Photo by Kristine Lofgren.
To grow in water, remove leaves from the bottom half of the cuttings, but be sure to leave at least one set of leaves at the top.
Set in a jar of water so the cutting is submerged by about half. Place in an indoor location away from direct sunlight.
Change the water every few days. You should start seeing roots develop after about a month. You’ll want to keep growing the new starts in the water for a few more weeks to ensure that the roots are strong before you transplant.
Expect fewer of your plants to survive using the water method as compared to rooting in soilless potting mix.
Once you see roots developing, and perhaps new growth forming, you can put your plants into pots filled with soil.
As described above, use either individual pots, or place multiple rooted cuttings in one large pot spaced about four to six inches apart.
Fill each container with potting soil and make holes that are large enough to accommodate the root system.
Gently lower each cutting into a hole and bury about a third of the stem. Then, firm soil around each and water the soil so it feels like a well wrung-out sponge.
When you’re ready to plant in the garden, harden the new plants off as described for rooting in in a soilless medium above before transplanting.
How to Propagate and Root Elderberry Cuttings
FAQ
Can I propagate elderberry in summer?
You can propagate elderberries in both the dormant and summer seasons, but I definitely prefer the dormant season because it’s easier and I usually have more …Mar 15, 2022
Can you take cuttings in summer?
Most softwood cuttings are taken in spring and early summer, from the tender new growth of the season. If potted by mid-summer they will develop sufficient roots to survive the winter, otherwise pot up in the following spring.
How long does it take for elderberry cuttings to root?
What to do with elderberry clippings?
You can take elderberry cuttings any time of year. They root readily in any situation. Just pull off any leaves and jam the sticks into whatever substrate you have or put them in a glass of water.