Creeping phlox is a low-growing, mat-forming flowering plant that is often seen spreading as a thick ground cover, in rock gardens, and even in crevices of stone walls. Creeping phlox grows best in regions with moderate temperatures, full sun, and rich, moist soil.
Creeping phlox (Phlox subulata) is a popular flowering groundcover that can add vibrant color and curb appeal to gardens. With its carpet-like mats of foliage and colorful blooms, it’s a great option for filling in beds or cascading down slopes and rock walls. However, over time it can outgrow its space and may need dividing or transplanting to keep the plants healthy and looking their best. Knowing the optimal times for transplanting creeping phlox is key to avoiding stress and encouraging the transplants to establish successfully.
Why Transplant Creeping Phlox?
There are a few key reasons you may want or need to transplant creeping phlox
-
To propagate new plants from existing clumps. Dividing overgrown patches creates new plants and revitalizes the parent plant.
-
To rejuvenate old plants. Older plants that are producing fewer blooms can benefit from being divided and rejuvenated.
-
To curb the plant’s spread. Creeping phlox can aggressively spread, so transplanting helps contain it.
-
To fill in new spaces. Transplanting lets you spread phlox to new areas that need a colorful groundcover
-
To improve growing conditions. You may want to move plants to a spot with better sunlight, drainage, or soil conditions
When to Transplant Creeping Phlox
Timing is crucial when transplanting creeping phlox. The best times are:
Spring
Early spring is ideal as growth is just beginning. Aim for 4-6 weeks before your average last spring frost date. The soil is still cool, encouraging good root growth after transplanting. Mature plants can be divided and young offshoots planted.
Fall
Early fall is another prime time, around 6-8 weeks before your first expected fall frost. Plants can establish roots before winter dormancy. Spring-blooming varieties may not flower until the following year after a fall transplant.
Avoid Midsummer Transplanting
The heat of midsummer is stressful for transplants. Avoid transplanting in July-August when hot temps and drought are common. Wait for cooler weather in fall.
Transplanting Tips for Success
Follow these tips to give creeping phlox transplants their best chance of flourishing:
-
Choose young, healthy plant divisions with plenty of roots. Avoid old, woody sections.
-
Prepare the soil well with compost or aged manure before transplanting. Good drainage is vital.
-
Plant divisions 18-24 inches apart to allow for spreading. Water thoroughly after planting.
-
Remove any flower buds the first year after transplanting. This allows the plant to direct energy to roots and foliage.
-
Provide consistent water the first 4-6 weeks, keeping soil moist but not soggy. Use mulch to retain moisture.
-
Situate transplants in full sun to light shade. At least 6 hours of direct sun is ideal for flowering.
-
Avoid transplant shock by moving plants at cooler times of day and minimizing root disturbance.
-
Watch for wilting leaves, slug damage, and mildew in the weeks after transplanting. Address issues promptly.
How to Transplant Creeping Phlox
Follow these simple steps for transplanting creeping phlox:
1. Prepare new planting area
Choose a site with well-draining soil and full sun to part shade. Remove weeds, loosen soil, and mix in compost. Dig holes wider and deeper than root balls.
2. Water phlox plants 1-2 days before digging
This hydrates roots and makes digging easier. Avoid transplanting in extreme heat or cold.
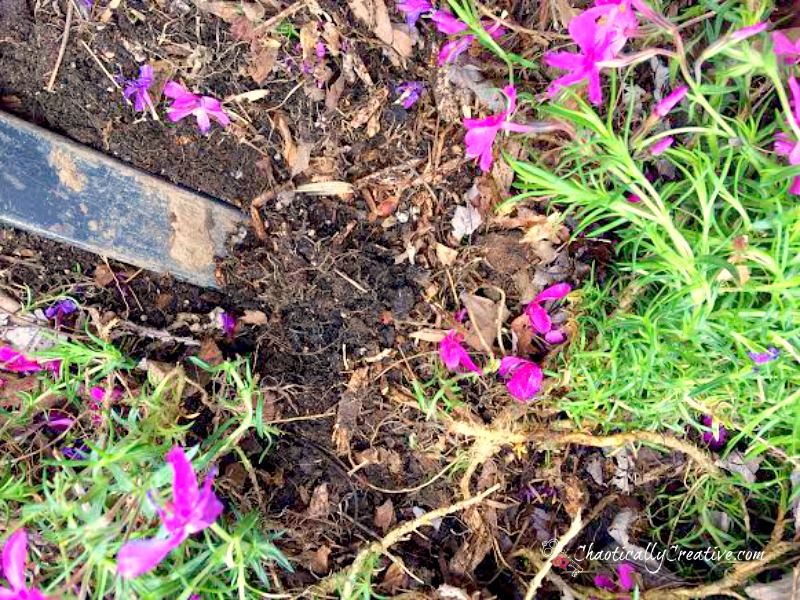
3. Dig up plant divisions
Use a shovel or garden fork to lift clumps, keeping as much root as possible. Shake off excess dirt.
4. Separate and select divisions
Gently pull or cut clump into smaller pieces with roots attached. Choose healthy divisions.
5. Plant divisions immediately
Place each division in its new hole, spreading roots out and keeping the crown just above soil level.
6. Fill holes and firm soil gently
Water deeply after planting. Add mulch to retain moisture while new roots establish.
7. Provide consistent water and care
Gradually taper off watering as plants establish over 4-6 weeks. Remove spent blooms and monitor health.
Long-Term Care for Healthy Creeping Phlox
Once planted, creeping phlox is relatively low maintenance. Follow these care tips:
-
Water during drought, soaking soil deeply 1-2 times per week. Increase water for new transplants.
-
Prune off spent blooms after flowering to encourage reblooming and a tidy appearance.
-
Remove fallen leaves and debris to prevent disease and improve air circulation.
-
Every 2-3 years, transplant and divide older plants to rejuvenate. Replant divisions to expand phlox patches.
-
Monitor for pests like aphids and slugs. Remove by hand or use insecticidal soap as needed.
-
Avoid wetting foliage, provide good air flow, and promptly remove diseased parts to prevent mildew.
Achieve Lush, Flowering Phlox with Proper Transplant Timing
By transplanting creeping phlox during the optimal spring and fall seasons, you can propagate new plants, invigorate old ones, curb spreading, and expand colorful groundcover to new areas. Pay close attention to soil, sunlight, moisture, and plant care before and after transplanting to set your phlox transplants up for success. With the right techniques at the right time, you’ll be rewarded with a lush carpet of green foliage and vibrant spring blooms.
Pruning
Pruning is optional on these plants. After the blooming period is over, you can trim back the foliage to create a neater form. This also will promote denser foliage, enhancing the phloxs beauty as a ground cover.
Alternatively, you can skip the pruning and let the plants grow naturally though you run the risk of poor airflow.
Propagating Creeping Phlox
Creeping phlox is best propagated via division. Not only is this a cost-effective way to get a new plant, but it also helps to rejuvenate mature and overgrown phlox. Typically, you can divide a plant every two to three years without seriously weakening it. Heres how:
- Dig up the entire plant immediately after its done blooming, being careful to keep the root ball intact.
- Cut through the roots with a sterile, sharp spade to divide them roughly in half.
- Replant each half in an appropriate growing site, and water to lightly moisten the soil.
When to Transplant Creeping Phlox
FAQ
What time of year can you transplant phlox?
Most phlox need to be divided every two to four years if they’re growing well. The best time to do divide and transplant is in spring, before new growth begins. Each division should consist of three to five vigorous shoots with roots attached.
How quickly does creeping phlox spread?
Grows at a slow to moderate speed to a spread of 1-2 feet. Space 18-24 inches apart to accomodate the width at maturity. Where Should I Plant An Emerald Blue Creeping Phlox? Plant this ground cover in rock beds, gardens or containers with well drained soil in full sun to part shade exposure throughout zones 3-9.
When should I transplant creeping phlox?
Choose the right time to transplant: The best time to transplant creeping phlox is in the early spring or fall when the plant is dormant. Avoid transplanting during hot summer months, as the heat can stress the plant. Prepare the soil: Before transplanting, prepare the soil by removing any weeds or grass from the planting area.
How to transplant creeping phlox?
Here are some steps to follow when preparing the soil for transplanting creeping phlox: Choose the right location: Before transplanting creeping phlox, carefully select the location where you want to plant it. Make sure it receives at least 6 hours of direct sunlight each day.
When should Phlox be divided and transplanted?
Most phlox need to be divided every two to four years if they’re growing well. The best time to do divide and transplant is in spring, before new growth begins. Each division should consist of three to five vigorous shoots with roots attached. When’s the best time to transplant creeping phlox?
Should you plant creeping phlox?
Using creeping phlox in your garden design brings advantages in color, ground coverage, and compatibility with other plants. This makes it a valuable addition for aesthetics and functionality. Transplanting creeping phlox can be a rewarding task for any gardener looking to spread this beautiful groundcover plant.
How far apart do you plant creeping phlox?
Growing creeping phlox (phlox subulata) in your garden can create a beautiful ground cover with vibrant shades of pink, purple, white, and blue. Here’s how to plant, prepare the soil, water, and manage sunlight for optimal growth. Creeping phlox can spread between 9 inches and 2 feet and thrives best when planted 12 to 18 inches apart.
When should I dig up Phlox?
Time it carefully: The best time to dig up and remove creeping phlox is during the early spring or fall seasons when the plant is not actively growing. Avoid digging up the plant in the heat of summer or during freezing winter temperatures as this can cause stress and potential damage to the plant.